
Docker, Kubernetes, and Helm — Intuitively and Exhaustively Explained
An in-depth guide to the technologies powering modern application infrastructure


In this article, we’ll explore how sophisticated backend environments for complex applications can be efficiently managed and scaled using Docker, Kubernetes, and Helm.
From the highest level, Docker allows you to package your code into something called a “container”, a fully self-contained and portable unit of software that can be duplicated and run pretty much anywhere. Kubernetes allows you to manage how these containers are applied to resources at scale, coordinating them into complex, interrelated applications. Helm adds an additional layer of abstraction on top of Kubernetes by bundling these interconnected components into reusable, shareable packages called charts, making it far easier to develop and re-use complete systems.
When used together, these three technologies transform backend infrastructure into a modular system of building blocks that you can mix, match, scale, and rearrange with remarkable flexibility. This power of abstraction is why virtually every major organization uses the three technologies to manage their backend infrastructure.
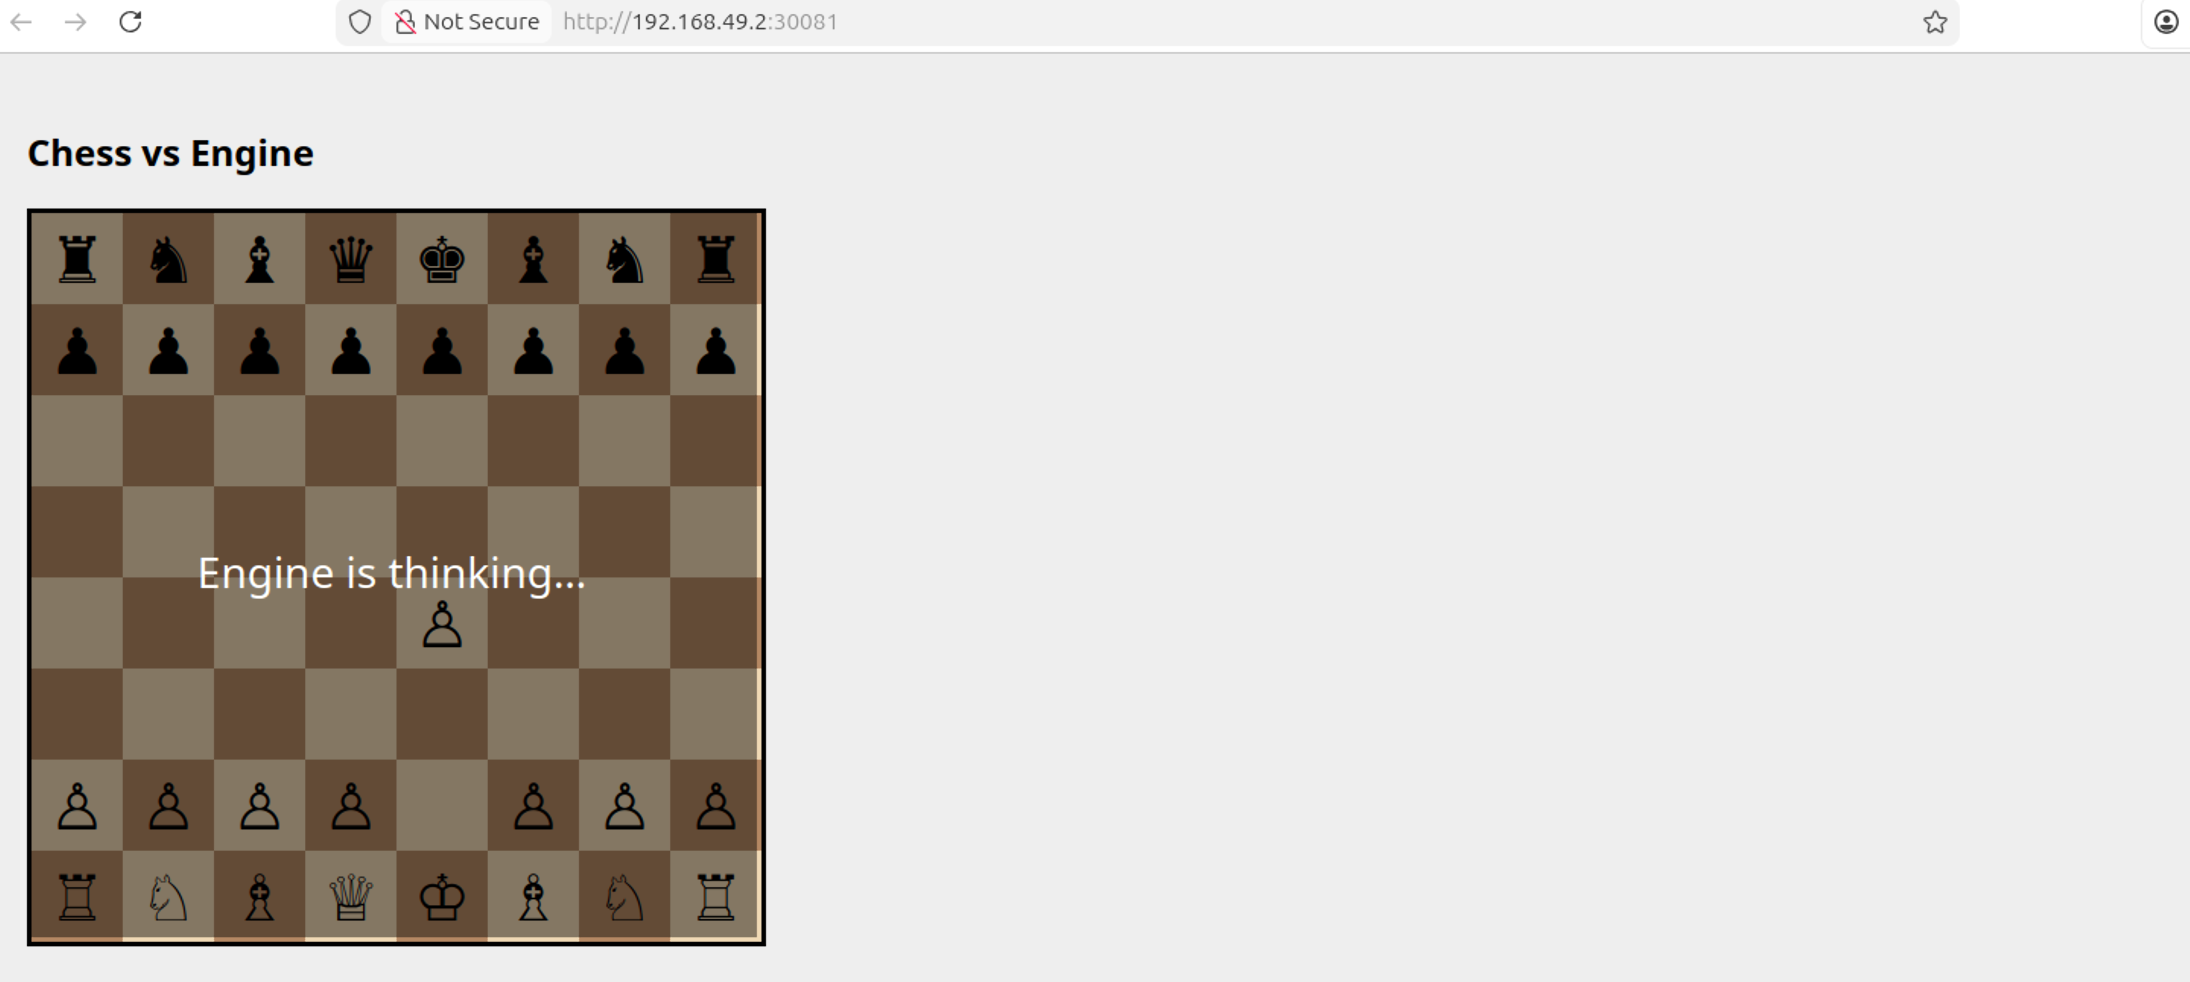
There’s a ton of depth to this topic, which isn’t realistic to explore “exhaustively” in a single tutorial. If you build an application with Kubernetes, you’re going to have to do some googling along the way. That said, we will form a solid conceptual understanding of the three technologies by building two demo applications: one that can estimate digits of pi at scale, leveraging numerous machines in a cluster to do it, and another that exposes a chess application with a simple database and workers which run a chess engine. Both of these are simplifications of very real-world use cases that large companies use Kubernetes for on a daily basis.
[init] Waiting for 10 worker pods to complete...
No resources found in default namespace.
[init] Workers finished: 0/10
No resources found in default namespace.
[init] Workers finished: 0/10
No resources found in default namespace.
[init] Workers finished: 0/10
[init] Workers finished: 2/10
[init] Workers finished: 10/10
[init] All workers completed, starting reducer.
[reducer] Collecting results from: /results
[reducer] inside_total = 863939569
[reducer] points_total = 1100000000

Distributed π estimate: 3.141598432727273
Who is this useful for? Anyone interested in building an application that serves large numbers of users, or processing large amounts of data, with multiple computers working together in a robust and scalable manner.
How advanced is this post? This is designed to be a first exposure to containerization with Docker, orchestration with Kubernetes, and deployment with Helm. That said, the technology is complex, and I’m skipping through a lot of the application logic and focusing on the orchestration and deployment side. Thus, this article may feel a bit abstract for more junior developers.
Prerequisites: Anyone can read this article and get a general understanding of the topic. Realistically, though, you should probably be somewhat comfortable with building at least simple full-stack applications to get the most out of it.
The Case For Learning on a Virtual Machine
While the power of these technologies exists on the cloud, I want to avoid setting up a cloud account and racking up a thousand-dollar AWS bill because we accidentally overallocated resources. We’ll be experimenting with the technology locally so we can get comfortable. As a result, following along with this tutorial might require a bit of configuration.
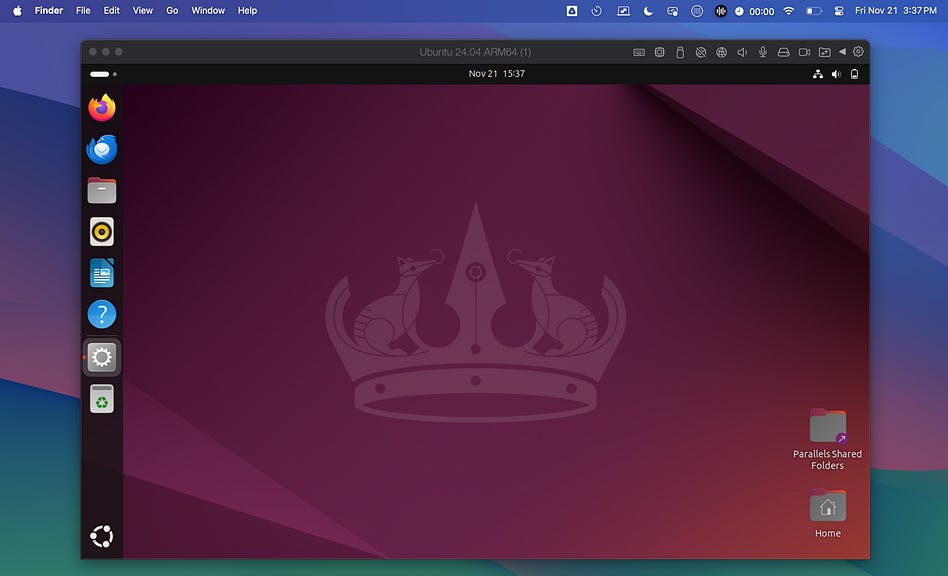
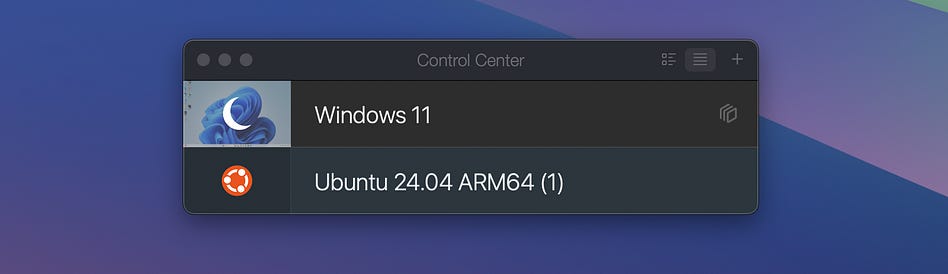
A big reason I avoid local configuration in tutorials is because of discrepancies about how your computer is set up, vs how my computer is set up. To help mitigate those issues, I tend to use an emulator that I can use to spool up new operating systems, then tear them down again, making it very easy to start from scratch. This isn’t sponsored, but I use Parallels Desktop on Mac to do this type of stuff. When I open Parallels Desktop, I can create or access various virtual computers within my computer.

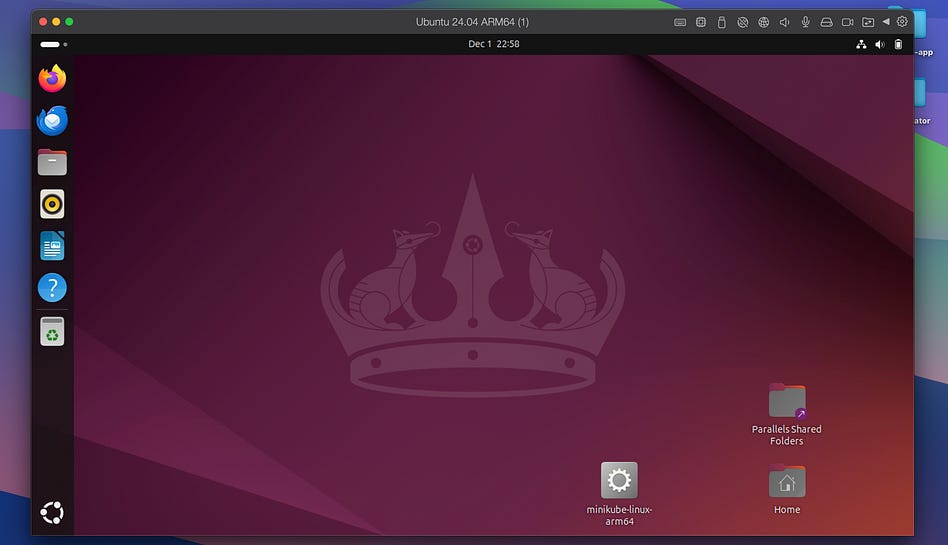
I can open up Ubuntu, for instance, and I have a little Ubuntu Linux machine on my computer.
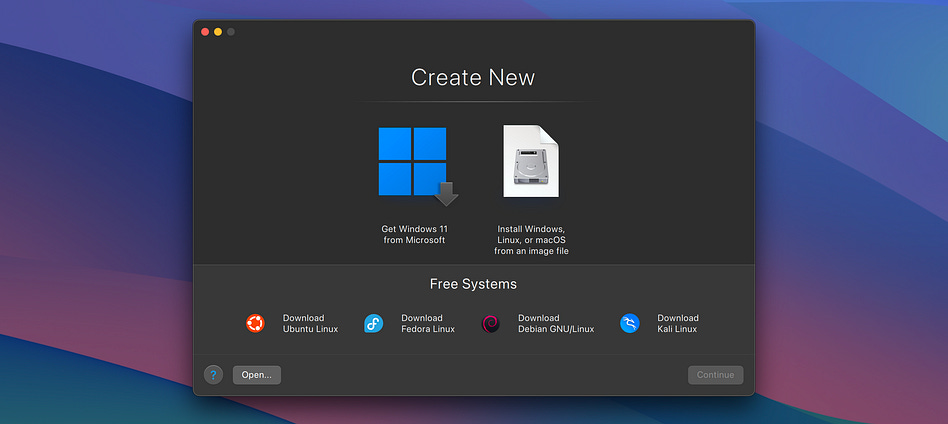
If I make some changes to this computer, for instance by installing packages, and I want to try again from scratch, I don’t have to do anything complicated. I can simply go back into Parallels and create a new Ubuntu system from scratch.
This is really powerful for me as a writer, because it helps me make sure I’m not forgetting to mention some setup process because I already did it on my computer a few months ago. It can be powerful for you, as a learner, because it minimizes the likelihood of something going wrong because you didn’t realize you made a change to your computer a few months ago.
There are numerous emulators available on most major operating systems. Some of them are free, and some of them are paid. Whether you use an emulator or not, you should be able to follow along, though the steps to install might differ slightly based on your operating system.
Setup
To get started, we’re going to need to install a few things. I’ll be assuming you’re in a Linux environment like Ubuntu. If not, you might need to do some googling to find the equivalent approach for you.
Setup 1) Installing Docker Engine
On Mac and Windows, it’s common to install Docker Desktop, but on linux it’s a bit quirky, and it’s more common to install the Docker engine directly via the command line.
Open up a terminal. First, it’s recommended to run this:
sudo apt update
sudo apt install ca-certificates curl gnupg
This updates the list of packages your Linux machine can install, and installs a few packages that Linux will use to securely install Docker.
Then run this:
sudo install -m 0755 -d /etc/apt/keyrings
curl -fsSL https://download.docker.com/linux/ubuntu/gpg | sudo gpg --dearmor -o /etc/apt/keyrings/docker.gpg
sudo chmod a+r /etc/apt/keyrings/docker.gpg
In essence, this downloads a trusted key from Docker, which can be used to secure Docker installation on your machine. This isn’t that important for us right now, but Docker being secure is very important for the big business that use it regularly, thus there’s a significant layer of protection even within docker installation.
Now run this:
echo \
  “deb [arch=$(dpkg --print-architecture) signed-by=/etc/apt/keyrings/docker.gpg] https://download.docker.com/linux/ubuntu \
  $(. /etc/os-release && echo “$VERSION_CODENAME”) stable” | \
  sudo tee /etc/apt/sources.list.d/docker.list > /dev/null
This adds Docker’s official software repository to the package manager on your Linux computer. Once you do that, you can run this:
sudo apt update
sudo apt install docker-ce docker-ce-cli containerd.io docker-buildx-plugin docker-compose-plugin
which actually installs Docker. You can now verify that Docker is installed successfully by running
sudo docker run hello-worldWhich will return the following
Unable to find image ‘hello-world:latest’ locally
latest: Pulling from library/hello-world
198f93fd5094: Pull complete
Digest: sha256:f7931603f70e13dbd844253370742c4fc4202d290c80442b2e68706d8f33ce26
Status: Downloaded newer image for hello-world:latest

Hello from Docker!
This message shows that your installation appears to be working correctly.

To generate this message, Docker took the following steps:
 1. The Docker client contacted the Docker daemon.
 2. The Docker daemon pulled the “hello-world” image from the Docker Hub.
    (arm64v8)
 3. The Docker daemon created a new container from that image which runs the
    executable that produces the output you are currently reading.
 4. The Docker daemon streamed that output to the Docker client, which sent it
    to your terminal.

To try something more ambitious, you can run an Ubuntu container with:
 $ docker run -it ubuntu bash

Share images, automate workflows, and more with a free Docker ID:
 https://hub.docker.com/

For more examples and ideas, visit:
 https://docs.docker.com/get-started/
We’ll dive further into Docker throughout this tutorial. If you want a sneak peek, you can get an idea of what’s going on by reading this output.
Setup 2) Installing Kubectl
Kubectl is a command-line tool for communicating with and managing “Kubernetes clusters”. We’ll explore what a “cluster” in Kubernetes is later. For now, it’s enough to know that Kubectl is necessary to do stuff with Kubernetes, so we need it on our computer.
This installs kubectl:
curl -LO “https://dl.k8s.io/release/$(curl -L -s https://dl.k8s.io/release/stable.txt)/bin/linux/amd64/kubectl”
chmod +x kubectl
sudo mv kubectl /usr/local/bin/
And this verifies that it’s been installed:
kubectl version --clientYou should get something like this:
Client Version: v1.34.2
Kustomize Version: v5.7.1
If you don’t, you might need to install for a different CPU architecture, for instance, by running this:
curl -LO “https://dl.k8s.io/release/$(curl -L -s https://dl.k8s.io/release/stable.txt)/bin/linux/amd64/kubectl”
chmod +x kubectl
sudo mv kubectl /usr/local/bin/
You can find more instructions for installing kubectl here.
Setup 3) Installing MiniKube
MiniKube is designed to allow you to run Kubernetes on a single machine. The whole point of Kubernetes is to run an application that’s distributed across many computers working together, but local deployment is convenient for senior devs who want to test out changes they’ve made on their computer. It’s really useful to us because it means we can play around with Kubernetes without needing to set up any cloud subscriptions or buy a bunch of hardware.
Just like the last command, you might need a slightly different install based on the architecture of your CPU. For me (running on Apple silicon, which is ARM-based), this does the trick
sudo apt-get install -y conntrack
curl -LO https://storage.googleapis.com/minikube/releases/latest/minikube-linux-arm64
sudo install minikube-linux-arm64 /usr/local/bin/minikube
We can make sure it’s set up by running
minikube start --driver=dockerWhich should get us an output that looks something like this, emojis and all.
😄  minikube v1.37.0 on Ubuntu 24.04 (arm64)
✨  Using the docker driver based on user configuration

💣  Exiting due to PROVIDER_DOCKER_NEWGRP: “docker version --format <no value>-<no value>:<no value>” exit status 1: permission denied while trying to connect to the docker API at unix:///var/run/docker.sock
💡  Suggestion: Add your user to the ‘docker’ group: ‘sudo usermod -aG docker $USER && newgrp docker’
📘  Documentation: https://docs.docker.com/engine/install/linux-postinstall/
Setup 4) Installing Helm
It’s hard to appreciate why Helm is necessary, given the fact that we haven’t dived into any of the other technologies yet. Basically, it will make it easier for us to manage and reuse existing Kubernetes. Installation is super easy:
curl https://raw.githubusercontent.com/helm/helm/main/scripts/get-helm-3 | bashRunning this afterward
helm versionshould result in something like this
version.BuildInfo{Version:”v3.19.2”, GitCommit:”8766e718a0119851f10ddbe4577593a45fadf544”, GitTreeState:”clean”, GoVersion:”go1.24.9”}Now that we installed everything, it’s probably a good idea to get a sense of what it all does. We’ll start with Docker.
Why Containerization, and Containers vs Virtual Machines
Docker allows you to package your application, and everything it needs to run, into a portable and repeatable unit called a container. This general process is called “Containerization” and is important for building robust and scalable backend applications.
Imagine you wanted to build a web service that converts videos to gifs in Python. You might find some library called super_video_to_gif , install it on your computer, and then build a server around that library. Great. You make it into a little GitHub repo that has all your dependencies listed out in a requierments.txt file. All you need to run your application on a computer is to do something like the following:
git clone https://...myrepo
cd myrepo
pip install -r requierments.txt
python run main.py
You hop onto AWS, run those commands, and oh no. Your pip install failed. Turns out the super_video_to_gif requires Python 3.10, and the AWS machines have Python 3.8 installed. So you change your install script to update Python. That works for a while until AWS updates some defaults on their computers, and it turns out they upgraded some package that super_video_to_gif relied on, and it isn’t compatible with the new version.
Etc.
Hopefully you get my point. Any time you make any change, you need to debug a bunch of incompatibilities. Even worse, if AWS updates something under your nose, you might find your application randomly stops working. This general fragility is what Docker chiefly attempts to avoid. By bundling everything together in a neat little package, it ensures that if a Docker container did run, it will run again, and will do so reliably across many machines. A big concept that empowers this is “base images”.
When you go to build a fancy Docker container, you do it by building on something that’s already predefined. Each of these base images has a file system with things like system libraries and runtimes already installed.
If we were developing our fancy video-to-GIF backend server, we might choose to use the official Python image, so that we know we’re always starting from the same place. Then, if we cloned our repo, installed our dependencies, and ran our application, we could do it with the confidence that we know exactly which version of Python we have, because it’s whatever Python version comes with the image.
You might be thinking this sounds like the virtual machine concept I introduced at the beginning of this article. Recall I’m spooling up virtual machines to help me explore this concept, and I can reproduce steps from scratch by installing a new virtual machine. Virtual machines and containerized images share a lot of conceptual ties, but they’re different in a few key ways that I’d like to briefly explore.
A Virtual Machine is very much like a virtual computer within your computer:
It has a kernel, which is the core of whatever operating system you’re using.
It has its own drivers, which can interact with the hardware on your computer: keyboard, mouse, speakers, screen, network adapters, etc.
It has all your files and installed applications.
It has its own virtualized representation of resources, like RAM, storage, and CPUs.
As a result, VMs are very, very isolated from one another. This is extremely useful if you want to run very different software stacks, experiment with risky tools, or keep workloads completely separated. But with this benefit, they come with two major drawbacks:
They’re heavy: You need to download an entire operating system image, which can be several gigabytes in size.
They’re slow: You need to boot and run that operating system inside your existing operating system, meaning you’re essentially doubling up on everything; two kernels, two sets of drivers, two full environments running simultaneously. Even with good virtualization support, this adds noticeable overhead.
Containers address these drawbacks by taking a different approach.
Instead of virtualizing an entire computer, containers reuse the host machine’s kernel. They only package the application and requirements needed to run the application; things like the runtime, libraries, configuration, and filesystem. This makes containers dramatically lighter and faster than VMs; they can start in milliseconds, take up a fraction of the space of a VM, and scale far more easily. Their environment is still isolated and reproducible, but not as completely independent as a full VM because they rely on the host’s kernel and drivers.
This does have the tradeoff that containers are not perfectly isolated from the host machine. Containers abstract a lot, but if you need a certain GPU driver to run your application, that won’t be helped by using a specific Docker image, because Docker images don’t handle GPU drivers.
Cloud providers make this problem easier by having standard definitions for hardware that you can build off of. Depending on your application, you may need to think outside of the container and consider the actual machine that is hosting your docker image.
This is pretty advanced, and out of scope of this article, but you could find yourself making these considerations if you were, for instance, deploying GPU accelerated AI workloads within your Docker container. For our purposes, Docker images can be thought of as consistent enough. In many applications, that is indeed the case.
What is a Docker Image, and How Do I Make One?
Great question. A Docker image is, essentially, a specific way to containerize an application. There are a few different approaches to containerization, but Docker is the most popular.
First, you develop your applications like you normally would. For instance, you can imagine a simple Python application called my-hello-app, which consists of a single Python script called hello.py within the src source code directory.
my-hello-app/
  └─ src/
    └─ hello.py
Instead of running hello.py based on whatever version of Python is on our machine, we can define something called a Dockerfile within our application. Typically, this is done outside the source code directory, because it works on the source code, and thus doesn’t belong in the source code.
my-hello-app/
  ├─ Dockerfile
  └─ src/
    └─ hello.py
This Dockerfile will include instructions on how the docker image, which is wrapped around our application, should be built. Here’s an example of what our Dockerfile might look like:
FROM python:3.10-slim

# Set a working directory inside the container
WORKDIR /app

# Copy your entire src/ folder into the container
COPY src/ ./src/

# Run the main script
CMD [”python”, “src/hello.py”]
Basically, what this Docker file says is that it will be based on the python:3.10-slim base image, A working directory within that image called /app will be created, and then the src/ directory of our application will be copied to the ./src/ directory of the image. We just created a working directory called /app, and . means the current working directory, so we’ll be copying our code into the /app/src/ directory within our image.
When we say CMD [“python”, “src/hello.py”], we’re specifying the default command that will execute when we actually run our Docker image, which is to run src/hello.py via python, assuming we’re within the /app current working directory. There are a few ways to define the default thing our container actually does when it gets started. This is one of the approaches.
Now that we have a Dockerfile defining how a Docker image ought to be built around our application, we can actually build the image by opening a terminal to our my-hello-app directory, and running.
sudo docker build -t hello-python .This means we’ll build a Docker image based on the Docker file in ., which is in my-hello-app. We’ll assign that image a tag, which is hello-python. You might notice that, after running, nothing gets created. That’s because, by default, images are stored across various folders in Docker’s managed file system. If you wanted to save it to a single file, you could do so by running
sudo docker imagesWhich will return something like this
IMAGE                 ID             DISK USAGE   CONTENT SIZE   EXTRA
hello-python:latest   0e6f976ab46f        208MB         45.2MB
These are all the Docker images that have been created. You might notice that hello-python is followed by :latest. This is a tag. We didn’t specify a tag, so Docker, by default, assigned a tag of latest to the build. You can assign other tags, for instance dev, qa , and prod to align docker containers with a CICD pipeline, but for now we’ll just keep things basic with the defaults.
If we want to actually run our built container, we can do so by running
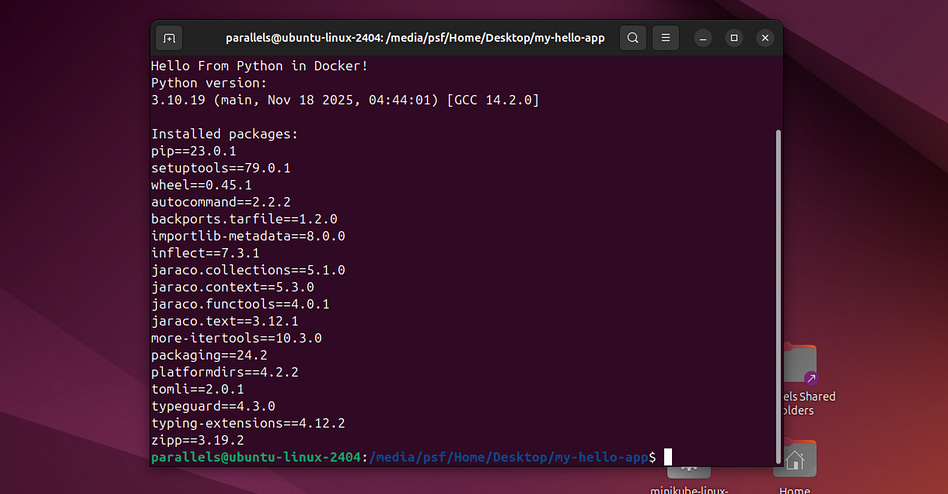
sudo docker run --rm hello-pythonThis runs our image (with the default tag, latest). Also, --rm automatically deletes the container after it stops running. The Python script in our Docker container simply prints out the current Python version and spits out all the dependencies. Running it results in:
Hello From Python in Docker!
Python version:
3.10.19 (main, Nov 18 2025, 04:44:01) [GCC 14.2.0]

Installed packages:
pip==23.0.1
setuptools==79.0.1
wheel==0.45.1
autocommand==2.2.2
backports.tarfile==1.2.0
importlib-metadata==8.0.0
inflect==7.3.1
jaraco.collections==5.1.0
jaraco.context==5.3.0
jaraco.functools==4.0.1
jaraco.text==3.12.1
more-itertools==10.3.0
packaging==24.2
platformdirs==4.2.2
tomli==2.0.1
typeguard==4.3.0
typing-extensions==4.12.2
zipp==3.19.2
We just built and ran a docker container! That’s cool and all, but what’s really cool is that we can move this to a completely different operating system, and we’ll get the same result. I can export the Docker image into something called a tar file, via
sudo docker save -o hello-python.tar hello-pythonthis specifies the output file with -o , and saves our hello-python (default :latest) to that file. Now our directory contains the following
my-hello-app/
  ├─ hello-python.tar
  ├─ Dockerfile
  └─ src/
    └─ hello.py
I’ve been doing all this in my Linux VM.
But we can copy this hello-python.tar file onto a Mac, for instance, and load it by running
docker load -i hello-python.tarWhich will load the image onto docker on my mac. I can then run the Docker image on my mac with
docker run --rm hello-pythonAnd, lo and behold, I get the same exact output I got on my linux machine.

Which is pretty cool. No installation, no configuration, same exact output.
We’re just scratching the surface with Docker, but often the surface is all you need. It handles containerization, so you don’t have to. We’ll explore more sophisticated Docker tricks as necessary later in the article. For now, though, we can move on to exploring Kubernetes.
Jumping into Kubernetes (K8s)
First of all, Kubernetes is a long word, and is often abbreviated into “k8s”, because there are 8 words between the “K” and “s”. Is Kubernetes plural? Is it’s singular form “Kubernete”? Does it matter? I guess not. What matters is that Kubernetes is often abbreviated as either K8 or K8s. I have a tendency to flip-flop between the two.
Kubernetes (K8s) is a system for automating the deployment, scaling, and management of containerized applications. Basically, if you have a bunch of hardware, you can use K8s to manage which containers are running and how they work together, allowing you to build sophisticated applications that operate across multiple computers.
Instead of speaking theoretically, we’re going to jump right into an example application. We’ll describe a problem, build a containerized solution with Docker, and deploy it with k8s. Once we have some understanding of k8s, we’ll then explore Helm.
All code for all examples in this article can be found here
Sample Problem Definition, Calculating Digits of Pi.
My boy Archimedes just hit me up, apparently he got a slick new MacBook Air, and he wants to use it to help him calculate an approximation of pi. He’s not very tech savvy, and he asked for our help. We don’t need to use Kubernetes for this, but what the heck.

To do this, we’re going to use Monte Carlo estimation. Basically, we’ll stick a circle in a square and randomly place points within the square.
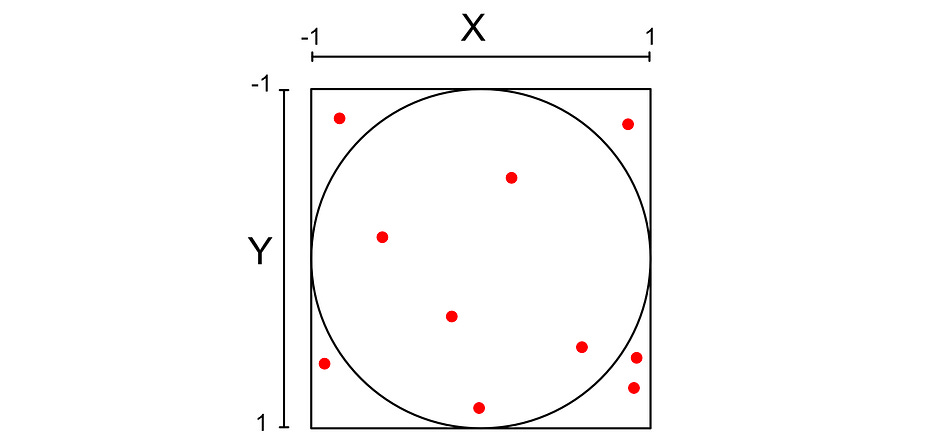
We can calculate if the point is inside the circle with the following expression.

I won’t get into the math, but the ratio of points in the circle should be approximately equal to pi over 4. If we had infinite points, this would be infinitely accurate.

We can do some algebra to move this expression around, to create an approximation for pi.

It’s crazy that Apple figured out those curved bezels before we calculated a decent approximation for pi, but I won’t try to think about it too hard. Let’s plan out how we might tackle this in K8s.
The Plan
If you read my article on Apache Spark, you might be familiar with the concept of “map-reduce,” which we’ll be using in this example.

We’re going to break this problem into two parts. First, we’ll define a worker that generates some number of random points in a cube, calculates if they are or are not within the square, and writes to a file how many of the points were in the circle, and how many points it tried. We’ll then build a simple “reducer” script, which takes in a few of those files and calculates digits of pi.
This separation is useful because we can employ more than one worker, who can work on the problem in parallel. Once the workers generate a bunch of points, the reducer can run when they finish, and reduce the results down into a single output.
We’ll be using k8s to manage how we’re orchestrating containers. To get started, let’s build the container itself.
Implementing the Worker and Reducer in Docker
To make things easy, we’re only going to specify one container, which holds both the worker and reducer logic. This will be the project’s file structure to start.
pi-estimator/
  └─ src/
      ├─ worker.py
      └─ reducer.py
Our worker.py file looks like this:
import os
import json
import random
import uuid

def estimate_chunk(num_points: int) -> tuple[int, int]:
    “”“Simulate num_points Monte Carlo trials.
    Returns (inside, total).”“”
    inside = 0
    for _ in range(num_points):
        x = random.random() * 2 - 1   # Uniform in [-1, 1]
        y = random.random() * 2 - 1
        if x*x + y*y <= 1:
            inside += 1
    return inside, num_points


def main():
    # How many points this worker should simulate
    points_per_worker = int(os.environ.get(”POINTS_PER_WORKER”, “100000”))

    # Where to write the result file
    result_dir = os.environ.get(”RESULT_DIR”, “/results”)

    # Make sure the directory exists
    os.makedirs(result_dir, exist_ok=True)

    # Perform the Monte Carlo trials
    inside, total = estimate_chunk(points_per_worker)

    # Generate a unique filename so workers don’t clash
    result_file = os.path.join(result_dir, f”result-{uuid.uuid4()}.json”)

    # Write out the result
    with open(result_file, “w”) as f:
        json.dump({”inside”: inside, “total”: total}, f)

    print(f”[worker] Completed {total} points → inside={inside}”)
    print(f”[worker] Wrote result to {result_file}”)


if __name__ == “__main__”:
    main()
We have a function estimate_chunk that does the actual work to generate random points and count which ones landed within the circle, and a main function that serves as an entry point and handles some key configuration details.
K8, which we’ll be using later, likes to communicate with containers via environment variables. As a result, we’re configuring how many points the script should test and where it should place the results, via environment variables.
reducer.py should look something like this:
import os
import json

def load_results(result_dir: str):
    “”“Load all JSON result files from the directory.”“”
    inside_total = 0
    points_total = 0

    if not os.path.exists(result_dir):
        print(f”[reducer] Results directory not found: {result_dir}”)
        return None, None

    files = [f for f in os.listdir(result_dir) if f.endswith(”.json”)]

    if not files:
        print(”[reducer] No result files found. Did any workers run?”)
        return None, None

    for name in files:
        file_path = os.path.join(result_dir, name)
        try:
            with open(file_path, “r”) as f:
                data = json.load(f)
                inside_total += data.get(”inside”, 0)
                points_total += data.get(”total”, 0)
        except Exception as e:
            print(f”[reducer] Failed to read {file_path}: {e}”)

    return inside_total, points_total


def compute_pi(inside: int, total: int) -> float:
    “”“Compute the Monte Carlo estimate of pi.”“”
    if total == 0:
        return float(”nan”)
    return 4 * inside / total


def main():
    result_dir = os.environ.get(”RESULT_DIR”, “/results”)

    print(f”[reducer] Collecting results from: {result_dir}”)
    inside, total = load_results(result_dir)

    if inside is None:
        print(”[reducer] No valid data found. Exiting.”)
        return

    pi_estimate = compute_pi(inside, total)

    print(f”[reducer] inside_total = {inside}”)
    print(f”[reducer] points_total = {total}”)
    print()
    print(f”Distributed π estimate: {pi_estimate}”)


if __name__ == “__main__”:
    main()
It gets all the files in the output path, generated by all workers that have run, and computes pi. It also uses environment variables so the result directory can be configured externally.
We can make sure this works before we try to set up k8s around it. I’m going to define a script called local_test.py which runs this code using whatever version of Python comes in default in my Ubuntu virtual machine.
pi-estimator/
  ├─ local_test.py
  └─ src/
      ├─ worker.py
      └─ reducer.py
And here’s the actual implementation for local_test.py
import os
import json
import shutil
import subprocess

RESULT_DIR = “local_results”

def run_worker(points=100000):
    “”“Run the worker.py script locally.”“”
    print(f”[test] Running worker with {points} points...”)

    env = os.environ.copy()
    env[”POINTS_PER_WORKER”] = str(points)
    env[”RESULT_DIR”] = RESULT_DIR

    subprocess.run(
        [”python”, “src/worker.py”],
        env=env,
        check=True
    )


def run_reducer():
    “”“Run the reducer.py script locally.”“”
    print(f”[test] Running reducer...”)

    env = os.environ.copy()
    env[”RESULT_DIR”] = RESULT_DIR

    subprocess.run(
        [”python”, “src/reducer.py”],
        env=env,
        check=True
    )


def reset_results():
    “”“Clear out the results directory.”“”
    if os.path.exists(RESULT_DIR):
        shutil.rmtree(RESULT_DIR)
    os.makedirs(RESULT_DIR, exist_ok=True)


def main():
    print(”[test] Starting local Monte Carlo π estimation”)
    reset_results()

    # Run multiple workers
    for i in range(3):
        print(f”[test] Worker {i+1}/3”)
        run_worker(points=200000)

    print()
    print(”[test] Running reducer to aggregate results:”)
    print(”--------------------------------------------”)

    run_reducer()

    print(”--------------------------------------------”)
    print(”[test] Done.”)


if __name__ == “__main__”:
    main()
Essentially, this script specifies environment variables and runs the worker a few times, then it runs the reducer. It’s not parallelized, but it does allow us to test the core logic and make sure everything is working correctly. When we run it, we get this output:
[test] Starting local Monte Carlo π estimation
[test] Worker 1/3
[test] Running worker with 200000 points...
[worker] Completed 200000 points → inside=157035
[worker] Wrote result to local_results/result-b6a69810-fe60-4f3d-bd2c-f4a29c80b249.json
[test] Worker 2/3
[test] Running worker with 200000 points...
[worker] Completed 200000 points → inside=156804
[worker] Wrote result to local_results/result-255f2b1b-01ce-467b-bc9d-135c06dd7758.json
[test] Worker 3/3
[test] Running worker with 200000 points...
[worker] Completed 200000 points → inside=156995
[worker] Wrote result to local_results/result-ba2466b4-04ec-4bc0-a866-b064b4b126d5.json

[test] Running reducer to aggregate results:
--------------------------------------------
[test] Running reducer...
[reducer] Collecting results from: local_results
[reducer] inside_total = 470834
[reducer] points_total = 600000

Distributed π estimate: 3.1388933333333333
--------------------------------------------
[test] Done.
This runs great for a relatively small number of points, but if we increase the number of points past around a million, we quickly bump into significant slowdowns. Let’s Dockerize this and run it with K8s so we can get a few of these workers running in parallel.
Dockerizing Our Application
We’re going to create a Dockerfile outside of our source so we can dockerize the application.
pi-estimator/
  ├─ local_test.py
  ├─ Dockerfile
  └─ src/
      ├─ worker.py
      └─ reducer.py
  └─ local_results/        <- automatically created by running local_test.py
      ├─ result-...json
      ├─ result-...json
      └─ result-...json
We could implement two Docker containers, but to make things easier, we’ll be implementing one Docker container that contains both the worker and reducer code. Here’s the Dockerfile that will make that work.
FROM python:3.10-slim

WORKDIR /app

COPY src/worker.py src/reducer.py .

ENTRYPOINT [”python”]
This is essentially the same as our Dockerfile from our previous example. It uses a base image, sets a working directory, and copies worker.py and reducer.py into that directory. The only difference is that, instead of specifying a command to run when the image is started up with CMD, we specify an ENTRYPOINT.
If we use CMD our docker container will run the same command every time. With ENTRYPOINT we can specify arguments when we actually run our docker image, which can modify how it’s run. When we run docker run my_image <arg1> <arg2>, it will be appended to whatever as specified in the ENTRYPOINT. In this case, that would be python <arg1> <arg2>. Thus, when we start up an image, we can specify if it’s a worker or reducer simply by changing the arguments we set when we run the image, via something like docker run my_image worker.py or docker run my_image reducer.py.
We can build this Docker container by navigating into the pi-estimator directory and running
sudo docker build -t pi-estimator .We can make sure everything works by running the Docker file all by itself. Recall that the worker requires some environment variables to be properly configured, and then will output a JSON file to a directory. We’re going to run the image, specify that it’s a worker, and set up the configuration and output path all within one command:
sudo docker run --rm \
  -e POINTS_PER_WORKER=200000 \
  -e RESULT_DIR=/results \
  -v $(pwd)/local_results:/results \
  pi-estimator worker.py
There’s four core things going on. First, this means we’re running a Docker image and killing it when it’s done.
sudo docker run --rm-e allows us to set environment variables. We’re setting two, one is how many points the worker generates, and the other is the output directory. These are compatible with what we set up in worker.py
-e POINTS_PER_WORKER=200000 \
-e RESULT_DIR=/results \
This is kind of a tricky one. Recall that docker containers have their own file system, which isolates them from the host system they’re running on. That’s great, but it would mean we can’t actually see our results, because they’ll be deleted when the image stops executing. To alleviate that, we’re going to attach a volume ( -v ) which allows us to specify a file from our computer’s file system that will be mounted to Docker. When Docker writes to that folder, it will be written to the folder on the host machine.
-v $(pwd)/local_results:/resultsThe syntax is -v local_path:path_in_docker, so we’re mounting local_results in our file system into our container as the results directory. Recall that we set the environment variable -e RESULT_DIR=/results in the previous step, so the Docker container will write its results to this folder, which means it will write its results to our computer.
The final line is the actual Docker container we’ll be running, and the argument that will be tacked onto the ENTRYPOINT
pi-estimator worker.pySo, within our container, we’ll be running python worker.py.
Running that whole command results in this output
[worker] Completed 200000 points → inside=157024
[worker] Wrote result to /results/result-89f2d5d5-3b62-441b-a075-cc62baad0a10.json
and, if we look into our local_results directory, we’ll see a new json file was created. We can run this command a few more times if we want, then run this to execute our reducer
sudo docker run --rm \
  -e RESULT_DIR=/results \
  -v $(pwd)/local_results:/results \
  pi-estimator reducer.py
which, for me, outputs this:
reducer] Collecting results from: /results
[reducer] inside_total = 785219
[reducer] points_total = 1000000

Distributed π estimate: 3.140876
Alright, we’ve containerized our application. It’ll work pretty much the same on any operating system, and we can spool it up with a single command to Docker. Let’s automate the orchestration and parallelization of these containers with Kubernetes.
A Brief Interlude, The Anatomy of Kubernetes
I typically avoid jargon as much as possible, but with K8s it’s hard to avoid. Before we move on I’d like to cover some basic Kubernetes ideas. These are the core elements that make up most K8s clusters. Feel free to refer back to this section if you’re confused about specific names. We’ll be using some of these words later in the article.
Clusters: The whole idea of K8s is that it allows you to run a job across multiple computers. Those computers, together, form a cluster.
Node: Each individual computer within the cluster
Pod: The smallest runnable unit in K8s. Kubernetes manages the creation and deletion of pods, which contain containers and run within a node. Usually, a Pod only contains a single container, but in some more advanced applications, a few containers can exist within a single pod. You can think of a “pod” as a scheduled unit in K8s, usually corresponding to a single container.
Container: We’ve covered this in depth. It’s a container, like Docker. There are more containerization technologies, like Podman, but Docker is the most common.
Volume: This is persistent storage mounted onto a Pod, which that Pod’s containers can access and use. If there’s a failure and a pod needs to restart, this allows the data to persist. Also, if more than one Pod in a container needs to talk with one another, we can do that by having them share files.
Persistent Volume: Unlike a normal volume (which lives only as long as its Pod), a PersistentVolume exists independently from any Pod that uses it. It’s used for databases, queues, things like that.
Service: Basically, networking for a pod. Different services expose Pods in different ways. For instance, you can assign an IP address to your Pod, so that Pods within a cluster can communicate with each other over HTTP requests. You can also employ load balancers, which can balance incoming requests from external sources and distribute them to various nodes in the cluster.
Ingress: This allows you to route incoming requests to different services, and thus to different pods. For instance, you might have a pod that manages login, and a pod that manages core application logic. When your K8s cluster gets a request for
example.com/login, it can route that request to the service that corresponds to the pod for login. In other words, Ingress allows you to set rules as to how requests are routed throughout the pods in your cluster.Controller: A controller is a background process inside Kubernetes that constantly compares the actual state of the cluster with the desired state, and takes action to make them match. In K8s you declare what you want with something called a “manifest”, then k8s uses controllers to try to make what you want.
Replica Set: Ensures that a certain number of identical Pods are always running. If a Pod crashes or a node dies, the ReplicaSet creates a new one, keeping your pods alive through failure. This is usually managed by the controller, not the user.
The Control Plane: The control plane is the brains of kubernetes. It contains the controller manager (which actually runs the controller), the API server (which manages all traffic into and out of the cluster, including communication to manage the cluster itself), the scheduler (which observes resource usage in pods, obeys specified constraints, and allocates pods to certain nodes as necessary), and etcd (which serves as memory for the control plane).
Kubelet: Runs on each node, receives instructions from the control plane, and manages the running of pods. This is managed by K8s.
Namespace: A way to organize and isolate resources inside a cluster by assigning them by name. Resources in one namespace don’t conflict with resources in another, allowing you to spool up several parallel versions of an application within a single cluster. This is commonly used to separate dev/staging/prod or to give teams their own space.
ConfigMap and Secret: We won’t be touching on these a lot in this tutorial, but they’re super important when building actual applications in the real world. Many K8s use cases involve complex environment variables that might be sensitive (like API keys) or require sophisticated workflows around setting them (like CICD). ConfigMaps and Secrets are special ways of dealing with environment variables that make them modular and more secure.
Orchestrating with Kubernetes
We’re going to make a new folder in our folder structure called k8s , which will contain a file called pi-job.yaml. This will specify how we configure kubernetes to run our application. We’re also creating a helper file called pi-image-structure.yaml, which we’ll discuss later.
pi-estimator/
  ├─ local_test.py
  ├─ Dockerfile
  └─ k8s/
      ├─ pi-job.yaml
      └─ pi-image-structure.yaml
  └─ src/
      ├─ worker.py
      └─ reducer.py
  └─ local_results/
      └─ ....json
pi-job.yaml is the major file that tells K8s what to do. We’ll go through line by line, but here’s the whole file:
# -------------------------------------------------------
# Persistent Volume Claim (shared across workers & reducer)
# -------------------------------------------------------
apiVersion: v1
kind: PersistentVolumeClaim
metadata:
  name: pi-results-pvc
spec:
  accessModes:
    - ReadWriteMany
  resources:
    requests:
      storage: 1Gi

---
# =======================================================
# RBAC so reducer can check worker pod status
# =======================================================
apiVersion: v1
kind: ServiceAccount
metadata:
  name: pi-reducer-sa

---
apiVersion: rbac.authorization.k8s.io/v1
kind: Role
metadata:
  name: pi-reducer-role
rules:
  - apiGroups: [”“]
    resources: [”pods”]
    verbs: [”get”, “list”]
  - apiGroups: [”batch”]
    resources: [”jobs”]
    verbs: [”get”, “list”]

---
apiVersion: rbac.authorization.k8s.io/v1
kind: RoleBinding
metadata:
  name: pi-reducer-binding
subjects:
  - kind: ServiceAccount
    name: pi-reducer-sa
roleRef:
  kind: Role
  name: pi-reducer-role
  apiGroup: rbac.authorization.k8s.io

---
# -------------------------------------------------------
# Worker Job (4 Pods in parallel)
# -------------------------------------------------------
apiVersion: batch/v1
kind: Job
metadata:
  name: pi-workers
spec:
  completions: 4
  parallelism: 4
  backoffLimit: 0
  template:
    spec:
      restartPolicy: Never
      containers:
        - name: worker
          image: pi-estimator
          imagePullPolicy: Never
          command: [”python”, “/app/worker.py”]
          env:
            - name: POINTS_PER_WORKER
              value: “200000”
            - name: RESULT_DIR
              value: “/results”
          volumeMounts:
            - name: results
              mountPath: /results
      volumes:
        - name: results
          persistentVolumeClaim:
            claimName: pi-results-pvc

---
# -------------------------------------------------------
# Reducer Job (waits for all 4 workers to finish)
# -------------------------------------------------------
apiVersion: batch/v1
kind: Job
metadata:
  name: pi-reducer
spec:
  completions: 1
  parallelism: 1
  backoffLimit: 0
  template:
    spec:
      restartPolicy: Never
      serviceAccountName: pi-reducer-sa

      initContainers:
        - name: wait-for-workers
          image: bitnami/kubectl:latest
          command:
            - sh
            - -c
            - |
              echo “[init] Waiting for 4 worker pods to complete...”
              while true; do
                succ=$(kubectl get pods -l job-name=pi-workers \
                    --field-selector=status.phase=Succeeded \
                    --no-headers | wc -l)
                echo “[init] Workers finished: ${succ}/4”
                if [ “$succ” -ge 4 ]; then
                  echo “[init] All workers completed, starting reducer.”
                  break
                fi
                sleep 2
              done

      containers:
        - name: reducer
          image: pi-estimator
          imagePullPolicy: Never
          command: [”python”, “/app/reducer.py”]
          env:
            - name: RESULT_DIR
              value: “/results”
          volumeMounts:
            - name: results
              mountPath: /results

      volumes:
        - name: results
          persistentVolumeClaim:
            claimName: pi-results-pvc
This is called a Kubernetes manifest file, which declares what we want Kubernetes to create and manage for us. It’s organized into six resource manifests:
One for a persistent volume (so different processes can send data to one another)
Three to set the correct permissions (we’ll talk about these later)
One to kick off four of the workers, which run in parallel
One to kick off the reducer, which aggregates the output from each of the workers and returns a prediction for pi.
Each of these manifests starts with an apiVersion, something like this:
apiVersion: batch/v1Originally, Kubernetes only had one apiVersion, which was v1. This contains the core elements of Kubernetes. As Kubernetes evolved and became more popular, different types of use cases became more prevalent. People were using Kubernetes to run large computational jobs, and people were using Kubernetes to support long-lasting applications. To support these types of workflows, the batch/v1 and apps/v1 APIs were created to run ephemeral jobs and long-lived applications, respectively. v1, apps/v1, and batch/v1 cover the vast majority of Kubernetes, though there are many other APIs that are important for some specific functionality.
on top of the API version, each resource also has a kind, which specifies the kind of resource we want to make within the apiVersion we’re using. Exactly what a kind represents can change depending on the apiVersion we’re using. For instance, it might represent what type of batch operation we’re making
apiVersion: batch/v1
kind: Job
...
it might represent that we want a persistent volume
apiVersion: v1
kind: PersistentVolumeClaim
...
Or that we want to create roles and bind those roles to resources.
apiVersion: v1
kind: ServiceAccount
...

apiVersion: rbac.authorization.k8s.io/v1
kind: Role
...

apiVersion: rbac.authorization.k8s.io/v1
kind: RoleBinding
There’s a lot going on in this manifest file, chiefly because we need a few different resources to get everything working. We can pick this apart by understanding each resource individually and what it’s doing. The simplest one is probably the persistent volume.
# -------------------------------------------------------
# Persistent Volume Claim (shared across workers & reducer)
# -------------------------------------------------------
apiVersion: v1
kind: PersistentVolumeClaim
metadata:
  name: pi-results-pvc
spec:
  accessModes:
    - ReadWriteMany
  resources:
    requests:
      storage: 1Gi
Each resource manifest consists of four key parts; the apiVersion and kind, which we discussed and will continue to explore, and the metadata and spec.
The metadata field allows you to assign information that’s useful to both humans and Kubernetes in terms of organization and grouping of resources. For this example we’re keeping it simple and just assigning a name which is pi-results-pvc (the persistent volume claim for the results of our pi-finding workers). Setting a name is important because it’s common to control and interact with resources by name in K8s. This will be super important in both the examples in this article.
The spec is where all the magic happens; it’s where you define what you actually want out of the resource. The most important for a persistent volume claim ( pvc ) is the request for some volume of storage.
resources:
  requests:
    storage: 1Gi
When you create a persistent volume claim and pass it to K8s, K8s then
passes that request to the control plane in your cluster. Depending on
whether your Kubernetes is running locally using Minikube or on a cloud
provider like AWS, GCP, or Azure, different storage provisioners are used
to fulfill that request. It’s important to note here that manifests are “declarative”, meaning they declare the state we want to achieve. If an existing PersistentVolume already satisfies the claim, the control-plane controllers will bind the PVC to it.
On top of the amount of storage, we’re also defining the access modes.
spec:
  accessModes:
    - ReadWriteMany
  resources:
    requests:
      storage: 1Gi
This says that we want to allow many different pods (essentially, different instances of containers) to be able to read and write to this volume simultaneously. There are a few different approaches that can be useful in different use cases.
ReadWriteOnce: One machine can write to it, and any pods on that machine can use it.
ReadWriteOncePod: Only a single pod is allowed to write to it, even if multiple pods are on the same machine.
ReadOnlyMany: Many pods on many machines can use it, but only for reading.
ReadWriteMany: Many pods on many machines can use it and write to it at the same time.
ReadWriteMany can result in race conditions and conflicts, so it’s not good for every use case, but for this application it should work fine; our worker nodes run in isolation, and our reducer will only read once all workers are done running.
Now that we have a claim for volume, let’s discuss the worker job, which uses that volume.
# -------------------------------------------------------
# Worker Job (4 Pods in parallel)
# -------------------------------------------------------
apiVersion: batch/v1
kind: Job
metadata:
  name: pi-workers
spec:
  completions: 4
  parallelism: 4
  backoffLimit: 0
  template:
    spec:
      restartPolicy: Never
      containers:
        - name: worker
          image: pi-estimator
          imagePullPolicy: Never
          command: [”python”, “/app/worker.py”]
          env:
            - name: POINTS_PER_WORKER
              value: “200000”
            - name: RESULT_DIR
              value: “/results”
          volumeMounts:
            - name: results
              mountPath: /results
      volumes:
        - name: results
          persistentVolumeClaim:
            claimName: pi-results-pvc
Recall that, in our original Docker container, we defined two scripts; worker.py could be used to generate a bunch of points and say if they’re inside or outside of a circle, then reducer.py could take those results (written as a json file) to calculate pi. Here, we’re defining a Job which spawns four workers and runs them in parallel.
Recall, there are three important core APIs in K8s, the v1 , app/v1, and batch/v1 apis. From a high-level view, the batch api has controllers for managing finite and scheduled tasks, while the app api has controllers for managing long-running applications. These are the most critical ones:
batch/v1: Job— A controller for executing on a specific task, then tears everything down when done. Good if you want to press play, execute a job, then free up resources when it’s done.batch/v1: CronJob— Similar to jobs, tares down on completion, but the controller sticks around so it can restart the task on a schedule. Good if you want to run a job every hour/day/week/etc.app/v1: Deployment— Runs long-lived applications and stateless applications. Probably the most important type of controller in K8s. Think the resources necessary to run a standard website.app/v1: StatefulSet— Similar to Deployment, but with extra rules imposed to enforce statefulness.app/v1: DaemonSet— Runs something on every machine (node) in the cluster. Useful for things like logging and monitoring.
A batch/v1: Job, then, is perfect for our application. We want the job to run, then stop running. Within this Job we’re assigning a name of pi-workers in the metadata field then defining a spec.
The spec has a few high-level parameters
spec:
  completions: 4
  parallelism: 4
  backoffLimit: 0
This says we want to spawn pods (containers) until four of them complete successfully, and we want to run four of them in parallel. K8s is designed to be resilient to error, so it will automatically retry running containers if they fail. This allows us to stop once we’ve run a certain amount successfully. By default, K8s will keep trying indefinitely, but we also set backoffLimit to zero, meaning K8s won’t retry running a pod that’s failed. This isn’t strictly required, but it means if we accidentally introduce a bug K8s won’t try to keep launching the same container over and over again.
After those simple configurations, we have the template for the worker itself
spec:
  completions: 4
  parallelism: 4
  backoffLimit: 0
  template:
    spec:
      restartPolicy: Never
      containers:
        - name: worker
          image: pi-estimator
          imagePullPolicy: Never
          command: [”python”, “/app/worker.py”]
          env:
            - name: POINTS_PER_WORKER
              value: “200000”
            - name: RESULT_DIR
              value: “/results”
          volumeMounts:
            - name: results
              mountPath: /results
      volumes:
        - name: results
          persistentVolumeClaim:
            claimName: pi-results-pvc
Now that we’ve covered some definitions and core ideas, this is pretty straightforward to understand. Each of the four pods this Job is spawning consists of a single container with an image named pi-estimator, which is the name of the Docker image we made. We’re starting that container with the command python /app/worker.py, which runs our worker script once the container starts.
We’re also specifying a few environment variables within the env clause, allowing us to specify how many points each worker simulates, and where the results end up.
We’re setting the RESULT_DIR environment variable to the same path we’re mounting the persistent volume to, meaning after our script runs, each of our workers will write its own output file to the persistent volume, allowing us to aggregate our results in a single place.
There’s two other fields that aren’t strictly necessary, but made their way in through the debugging process. imagePullPolicy: Never means we’ll never pull the image from an external registry, like Docker Hub, and restartPolicy: Never means if the pod fails, never restart it. This is common for a Job because it needs pods to conclude to be able to manage the pods correctly. If the pod keeps restarting itself every time it finishes, then the pod never concludes, and the Job can’t be managed properly.
The astute among you might notice that we’re calling /app/worker.py. Our Dockerfile which defines our image looks like this
FROM python:3.10-slim

WORKDIR /app

COPY src/worker.py src/reducer.py .

ENTRYPOINT [”python”]
It can be kind of hard to be 100% sure where all our files are within the docker container. Instead of guessing, I made a simple manifest file that lets us explore the folder structure of our image, called pi-image-structure.yaml.
apiVersion: batch/v1
kind: Job
metadata:
  name: pi-image-structure
spec:
  backoffLimit: 0
  template:
    spec:
      restartPolicy: Never
      containers:
      - name: explorer
        image: pi-estimator:latest
        imagePullPolicy: Never
        command: [”/bin/sh”, “-c”]
        args:
          - |
            echo “=== DIRECTORY LISTING OF /app (detailed) ===”;
            ls -alh /app;
            echo;
            echo “=== RECURSIVE LISTING OF /app ===”;
            ls -R /app;
            echo;
            echo “=== TREE VIEW OF /app (manual) ===”;
            find /app -printf “%p\n”;
            echo “=== DONE ===”;
It’s just like the Job we were just talking about, except it only spawns the image once, and instead of running a command to run our script, it runs some commands to view the structure of the files within the image. I don’t want this tangent to take too long, we haven’t finished discussing the big manifest file running our job. It’s just a little hack I used to make sure all of my paths were set up correctly.
Anyway, back to our manifest file for our pi estimation. We discussed two of the resources so far; the persistent volume claim and the parallel job for the workers. We also need another Job which runs the reducer after the workers are done. This resource manifest makes that happen.
# -------------------------------------------------------
# Reducer Job (waits for all 4 workers to finish)
# -------------------------------------------------------
apiVersion: batch/v1
kind: Job
metadata:
  name: pi-reducer
spec:
  completions: 1
  parallelism: 1
  backoffLimit: 0
  template:
    spec:
      restartPolicy: Never
      serviceAccountName: pi-reducer-sa

      initContainers:
        - name: wait-for-workers
          image: bitnami/kubectl:latest
          command:
            - sh
            - -c
            - |
              echo “[init] Waiting for 4 worker pods to complete...”
              while true; do
                succ=$(kubectl get pods -l job-name=pi-workers \
                    --field-selector=status.phase=Succeeded \
                    --no-headers | wc -l)
                echo “[init] Workers finished: ${succ}/4”
                if [ “$succ” -ge 4 ]; then
                  echo “[init] All workers completed, starting reducer.”
                  break
                fi
                sleep 2
              done

      containers:
        - name: reducer
          image: pi-estimator
          imagePullPolicy: Never
          command: [”python”, “/app/reducer.py”]
          env:
            - name: RESULT_DIR
              value: “/results”
          volumeMounts:
            - name: results
              mountPath: /results

      volumes:
        - name: results
          persistentVolumeClaim:
            claimName: pi-results-pvc
This is virtually the same as the worker manifest, save two key differences. First and most trivially, it calls the reducer.py script, rather than the worker.py script. It also uses an initContainer.
When you run a manifest file in K8s, it creates all resources at the same time asynchronously. That means K8s will create our worker job with 4 workers (which take a while to run because they have a lot of work to do) and our reducer at the same time. If we run our reducer as soon as it’s spooled up, it will look in the shared volume and see that there’s nothing in there, as the workers haven’t finished running yet.
There are a few ways of dealing with this, which have their costs and benefits. I opted to use something called an initContainer. initContainers run before your actual container, in order if you have more than one init container. Your actual container in your pod only runs after all of your init containers have finished running. Thus, if we make our initContainer run as long as we have workers running, then it will effectively delay our reducer from starting until after all of our workers have finished.
This is the definition for the initContainer
initContainers:
  - name: wait-for-workers
    image: bitnami/kubectl:latest
    command:
      - sh
      - -c
      - |
        echo “[init] Waiting for 4 worker pods to complete...”
        while true; do
          succ=$(kubectl get pods -l job-name=pi-workers \
              --field-selector=status.phase=Succeeded \
              --no-headers | wc -l)
          echo “[init] Workers finished: ${succ}/4”
          if [ “$succ” -ge 4 ]; then
            echo “[init] All workers completed, starting reducer.”
            break
          fi
          sleep 2
        done
It uses a base image called bitnami/kubectl:latest which is a very popular kubernetes image designed to run kubectl commands from within a container. This lets it spool up an image that can talk with the cluster it’s in.
The command we’re sending to this image is formatted a bit weirdly, simply because it’s a Yaml file. The YAML file expects a list of commands, so a YAML file like this:
command:
  - thing1
  - thing2
  - thing3
would look like a command like
thing1 thing2 thing3The symbol | is a convention in YAML which means “treat the following thing as a single multi-lined string, line breaks and all. So we’re essentially running the command:
sh -c “
echo \”[init] Waiting for 4 worker pods to complete...\”
while true; do
  succ=\$(kubectl get pods -l job-name=pi-workers \
      --field-selector=status.phase=Succeeded \
      --no-headers | wc -l)
  echo \”[init] Workers finished: \${succ}/4\”
  if [ \”\$succ\” -ge 4 ]; then
    echo \”[init] All workers completed, starting reducer.\”
    break
  fi
  sleep 2
done
“
the command sh specifies that we’re simply running a command in the Unix POSIX shell, which every Linux machine has. the -c argument says “run the following string as a command”, then we’re passing the string into it, which is written in POSIX shell script. If you’re not familiar with POSIX shell scripts this might look a bit daunting. In essence:
It prints the text
[init] Waiting for 4 worker pods to complete…while true; dostarts an infinite loop which will always run until broken out ofsucc=…counts the number of completed worker pods. It does that by getting all the pods withkubectl get podswith a filter that only selects pods of the correct name with-l job-name=pi-workersand only keeps pods that have successfully finished with— field-selector=status.phase=Succeeded. It makes sure there are no headers with— no-headers, and| wc -lcounts how many lines exist within the resulting text from the previous commands. Basically, we’re making a line of text for all of the workers that have finished successfully, and are counting the number of rows.If the number of successful pods is greater than or equal to four
if [ \”\$succ\” -ge 4 ]; then, then print and break out. Otherwise sleep for two seconds.
I think it’s kind of cool how we didn’t need to implement any code. By using a base image that already had kubectl set up, we could just use a kubectl and some fancy shell scripting to whip up some sophisticated functionality. The end result is that our init container doesn’t stop running until all workers have stopped running. It also consumes practically zero resources, as the Docker image is lightweight and the majority of time the image is sleeping (thus not consuming resources).
By default, a pod can’t run kubectl commands to be able to communicate with the cluster it exists within, as a matter of security. To enable these permissions, we specify serviceAccountName: pi-reducer-sa, which is another set of resources we need to define in our manifest.
apiVersion: v1
kind: ServiceAccount
metadata:
  name: pi-reducer-sa

---
apiVersion: rbac.authorization.k8s.io/v1
kind: Role
metadata:
  name: pi-reducer-role
rules:
  - apiGroups: [”“]
    resources: [”pods”]
    verbs: [”get”, “list”]
  - apiGroups: [”batch”]
    resources: [”jobs”]
    verbs: [”get”, “list”]

---
apiVersion: rbac.authorization.k8s.io/v1
kind: RoleBinding
metadata:
  name: pi-reducer-binding
subjects:
  - kind: ServiceAccount
    name: pi-reducer-sa
roleRef:
  kind: Role
  name: pi-reducer-role
  apiGroup: rbac.authorization.k8s.io
First, we create a service account, which pods can use as an identity when talking with the Kubernetes API in the control plane.
apiVersion: v1
kind: ServiceAccount
metadata:
  name: pi-reducer-sa
Next, we define a role, which defines a set of actions that an account would be able to perform. This allows for getting (reading one) and listing (reading all) pods and jobs.
apiVersion: rbac.authorization.k8s.io/v1
kind: Role
metadata:
  name: pi-reducer-role
rules:
  - apiGroups: [”“]
    resources: [”pods”]
    verbs: [”get”, “list”]
  - apiGroups: [”batch”]
    resources: [”jobs”]
    verbs: [”get”, “list”]
We then bind that role to the service account, by specifying the service account and role by name within a RoleBinding.
apiVersion: rbac.authorization.k8s.io/v1
kind: RoleBinding
metadata:
  name: pi-reducer-binding
subjects:
  - kind: ServiceAccount
    name: pi-reducer-sa
roleRef:
  kind: Role
  name: pi-reducer-role
  apiGroup: rbac.authorization.k8s.io
A bit verbose, and some boilerplate, but conceptually intuitive I think.
And that’s actually all we need to code up to get our container working in kubernetes. Lets spool up minikube and run it.
Running in Kubernetes
First of all, we defined a lot of stuff in the last section, and it’s probably a good idea to do a simple smoke test. We have two manifest files in our k8s folder; pi-job.yaml which is super complicated, and pi-image-structure.yaml which simply prints out the directory structure within our image. Let’s try running pi-image-structure.yaml first, to make sure everything is set up nicely.
pi-estimator/
  ├─ local_test.py
  ├─ Dockerfile
  └─ k8s/
      ├─ pi-job.yaml
      └─ pi-image-structure.yaml
  └─ src/
      ├─ worker.py
      └─ reducer.py
  └─ local_results/
      └─ ....json
First of all, recall I’m running all this in a virtual machine. If you’re doing something similar, I recommend allocating plenty of RAM in the VM so Kubernetes doesn’t have any issues.
On Parallels, you can do that by making sure the VM is shut down, opening it by double-clicking the name, and clicking the gear on the top right. You can then give it a good amount of processors and RAM to play with.
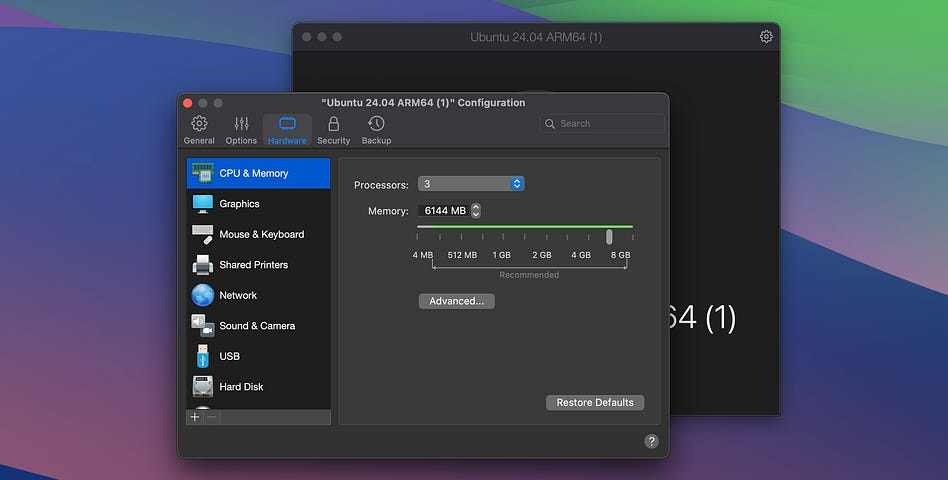
Once you do that, go ahead and start up the VM.
Open up a terminal, and CD into wherever your pi-estimator directory is
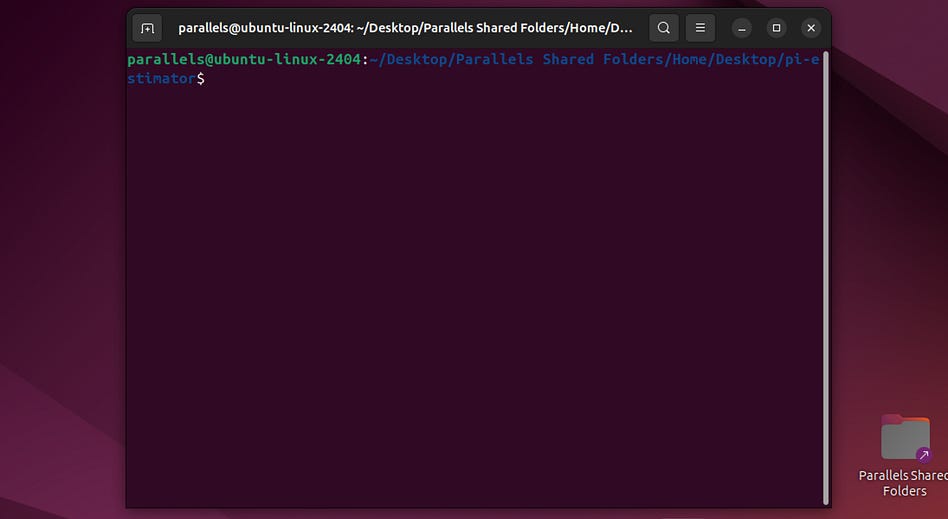
then run
minikube startYou’ll get a bunch of emojis and a message saying minikube started. Then run
minikube image build -t pi-estimator:latest .This will build the docker image for pi-estimator, based on our Dockerfile, and load it into minikube. if we then run
minikube image listwe’ll be able to see our image in minikube.
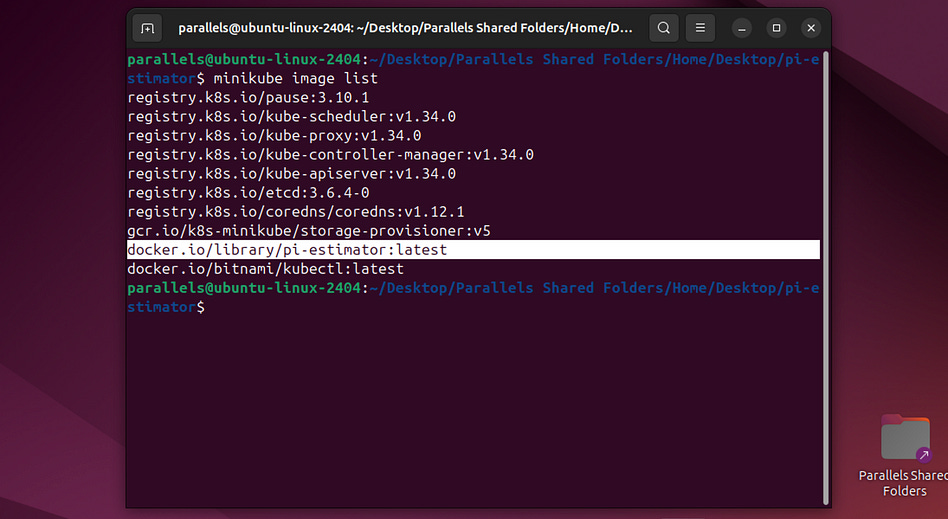
Let’s go ahead and cd into our k8s folder, and run
kubectl apply -f pi-image-strcture.yamlwhich should return something like this.
job.batch/pi-image-structure createdRecall that pi-image-structure.yaml defines a simple command that prints out the directory structure of our pi-estimator docker image. Running kubectl apply applies this manifest to the cluster.
We can then run the following command to see that our job ran and completed.
kubectl get jobsNAME STATUS COMPLETIONS DURATION AGE
pi-image-structure Complete 1/1 4s 59sWe can also run the following commands to see the individual pod which was created during the job, ran successfully, then destroyed.
kubectl get podsNAME READY STATUS RESTARTS AGE
pi-image-structure-rmgh2 0/1 Completed 0 2m52sWe can run the following command to check out the logs from all pods that ran in this job (only the one)
kubectl logs -l job-name=pi-image-structure --prefix[pod/pi-image-structure-rmgh2/explorer] === RECURSIVE LISTING OF /app ===
[pod/pi-image-structure-rmgh2/explorer] /app:
[pod/pi-image-structure-rmgh2/explorer] reducer.py
[pod/pi-image-structure-rmgh2/explorer] worker.py
[pod/pi-image-structure-rmgh2/explorer]
[pod/pi-image-structure-rmgh2/explorer] === TREE VIEW OF /app (manual) ===
[pod/pi-image-structure-rmgh2/explorer] /app
[pod/pi-image-structure-rmgh2/explorer] /app/worker.py
[pod/pi-image-structure-rmgh2/explorer] /app/reducer.py
[pod/pi-image-structure-rmgh2/explorer] === DONE ===And we can see that the /app directory contains our worker.py and our reducer.py. More importantly, though, we just successfully ran our first Kubernetes manifest!
Of course, our actual pi-job.yaml is way more complicated, but running it is pretty much the same thing. First, though, let’s run this command to delete all traces of our pi-image-structure so it’s not polluting our output.
kubectl delete job pi-image-structureThese two commands should both result in an empty output
kubectl get jobs
kubectl get pods
We can now run
kubectl apply -f pi-job.yamland see that a bunch of resources were created (or unchanged, because I ran this previously)
persistentvolumeclaim/pi-results-pvc created
serviceaccount/pi-reducer-sa unchanged
role.rbac.authorization.k8s.io/pi-reducer-role unchanged
rolebinding.rbac.authorization.k8s.io/pi-reducer-binding unchanged
job.batch/pi-workers created
job.batch/pi-reducer created
And we have a bunch of pods that all finished pretty quickly.
kubectl get podsNAME READY STATUS RESTARTS AGE
pi-reducer-zwxnb 0/1 Completed 0 5s
pi-workers-784w4 0/1 Completed 0 5s
pi-workers-sq2q5 0/1 Completed 0 5s
pi-workers-x9nnl 0/1 Completed 0 5s
pi-workers-z6znv 0/1 Completed 0 5sWe can view the logs across all our workers
kubectl logs -l job-name=pi-workers --prefix[pod/pi-workers-784w4/worker] [worker] Completed 200000 points → inside=157207
[pod/pi-workers-784w4/worker] [worker] Wrote result to /results/result-3ae62882-d551-4e5d-b5df-5f7c3b2124a6.json
[pod/pi-workers-sq2q5/worker] [worker] Completed 200000 points → inside=157099
[pod/pi-workers-sq2q5/worker] [worker] Wrote result to /results/result-e4094053-03b7-477d-a80d-d0f97b8e7cbc.json
[pod/pi-workers-x9nnl/worker] [worker] Completed 200000 points → inside=157433
[pod/pi-workers-x9nnl/worker] [worker] Wrote result to /results/result-b715483c-5845-4f28-9258-ff09a20d030e.json
[pod/pi-workers-z6znv/worker] [worker] Completed 200000 points → inside=157704
[pod/pi-workers-z6znv/worker] [worker] Wrote result to /results/result-d31f9b4a-daf4-43e0-a792-f62b7eb5e916.jsonand the logs in our reducer
kubectl logs -f job/pi-reducerDefaulted container “reducer” out of: reducer, wait-for-workers (init)
[reducer] Collecting results from: /results
[reducer] inside_total = 314786221
[reducer] points_total = 400800000
Distributed π estimate: 3.1415790518962075And see that it successfully aggregated all of the results from our workers! We could scale up the number of points, scale up the number of workers, and waste a whole lot of money on AWS if we really wanted to.
This is pretty nifty, but you might notice a key issue. Everything is hard-coded. If we wanted to increase the number of workers or how many points each worker was processing, we’d need to manually adjust our manifest file. This is possible, and it might even be acceptable in some applications, but it feels like this particular problem needs some ease of configuration. We can do that with Helm.
Helm
Helm is often described as “the package manager for Kubernetes”; it abstracts Kubernetes into something called a chart, which allows you to connect different Kubernetes applications together like Legos. We’ll play around with that later. For now, we’ll be using a functionality of Helm called templating to be able to configure our Job before running it.
We can kick off working in helm by navigating to pi-estimator and running
helm create chartThis creates a directory in pi-estimator called chart, which will contain a bunch of boilerplate we don’t need. We can clean it up with the following:
rm -rf chart/templates/*
rm -rf chart/templates/tests
rm -f chart/values.yaml
touch chart/values.yaml
This will clean up a bunch of the default stuff we don’t need, and make a barebones basis for us to work off of. Something like this:
pi-estimator/
  chart/
    Chart.yaml
    values.yaml
    templates/
      ...
  k8s/
    ...
  src/
    ...
...
Helm relies on two core ideas to do it’s magic, the chart and templates. A chart is essentially a package that contains everything necessary to define a K8s application. It has metadata about it, which is defined in Chart.yaml, default configuration values defined in values.yaml and configurable templates defined in the templates directory.
Instead of defining our K8s application in one big manifest, we break up all the resources into different templates. Each of these templates can have variables, which can have default values defined in values.yaml or can be manually changed. This is what will allow us to run our pi estimation job with a varying number of workers, a varying number of points per worker, and other fun stuff like that.
To get started, we can go into Chart.yaml and define it as
apiVersion: v2
name: pi-estimator
description: A Helm chart for running a parallel Pi estimation job in Kubernetes.
type: application
version: 0.1.0
appVersion: “1.0”
This defines the v2 API for Helm, which is the current standard, and the name of the application is pi-estimator. We give it a description, and assign it as type: application (as opposed to the alternative type: library, which isn’t designed to be run on its own but instead consists of re-usable logic). There’s also some versioning information, which can be useful if you’re trying to keep track of logic around the helm chart or application as a whole. When we later call helm install pi-estimator ./chart, helm will look for our Chart.yaml file in the directory, and will look for a template directory, that contains our resource definitions.
Within our template directory we need one template for each of our resources. Behind the scenes, Helm will compile these into a single manifest. This will look a lot like our pi-job.yaml from Kubernetes, with one minor change: variables. Here’s an example of a template for our persistent volume claim.
apiVersion: v1
kind: PersistentVolumeClaim
metadata:
  name: {{ .Values.pvc.name }}
spec:
  accessModes:
    - {{ .Values.pvc.accessMode }}
  resources:
    requests:
      storage: {{ .Values.pvc.size }}
If you scroll back through our k8s manifest file, you’ll see this is exactly the same, except some of the fields are abstracted away into variables surrounded by double curly brackets. This would be saved in templates/pvc.yaml, and all of the other resources would get their own templace, like so.
templates/pvc.yaml
apiVersion: v1
kind: PersistentVolumeClaim
metadata:
  name: {{ .Values.pvc.name }}
spec:
  accessModes:
    - {{ .Values.pvc.accessMode }}
  resources:
    requests:
      storage: {{ .Values.pvc.size }}
templates/job-workers.yaml
apiVersion: batch/v1
kind: Job
metadata:
  name: {{ .Values.workers.jobName }}
spec:
  completions: {{ .Values.workers.count }}
  parallelism: {{ .Values.workers.count }}
  backoffLimit: 0
  template:
    spec:
      restartPolicy: Never
      containers:
        - name: worker
          image: {{ .Values.image }}
          imagePullPolicy: {{ .Values.imagePullPolicy }}
          command: [”python”, “/app/worker.py”]
          env:
            - name: POINTS_PER_WORKER
              value: “{{ .Values.workers.pointsPerWorker }}”
            - name: RESULT_DIR
              value: “{{ .Values.resultDir }}”
          volumeMounts:
            - name: results
              mountPath: /results
      volumes:
        - name: results
          persistentVolumeClaim:
            claimName: {{ .Values.pvc.name }}
templates/job-reducer.yaml
apiVersion: batch/v1
kind: Job
metadata:
  name: {{ .Values.reducer.jobName }}
spec:
  completions: 1
  parallelism: 1
  backoffLimit: 0
  template:
    spec:
      restartPolicy: Never
      serviceAccountName: {{ .Values.rbac.serviceAccount }}

      initContainers:
        - name: wait-for-workers
          image: bitnami/kubectl:latest
          command:
            - sh
            - -c
            - |
              echo “[init] Waiting for {{ .Values.workers.count }} worker pods to complete...”
              while true; do
                succ=$(kubectl get pods -l job-name={{ .Values.workers.jobName }} \
                    --field-selector=status.phase=Succeeded \
                    --no-headers | wc -l)
                echo “[init] Workers finished: ${succ}/{{ .Values.workers.count }}”
                if [ “$succ” -ge {{ .Values.workers.count }} ]; then
                  echo “[init] All workers completed, starting reducer.”
                  break
                fi
                sleep 2
              done

      containers:
        - name: reducer
          image: {{ .Values.image }}
          imagePullPolicy: {{ .Values.imagePullPolicy }}
          command: [”python”, “/app/reducer.py”]
          env:
            - name: RESULT_DIR
              value: “{{ .Values.resultDir }}”
          volumeMounts:
            - name: results
              mountPath: /results

      volumes:
        - name: results
          persistentVolumeClaim:
            claimName: {{ .Values.pvc.name }}
templates/rbac-role.yaml
apiVersion: rbac.authorization.k8s.io/v1
kind: Role
metadata:
  name: {{ .Values.rbac.role }}
rules:
  - apiGroups: [”“]
    resources: [”pods”]
    verbs: [”get”, “list”]
  - apiGroups: [”batch”]
    resources: [”jobs”]
    verbs: [”get”, “list”]
templates/rbac-rolebinding.yaml
apiVersion: rbac.authorization.k8s.io/v1
kind: RoleBinding
metadata:
  name: {{ .Values.rbac.roleBinding }}
subjects:
  - kind: ServiceAccount
    name: {{ .Values.rbac.serviceAccount }}
roleRef:
  kind: Role
  name: {{ .Values.rbac.role }}
  apiGroup: rbac.authorization.k8s.io
templates/rbac-serviceaccount.yaml
apiVersion: v1
kind: ServiceAccount
metadata:
  name: {{ .Values.rbac.serviceAccount }}
For those playing at home, this is the full folder structure of our project so far.
pi-estimator/
  ├─ local_test.py
  ├─ Dockerfile
  └─ chart
      └─ charts (empty directory, we’ll explore this later)
      └─ templates
        ├─ job-reducer.yaml
        ├─ job-workers.yaml
        ├─ pvc.yaml
        ├─ rbac-role.yaml
        ├─ rbac-rolebinding.yaml
        └─ rbac-rserviceaccount.yaml
      └─.helmignore (auto created, when we called helm create)
      └─ Chart.yaml
      └─ values.yaml
  └─ k8s/
      ├─ pi-job.yaml
      └─ pi-image-structure.yaml
  └─ src/
      ├─ worker.py
      └─ reducer.py
  └─ local_results/
      └─ ....json
Hopefully, by now you have some idea of what most of these files represent.
Now, we can specify what’s in our values.yaml, thus defining default values for our templates
image: “pi-estimator”
imagePullPolicy: Never

resultDir: “/results”

pvc:
  name: pi-results-pvc
  size: 1Gi
  accessMode: ReadWriteMany

rbac:
  serviceAccount: pi-reducer-sa
  role: pi-reducer-role
  roleBinding: pi-reducer-binding

workers:
  jobName: pi-workers
  count: 4
  pointsPerWorker: “200000”

reducer:
  jobName: pi-reducer
We referenced {{ .Values.workers.count }} within a few of our templates. The Values file has a workers field that has a count, which defaults to 4.
We can run our cluster via this chart by running this command from our pi-estimator folder.
helm install pi-estimator ./chartYou might get some errors if you try to run this though. Recall that Kubernetes is declarative, meaning if you re-run the same script over and over again, it won’t create multiple persistent volumes, for instance. It will just create the one because it already exists. The issue is that helm didn’t create these resources, but they already exist. Helm is squeamish about managing resources that it didn’t create. You can alleviate that by simply deleting all the resources we made from previous runs.
kubectl delete jobs --all
kubectl delete pods --all
kubectl delete serviceaccount pi-reducer-sa
kubectl delete role pi-reducer-role
kubectl delete rolebinding pi-reducer-binding
kubectl delete pvc pi-results-pvc
If you re-run helm install pi-estimator ./chart, it should work now.
We run this as many times as we want, simply by running
helm uninstall pi-estimatorthen re-running
helm install pi-estimator ./chartwhich is pretty nifty within itself. Instead of having a bunch of resources floating around, they all exist within the same chart, and can be spooled up, taken down, and otherwise managed based on that chart.
We can also override the default values right in our helm call. For instance, this will spawn 10 workers which each processes 10 million points for estimating pi.
helm install pi-estimator ./chart \
  --set workers.count=10 \
  --set workers.pointsPerWorker=10000000
10 million points takes a while to get through, which is cool because we can watch our job process real time. If we run the previous helm install command, we can then run
kubectl get pods -wwhich shows all the pods in “watch mode”, meaning it’ll update as pods update their state. At the start, we have a bunch of workers working through their tasks, and the reducer is stuck on initialization.
NAME               READY   STATUS     RESTARTS   AGE
pi-reducer-bjsr5   0/1     Init:0/1   0          44s
pi-workers-48qxm   1/1     Running    0          44s
pi-workers-7d9cw   1/1     Running    0          44s
pi-workers-8k7dn   1/1     Running    0          44s
pi-workers-c6kcj   1/1     Running    0          44s
pi-workers-dtgl9   1/1     Running    0          44s
pi-workers-fkqkd   1/1     Running    0          44s
pi-workers-h2522   1/1     Running    0          44s
pi-workers-jxhrm   1/1     Running    0          44s
pi-workers-mh6z7   1/1     Running    0          44s
pi-workers-strsl   1/1     Running    0          44s
Then, once the workers finish up, we’ll see the reducer kick into gear soon after and then quickly complete.
NAME               READY   STATUS      RESTARTS   AGE
pi-reducer-bjsr5   0/1     Completed   0          91s
pi-workers-48qxm   0/1     Completed   0          91s
pi-workers-7d9cw   0/1     Completed   0          91s
pi-workers-8k7dn   0/1     Completed   0          91s
pi-workers-c6kcj   0/1     Completed   0          91s
pi-workers-dtgl9   0/1     Completed   0          91s
pi-workers-fkqkd   0/1     Completed   0          91s
pi-workers-h2522   0/1     Completed   0          91s
pi-workers-jxhrm   0/1     Completed   0          91s
pi-workers-mh6z7   0/1     Completed   0          91s
pi-workers-strsl   0/1     Completed   0          91s
Helm manages the deployment of Kubernetes, but we can still use kubectl to look into the logs from these workers to see what’s up. We can inspect the logs from the workers
kubectl logs -l job-name=pi-workers --prefix...
[pod/pi-workers-8k7dn/worker] [worker] Wrote result to /results/result-c8a590c3-3aa6-480c-a0c0-2756e3c11e28.json
[pod/pi-workers-h2522/worker] [worker] Completed 10000000 points → inside=7855214
[pod/pi-workers-h2522/worker] [worker] Wrote result to /results/result-7c5332b8-34ed-4672-b4da-27b79908ac7f.json
[pod/pi-workers-jxhrm/worker] [worker] Completed 10000000 points → inside=7853418
[pod/pi-workers-jxhrm/worker] [worker] Wrote result to /results/result-80b63c07-b5a4-4035-807c-2ae38e504d1e.jsonThe actual pod id for our reducer was pi-reducer-bjsr5, and we can look into both the initContainer logs
kubectl logs pod/pi-reducer-bjsr5 -c wait-for-workers -f[init] Waiting for 10 worker pods to complete...
No resources found in default namespace.
[init] Workers finished: 0/10
No resources found in default namespace.
[init] Workers finished: 0/10
No resources found in default namespace.
[init] Workers finished: 0/10
[init] Workers finished: 2/10
[init] Workers finished: 10/10
[init] All workers completed, starting reducer.And we can check out the actual output of the reducer, which yields our prediction.
kubectl logs -f job/pi-reducerDefaulted container “reducer” out of: reducer, wait-for-workers (init)
[reducer] Collecting results from: /results
[reducer] inside_total = 863939569
[reducer] points_total = 1100000000
Distributed π estimate: 3.141598432727273Here I have a few extra points, because my persistent volume persisted from a previous run, but you get the idea.
We could probably stop here if we wanted to, but I don’t. Let’s build an application using some more cool Helm stuff!
Using Helm For Real
What we just described will get you far, now I want to describe how to get far fast.
Templates are a powerful part of Helm, but arguably more powerful part of Helm is the modularity of charts. Recall that, in our folder structure for our Helm chart, there was an empty directory called charts.
pi-estimator/
  ├─ local_test.py
  ├─ Dockerfile
  └─ chart
      └─ charts <- this guy
      ...
  ...
That folder is for recording charts that our chart is dependent on. Kind of like how in programming languages like Python, where you can write code that is dependent on certain libraries, in Helm you can co-opt and re-use complete charts that are already created. There’s a whole lot of them, which can do all sorts of cool things.
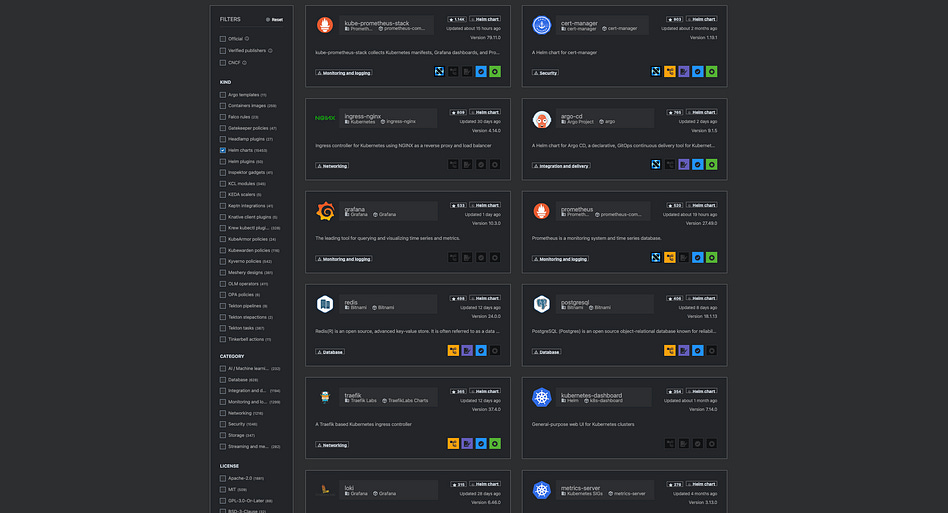
We’re going to make another application that uses some of the more popular pre-built components. I’ve been enjoying chess lately. Let’s make a chess website where we can play against a computer.
The Plan
If you’ve made it this far in the article, you’re the type of nerd who’s at least heard of chess, and maybe you’ve played a game or two. We’re going to build a chess application that allows us to play chess against a computer opponent. It will consist of the following:
A server pod, which manages session data, like active games and moves played, and serves a website, allowing us to play chess on a chessboard
A redis database, allowing us to store data and coordinate actions between pods. We’ll talk about this in-depth later.
A worker pod, which sees when a player has moved and does computer processing to come up with a retaliatory move
We’ll also have monitoring and logging tools, like what a proper production application would have. We’ll cover that later.
Ultimately, we’ll be deploying this in Kubernetes with helm, but this is a fair amount of work to do in one big bite. We’re going to explore a subset of this by setting up some Docker files which run our server, redis, and worker pods. We’ll build an application by spooling these up manually, then we’ll work to orchestrate their deployment onto k8s within a single helm chart.
Throughout this process, I found that starting with containers then switching to Helm is more trouble than it’s worth. If you’re building a new project, I recommend just starting in Helm. The transition to “these containers work” to “it runs in Helm” is not always as trivial as one might expect. That said, I think exploring the containers themselves is a good place to start from a learning perspective, we’ll first explore our chess application as a set of containers, then make a few modifications to make it work in Helm.
The Application
The actual logic of the application isn’t the point of this article, so I’m going to blitz through it. The structure of the directory looks like this:
chess-app
├── backend/
│   ├── app.py
│   ├── Dockerfile
│   └── requirements.txt
│
├── chart/
│    └── we’ll talk about this later
│
├── chess-client/
│   ├── Dockerfile
│   ├── play.py
│   └── requirements.txt
│
└── worker/
    ├── Dockerfile
    ├── requirements.txt
    └── worker.py
getting the frontend (which allows us to interact with a board online) to actually work when just running containers ended up being kind of a pain, so I made a simple console-based application called chess-client, which is designed to let us play chess against the computer and see if it’s working. The idea is that we can hopefully run the Worker image in one terminal, the Backend image in another terminal, redis in another terminal, then run our chess-cleint in another terminal. Our chess-client will talk with our backend, which in turn will talk with redis. The worker will observe jobs queued up on redis, and write move results which the Backend will pass back to the chess-cleint. Once we get everything working in K8s via helm, we’ll re-incorporate the frontend and ditch the chess-client.
The Backend
The following is backend/app.py , which is like the glue of our application that ties all the components together.
from fastapi import FastAPI
from pydantic import BaseModel
import uuid
import redis
import json
from prometheus_client import Counter, Histogram, generate_latest
from fastapi.responses import Response
import time

# Simple logger helper
def log(*args):
    print(”[BACKEND]”, *args, flush=True)

app = FastAPI()

# --------------------------------------------------------
# Redis initialization
# --------------------------------------------------------
REDIS_HOST = “redis-master”
log(”Connecting to Redis at:”, REDIS_HOST)

try:
    r = redis.Redis(host=REDIS_HOST, port=6379, decode_responses=True)
    r.ping()
    log(”Connected to Redis successfully.”)
except Exception as e:
    log(”ERROR connecting to Redis:”, e)
    raise

REQUEST_COUNT = Counter(”api_requests_total”, “Total API requests”)
JOB_LATENCY = Histogram(”job_latency_seconds”, “Time waiting for Stockfish”)


class MoveRequest(BaseModel):
    game_id: str
    move: str
    fen: str


# --------------------------------------------------------
# Routes
# --------------------------------------------------------
@app.get(”/start”)
def start_game():
    REQUEST_COUNT.inc()
    game_id = str(uuid.uuid4())
    log(f”/start → new game_id generated: {game_id}”)
    return {”game_id”: game_id}


@app.post(”/move”)
def make_move(req: MoveRequest):
    REQUEST_COUNT.inc()
    job_id = str(uuid.uuid4())

    log(f”/move received: game_id={req.game_id}, move={req.move}, fen={req.fen}”)
    log(f”Generated job_id={job_id}”)

    # Push job to Redis queue
    job_payload = {
        “job_id”: job_id,
        “game_id”: req.game_id,
        “move”: req.move,
        “fen”: req.fen
    }

    r.rpush(”jobs”, json.dumps(job_payload))
    log(”Job pushed to Redis:”, job_payload)

    # Wait for worker response
    with JOB_LATENCY.time():
        log(”Waiting for worker to compute result...”)
        while True:
            result_raw = r.get(f”result:{job_id}”)
            if result_raw:
                log(”Result received from worker:”, result_raw)

                # Cleanup Redis key
                r.delete(f”result:{job_id}”)
                log(”Deleted Redis key:”, f”result:{job_id}”)

                return json.loads(result_raw)

            # Avoid spinning too hot — also logs periodically to prevent total silence
            time.sleep(0.05)


@app.get(”/metrics”)
def metrics():
    log(”/metrics scraped”)
    return Response(generate_latest(), media_type=”text/plain”)
This is the Backend of the application. It has some details we’ll talk about when we get to the Helm part (namely Prometheus), but the majority of it is pretty simple. It’s a fastAPI api, which is a lightweight and convenient way to make an API in Python. We’re defining a start, move, and metrics endpoint which will allow us to start a new game of chess, make a move in that game of chess, and get some key metrics (which uses Prometheus. Again, we’ll talk about that later).
The start endpoint simply identifies a new UUID. A UUID is a “universal unique identifier”, which is essentially a long string of random numbers. Technically, it’s possible to create a UUID that’s the same as another one, but they’re so long, it’s practically impossible.
the annual risk of a given person being hit by a meteorite is estimated to be one chance in 17 billion, which means the probability is about 0.00000000006 (6 × 10⁻¹¹), equivalent to the odds of creating a few tens of trillions of UUIDs in a year and having one duplicate. In other words, only after generating 1 billion UUIDs every second for the next 100 years, the probability of creating just one duplicate would be about 50%. — Source
Thus, practically, we can create a new, completely unique identifier, which will identify a new game. After our client calls the start endpoint, they’ll use the UUID to tell the server which game they want to make a move in. Thus, multiple parallel games can be going on simultaneously, with different users making different games with different UUIDs.
When a player does make a move, they use the move endpoint. arguments to the move endpoint consists of the UUID of the game you’re playing in, the move you want to make, and something called a “fen”, which stands for “Forsyth-Edwards Notation”. It’s essentially a string of text that represents a chessboard position. For instance, this represents the starting position of chess:

These details don’t matter for understanding Kubernetes, nor do they matter for Helm. However, naturally, it’s important to make a system that can play chess.
We also create a job_id, which is yet another UUID. The whole idea of this application is that, after you make a move, a computer will compute and make a retaliatory move. The process of calculating that move can be computationally expensive. Imagine we had a few different people playing games of chess at the same time, we might need to process many different games simultaneously. Thus, we might want a few computers working in parallel to solve positions as quickly as possible.
To solve this, our app uses something called a “redis queue”. Redis is a very efficient and very popular in-memory database that can be used to store small amounts of high-speed data. It’s great for keeping track of a queue of jobs that many pods might be interested in within a cluster.
At the beginning of this script, we ran
r = redis.Redis(host=REDIS_HOST, port=6379, decode_responses=True)which connects to a container running Redis, and assigns that connection to a variable r.
When we make a move, we register the data for a job to redis with
r.rpush(”jobs”, json.dumps(job_payload))This is a queue of jobs that the pods running our worker nodes need to process. Once they get around to processing the job (which creates a new move), the worker will add an element in the queue with an id of
result:{job_id}Once we find that, we delete it from the queue, and send the computer-evaluated move to the client to update the board.
This general architecture is what’s called “producer-consumer”. Our backend “produces” jobs, and our workers “consume” them. Similarly, our workers “produce” results, and our backend “consumes” them. Thus we consistently have workers trying to solve positions as fast as they can, and the backend updates the players board position as soon as a result is available.
The Backend is served with uvicorn, just like any standard fastAPI app, so our Dockerfile looks like this
FROM python:3.10-slim
WORKDIR /app
COPY requirements.txt .
RUN pip install -r requirements.txt
COPY app.py .
CMD [”uvicorn”, “app:app”, “--host”, “0.0.0.0”, “--port”, “80”]
We also have a requierments.txt, which the Dockerfile uses to install python dependencies
fastapi
uvicorn[standard]
redis
prometheus-client
pydantic
The Worker
Here’s worker/worker.py, which consumes jobs in Redis and spits out predicted moves back into Redis.
import redis
import json
import time
import traceback
from prometheus_client import start_http_server, Counter
from stockfish import Stockfish
import os

# Simple logging helper
def log(*args):
    print(”[WORKER]”, *args, flush=True)

# --------------------------------------------------------
# 1. Load Stockfish
# --------------------------------------------------------
STOCKFISH_PATH = os.getenv(”STOCKFISH_EXECUTABLE”, “/usr/games/stockfish”)
log(”Using Stockfish path:”, STOCKFISH_PATH)

try:
    ENGINE = Stockfish(
        path=STOCKFISH_PATH,
        parameters={”Threads”: 1, “Skill Level”: 10}
    )
    log(”Stockfish initialized successfully.”)
except Exception as e:
    log(”Stockfish FAILED to start:”, e)
    log(traceback.format_exc())
    raise

# --------------------------------------------------------
# 2. Redis connection
# --------------------------------------------------------
REDIS_HOST = os.getenv(”REDIS_HOST”, “redis-master”)
log(”Connecting to Redis at:”, REDIS_HOST)

try:
    r = redis.Redis(host=REDIS_HOST, port=6379, decode_responses=True)
    r.ping()
    log(”Connected to Redis.”)
except Exception as e:
    log(”FAILED to connect to Redis:”, e)
    log(traceback.format_exc())
    raise

REQUESTS = Counter(”engine_requests_total”, “How many Stockfish requests”)

# --------------------------------------------------------
# 3. Worker loop
# --------------------------------------------------------
def main():
    log(”Starting Prometheus metrics on port 9000...”)
    start_http_server(9000)

    log(”Worker READY. Waiting for jobs...”)

    while True:
        try:
            job = r.lpop(”jobs”)

            if not job:
                time.sleep(0.5)
                continue

            log(”Got job:”, job)
            data = json.loads(job)
            REQUESTS.inc()

            # ---------------------------------------------
            # FIX: translate ‘startpos’ into full FEN
            # ---------------------------------------------
            fen = data[”fen”]
            if fen == “startpos”:
                fen = “rnbqkbnr/pppppppp/8/8/8/8/PPPPPPPP/RNBQKBNR w KQkq - 0 1”
                log(”Translated ‘startpos’ to full FEN:”, fen)

            log(”Setting FEN:”, fen)
            ENGINE.set_fen_position(fen)

            best_move = ENGINE.get_best_move()
            log(”Best move computed:”, best_move)

            result_key = f”result:{data[’job_id’]}”
            r.set(result_key, json.dumps({”best_move”: best_move}))
            log(”Wrote result to Redis:”, result_key)

        except Exception as e:
            log(”ERROR in worker loop:”, e)
            log(traceback.format_exc())

        time.sleep(0.05)

if __name__ == “__main__”:
    log(”>>> Worker starting up...”)
    main()
We’re using Stockfish to do analysis. I want to make an article on Stockfish and how it works, but basically it’s a very small, efficient, and powerful chess engine.
Once we set up Stockfish and connect to Redis, the workers are really simple. Every so often, our worker checks Redis for jobs
job = r.lpop(”jobs”)it then passes the position to Stockfish to get a move, then publishes the result to Redis in a way our backend will understand.
The Dockerfile for this has the usual suspects, paired with some code for installing Stockfish into the Docker image.
FROM python:3.10-slim

# Install Stockfish engine binary
RUN apt-get update && \
    apt-get install -y --no-install-recommends stockfish && \
    rm -rf /var/lib/apt/lists/*

WORKDIR /app

COPY requirements.txt .
RUN pip install --no-cache-dir -r requirements.txt

COPY worker.py .

# documenting where stockfish lives (on Debian it’s usually /usr/games/stockfish)
ENV STOCKFISH_EXECUTABLE=/usr/games/stockfish

CMD [”python”, “worker.py”]
and it also has a requierments.txt
redis
prometheus-client
stockfish
The Chess Client
Later, we’ll pack this up into a website, but for now, I wanted to make a simple container that we could interface with via the command line to play chess. Just something simple we could play around with to make sure everything works properly.
chess-client/play.py
import requests
from chess import Board
import os

API_URL = os.getenv(”API_URL”, “http://backend-test:80”)  # default if running inside minikube

def print_board(board):
    print(board)
    print()

def main():
    print(”Starting a new game...”)

    try:
        game_id = requests.get(f”{API_URL}/start”).json()[”game_id”]
    except Exception as e:
        print(”ERROR contacting backend:”, API_URL)
        print(e)
        return

    board = Board()
    print_board(board)

    while not board.is_game_over():
        move_uci = input(”Your move (e.g., e2e4): “).strip()

        try:
            board.push_uci(move_uci)
        except Exception:
            print(”Invalid move, try again.”)
            continue

        print(”\nYou played:”, move_uci)
        print_board(board)

        print(”Waiting for engine response...”)
        res = requests.post(
            f”{API_URL}/move”,
            json={
                “game_id”: game_id,
                “move”: move_uci,
                “fen”: board.fen()
            }
        )

        if not res.ok:
            print(”Backend error:”, res.text)
            break

        data = res.json()
        engine_move = data[”best_move”]

        print(”Engine plays:”, engine_move)
        board.push_uci(engine_move)
        print_board(board)

    print(”Game over!”)
    print(board.result())

if __name__ == “__main__”:
    main()
This is really chess-specific, so I don’t want to spend too long getting into it. Basically, it connects to our backend image
API_URL = os.getenv(”API_URL”, “http://backend-test:80”)Starts a new game
game_id = requests.get(f”{API_URL}/start”).json()[”game_id”]requests you to make a move
move_uci = input(”Your move (e.g., e2e4): “).strip()then sends that move to the backend, which will in turn make a job and thus get a new computer-generated move response
res = requests.post(
    f”{API_URL}/move”,
    json={
        “game_id”: game_id,
        “move”: move_uci,
        “fen”: board.fen()
    }
)
and updates the board with that move
board.push_uci(engine_move)It does this until the game is over, allowing us to play a game of chess against a computer!
Running Our Chess Game directly in Minikube
We don’t need to set up all the Helm stuff to play around with this. Again, I think I probably should have because I essentially needed to make this app twice and do a bunch of work, but you can benefit from my suffering. Grab some popcorn, I’m gonna spin up a few terminals.
We’ll need four; one for redis, one for the backend, one for the worker, and one for our client. These will be like pods in a Kubernetes cluster talking with one another, except I’m managing all the images manually. Before that, though, we need to actually build our images. If we cd into our chess-app directory, we can run the following commands
docker image build -t chess-backend ./backend
docker image build -t chess-worker ./worker
docker image build -t chess-client ./chess-client
We’ll then need to build something called a network
docker network create chess-netBy default, Docker containers can’t communicate with each other, which obviously they’ll have to to make this whole thing work. If we create a network, then create our images within that network, it will allow those images to talk with one another.
Redis is kind of the center of all of this, and both our backend and worker need Redis to be running to work properly. So, we’ll start up Redis first.
docker run -d --network chess-net --name redis-master redisThis runs redis in our network with the name redis-master, which is required because we connect to it by name in our code. We don’t need to keep this terminal open, the Redis pod is running in the background.
Now we can open up a terminal and run
docker run --network chess-net -p 8080:80 --name backend-test chess-backendyou should see this
[BACKEND] Connecting to Redis at: redis-master
[BACKEND] Connected to Redis successfully.
INFO:     Started server process [1]
INFO:     Waiting for application startup.
INFO:     Application startup complete.
INFO:     Uvicorn running on http://0.0.0.0:80 (Press CTRL+C to quit)
Now our backend is working. We can open up yet another terminal and run our worker
docker run --network chess-net --name worker-test chess-workeryou should see something like this
[WORKER] Using Stockfish path: /usr/games/stockfish
[WORKER] Stockfish initialized successfully.
[WORKER] Connecting to Redis at: redis-master
[WORKER] Connected to Redis.
[WORKER] >>> Worker starting up...
[WORKER] Starting Prometheus metrics on port 9000...
[WORKER] Worker READY. Waiting for jobs...
And, finally, we can open up yet another terminal and launch our chess client, which will talk with our backend.
docker run -it --network chess-net chess-clientAnd, with that, we can play chess
This is pretty rad, and we might be able to deploy this on a computer and have a little chess website. But what if we get more people? What if a server goes down? To make this a proper application that could stand up to real world usage, we’re going to deploy this to K8s via helm.
The Chess App in K8s via Helm
As I previously mentioned, I had to do a bunch of tiny little tweaks to the application, and I don’t want to go through everything again. In the GitHub repo attached to this article I included both versions of this application, which you can take a gander at yourself if you really want to. We’re going to shift over to the helm-deployed version of this, and talk over some of the highlights. Another caveat is that this app isn’t a perfect production application, realistically, you would want to do more research and think more closely about configuration if you were actually rolling out a product. Technical maturity comes with time.
One major change actually has nothing to do with Helm. I wanted to have this run in a proper website, so within the backend I added a few files
chess-app-helm
├── backend/
│   ├── app.py
│   ├── Dockerfile
│   ├── requirements.txt
│   └── static
│       ├── app.js
│       ├── index.html
│       └── style.css
... other things
the new static folder in backend represents all of the assets needed to serve to a website to get it to work correctly.
and, in our backend’s app.py, we serve this to the user
...
@app.get(”/”, response_class=HTMLResponse)
def index():
    with open(”static/index.html”, “r”) as f:
        return f.read()
...
Originally, I thought it would be cute to have two servers, one that does all the “backend-y” stuff, and another that serves just the website. There’s not a really compelling reason for this, though, and I kept bumping into CORS issues, so I decided to just serve it from the backend.
Besides that, the only significant change is that we have a chart directory with templates. And this time we’re actually using the charts/charts/ directory, so we can actually talk about that.
CHESS-APP-HELM
├── backend/
│   └──...
│
├── chart/
│   ├── charts/
│   ├── templates/
│   │   ├── _helpers.tpl
│   │   ├── backend-deployment.yaml
│   │   ├── backend-service.yaml
│   │   ├── ingress.yaml
│   │   ├── worker-deployment.yaml
│   │   └── worker-service.yaml
│   ├── Chart.lock
│   ├── Chart.yaml
│   └── values.yaml
│
└── worker/
    └──...
As usual we need to define some templates, but first I want to take a look at Chart.yaml
apiVersion: v2
name: chess
description: Chess engine demo with backend, worker, and monitoring
type: application
version: 0.1.0
appVersion: “1.0”

dependencies:
  - name: kube-prometheus-stack
    version: “55.8.0”
    repository: “https://prometheus-community.github.io/helm-charts”

  - name: redis
    version: “19.6.0”
    repository: “https://charts.bitnami.com/bitnami”
It’s got some dependencies! About fifteen thousand words into the article, we have arrived at the most important use of Helm, arguably. Helm lets you use pre-made charts within your chart, allowing you to connect different powerful pre-made components together.
Obviously, we’re using redis. When we launch our Helm chart, we’ll automatically spawn a redis cluster based on the dependency we specified. I wanted to get fancy, so I also included prometheus as a dependency as well. This is a logging tool used by big, serious companies to keep track of key metrics within their cluster. We won’t be digging too hard into prometheus, but I wanted to include it to show how you can just, kinda, tack on whole complex charts with a single dependency call. When we actually get this thing running, Helm will download those dependencies, and they’ll end up living in the charts/charts directory.
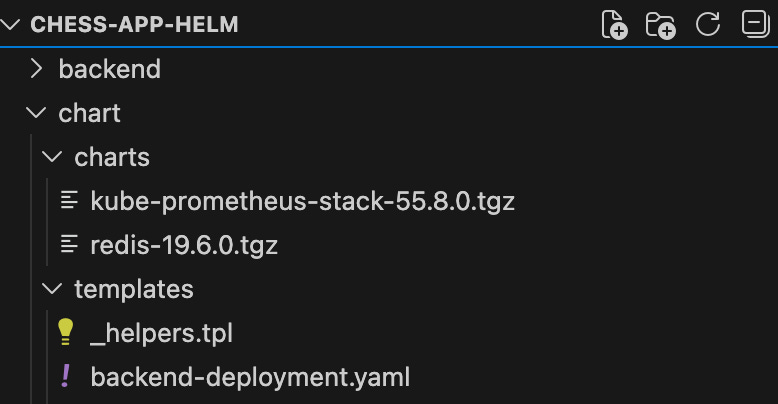
This is part of the reason it’s nice to just start with Helm, rather than build things out yourself and then stick them into Helm later. It defeats a big part of the purpose of the helm in the first place. I spent a long time re-configuring stupid things with Redis because of differences in how I deploy it manually vs how I set up deployment in Helm. Also, Helm makes it really easy to uninstall, reinstall, and update a whole chart, which is useful when you’re building stuff. Just start with Helm.
Anywho, within our templates we have a new file type; _helpers.tpl, which is a template file. It lets us define a few handy snippets which we can use across templates, and looks like this:
{{- define “chess.backendName” -}}
{{ include “chess.fullname” . }}-backend
{{- end }}

{{- define “chess.workerName” -}}
{{ include “chess.fullname” . }}-worker
{{- end }}

{{- define “chess.frontendName” -}}
{{ include “chess.fullname” . }}-frontend
{{- end }}

{{- define “chess.fullname” -}}
{{ .Chart.Name }}
{{- end }}
This lets us define a few standard naming conventions we can use across different templates to keep things straight. It’s a little pedantic because it’s AI generated, but whatever. It defines:
chess.fullname: The name of the chart
chess.frontendName: The name of the chart, plus “-frontend”
Same deal for the worker and backend.
Because resources communicate with one another by name, including connecting to each other in the code, it’s super useful to define these as consistent variables that can be injected throughout various templates.
Also, see how there’s a definition for the frontend, but previously I said I ditched the frontend? I got things working and didn’t want to go through all the files. There might be some dangling references to the frontend, but they generally don’t matter (probably, or if you delete it it will cause some random error somewhere).
I also have a Values.yaml, with some defaults
backend:
  image: chess-backend
  imagePullPolicy: IfNotPresent
  port: 80
  replicas: 1
  service:
    type: NodePort
    nodePort: 30081

worker:
  image: chess-worker
  imagePullPolicy: IfNotPresent
  replicas: 1

redis:
  image:
    tag: latest
  master:
    persistence:
      enabled: false
  replica:
    persistence:
      enabled: false
  auth:
    enabled: false

ingress:
  enabled: false
  host: chess.local
The charts we’re calling in dependencies can be configured within the values.yaml, which is another reason you should start with Helm. I had some issues where I was expecting to assign a name to redis, but that broke Redis because it expected a name that it had defined itself. I had to go through the worker and backend and adjust their naming convention to be able to find Redis based on the name it wanted to have, which was chess-redis-master.
I’m assigning ports and doing generally boring stuff in this, which I landed on after boring research and looking up examples with defaults. I’m sure you could dig into each of these decisions, but they’re not very conceptually interesting, just the kind of stuff you need to play around with when actually making something. One exception to that, though, is ingress within values.yaml.
ingress:
  enabled: false
  host: chess.local
One of my templates, ingress.yaml uses this as an if statement.
{{- if .Values.ingress.enabled }}
apiVersion: networking.k8s.io/v1
kind: Ingress
metadata:
  name: chess-app
spec:
  rules:
    - host: {{ .Values.ingress.host }}
      http:
        paths:
          - path: /
            pathType: Prefix
            backend:
              service:
                name: {{ include “chess.frontendName” . }}
                port:
                  number: 80
{{- end }}
Recall that, when we download with Helm, it essentially combines all templates into a single manifest. By wrapping our configuration in this if statement, we can use our values.yaml to completely disable certain components. Again, this doesn’t matter because our frontend doesn’t even exist anymore, but I still thought it was a cool note.
Let’s look at some of the templates for the actual resources we’re using.
backend-deployment.yaml
apiVersion: apps/v1
kind: Deployment
metadata:
  name: {{ include “chess.backendName” . }}
spec:
  replicas: {{ .Values.backend.replicas }}
  selector:
    matchLabels:
      app: {{ include “chess.backendName” . }}
  template:
    metadata:
      labels:
        app: {{ include “chess.backendName” . }}
      annotations:
        prometheus.io/scrape: “true”
        prometheus.io/port: “{{ .Values.backend.port }}”
        prometheus.io/path: “/metrics”
    spec:
      containers:
        - name: backend
          image: “{{ .Values.backend.image }}”
          imagePullPolicy: “{{ .Values.backend.imagePullPolicy }}”
          ports:
            - containerPort: {{ .Values.backend.port }}
          env:
            - name: REDIS_HOST
              value: “{{ .Release.Name }}-redis-master”
First of all, unlike the jobs from the previous example, this is a deployment from the app/v1 api, meaning Helm will try to keep this thing running indefinitely. It has a name , which it gets from _helpers.tpl and a spec with a few different things going on.
First of all, we define some number of replicas for the backend deployment. The backend has a service associated with it (which we’ll look at next), which automatically load balances to some number of replica instances of a pod. This allows k8s to be more robust to traffic, and more resilient to outages.
Weirdly, deployments keep track of managing pods not by keeping track of which pods it created, but only based on labels. This code snippet basically says “these are the pods I control”
selector:
    matchLabels:
      app: {{ include “chess.backendName” . }}
And this other one, in the template, says this is the label I will assign to pods I create.
template:
    metadata:
      labels:
        app: {{ include “chess.backendName” . }}
Generally, these should always agree with each other, for obvious reasons. Otherwise, the deployment would make pods that it then immediately forgets about, and I don’t even know what would happen.
We also have some annotations that tell Prometheus that we want it to record data from the pods we’re creating.
annotations:
  prometheus.io/scrape: “true”
  prometheus.io/port: “{{ .Values.backend.port }}”
  prometheus.io/path: “/metrics”
You might recall, in our app.py in our backend, there was an endpoint for metrics
@app.get(”/metrics”)
def metrics():
    return Response(generate_latest(), media_type=”text/plain”)
generate_latest is imported from the Prometheus library, and returns metrics we manually created through the applications, and also other metrics that Prometheus records all on its own. Because Prometheus exists as a dependency, it’s sitting around waiting to collect data within our cluster. By setting these annotations in the template, we’re making it so Prometheus actually collects that data, and knows where to grab that data.
The rest is a lot of the typical stuff we’ve discussed previously
spec:
  containers:
    - name: backend
      image: “{{ .Values.backend.image }}”
      imagePullPolicy: “{{ .Values.backend.imagePullPolicy }}”
      ports:
        - containerPort: {{ .Values.backend.port }}
      env:
        - name: REDIS_HOST
          value: “{{ .Release.Name }}-redis-master”
We’re deploying our Docker container, exposing some ports, and saving the name of Redis as an environment variable so our backend can connect to it.
These backend pods, one if we only have one replica, more if we have more, are exposed behind one networking endpoint due to backend-service.yaml.
apiVersion: v1
kind: Service
metadata:
  name: {{ include “chess.backendName” . }}
spec:
  type: {{ .Values.backend.service.type }}
  selector:
    app: {{ include “chess.backendName” . }}
  ports:
    - name: http
      port: {{ .Values.backend.port }}
      targetPort: {{ .Values.backend.port }}
      nodePort: {{ .Values.backend.service.nodePort }}
The worker deployment is pretty much the same as the backend deployment
worker-deployment.yaml
apiVersion: apps/v1
kind: Deployment
metadata:
  name: {{ include “chess.workerName” . }}
spec:
  replicas: {{ .Values.worker.replicas }}
  selector:
    matchLabels:
      app: {{ include “chess.workerName” . }}
  template:
    metadata:
      labels:
        app: {{ include “chess.workerName” . }}
      annotations:
        prometheus.io/scrape: “true”
        prometheus.io/port: “9000”
        prometheus.io/path: “/metrics”
    spec:
      containers:
        - name: worker
          image: “{{ .Values.worker.image }}”
          imagePullPolicy: “{{ .Values.worker.imagePullPolicy }}”
          env:
            - name: REDIS_HOST
              value: “{{ .Release.Name }}-redis-master”
          ports:
            - containerPort: 9000
The worker also has a service, worker-service.yaml. It’s not really necessary because each of the pods are just getting jobs from redis, and writing results. It is necessary for Prometheus to be able to scrape performance data, though.
apiVersion: v1
kind: Service
metadata:
  name: {{ include “chess.workerName” . }}
spec:
  type: ClusterIP
  selector:
    app: {{ include “chess.workerName” . }}
  ports:
    - name: metrics
      port: 9000
      targetPort: 9000
If it seems like this is a lot of handwavy descriptions, it is. I think that’s the nature of this type of work; you shouldn’t be re-inventing the wheel, and there’s no reason for most developers to understand each parameter in depth. Follow templates, look up best practices, and dig in when you encounter an issue. I think the most important part is to understand how these resources relate from a high level to power applications, and to know enough to have a base you can branch off of as necessity demands. This isn’t designed to be a poster child of the perfect helm app, just an example to start building a conceptual understanding.
I think we covered all the helm stuff. Let’s run it
Running the Helm App, Using it, and Observing Metrics
It’s funny. It takes forever to describe what’s going on in Helm, then running it is like three command lines.
I separated the helm deployment of the chess app into its own folder (chess-app-helm), so I’m going to go ahead and build all the images required. These are being built with minikube so they’ll end up in minikube.
minikube image build -t chess-backend ./backend
minikube image build -t chess-worker ./worker
Then we need to install the dependencies
helm dependency update ./chartThis will populate our chart/chart/ with our downloaded charts.
Then we can go ahead and install the app.
helm install chess ./chart -n chess --create-namespaceIf we call this to get the pods we just created
kubectl get pods -n chesswe’ll see we’re encountering issues
NAME                                                     READY   STATUS             RESTARTS      AGE
alertmanager-chess-kube-prometheus-stac-alertmanager-0   2/2     Running            0             34s
chess-backend-57dd7cf788-cht69                           0/1     Error              2 (30s ago)   35s
chess-grafana-6547bcdd7d-6fkqb                           3/3     Running            0             35s
chess-kube-prometheus-stac-operator-85b4f7c55-j86kf      1/1     Running            0             35s
chess-kube-state-metrics-6d67db698b-qlnxt                1/1     Running            0             35s
chess-prometheus-node-exporter-wlnzt                     1/1     Running            0             35s
chess-redis-master-0                                     1/1     Running            0             35s
chess-redis-replicas-0                                   1/1     Running            0             35s
chess-redis-replicas-1                                   0/1     Running            0             7s
chess-worker-75b8f44456-4b79q                            0/1     CrashLoopBackOff   2 (16s ago)   35s
prometheus-chess-kube-prometheus-stac-prometheus-0       2/2     Running            0             34s
This is because the backend and worker are trying to connect to redis, but Redis isn’t fully set up yet. After around 30 seconds it connects successfully.
NAME                                                     READY   STATUS    RESTARTS       AGE
alertmanager-chess-kube-prometheus-stac-alertmanager-0   2/2     Running   0              2m14s
chess-backend-57dd7cf788-cht69                           1/1     Running   3 (114s ago)   2m15s
chess-grafana-6547bcdd7d-6fkqb                           3/3     Running   0              2m15s
chess-kube-prometheus-stac-operator-85b4f7c55-j86kf      1/1     Running   0              2m15s
chess-kube-state-metrics-6d67db698b-qlnxt                1/1     Running   0              2m15s
chess-prometheus-node-exporter-wlnzt                     1/1     Running   0              2m15s
chess-redis-master-0                                     1/1     Running   0              2m15s
chess-redis-replicas-0                                   1/1     Running   0              2m15s
chess-redis-replicas-1                                   1/1     Running   0              107s
chess-redis-replicas-2                                   1/1     Running   0              81s
chess-worker-75b8f44456-4b79q                            1/1     Running   3 (116s ago)   2m15s
prometheus-chess-kube-prometheus-stac-prometheus-0       2/2     Running   0              2m14s
We could probably make this a bit more elegant by making an initContainer on the worker and backend that waits for Redis to be set up, but whatever.
We can expose the backend service as a url via
minikube service chess-backend -n chess --urland, if we click the url we get, we’ll see a chess board!
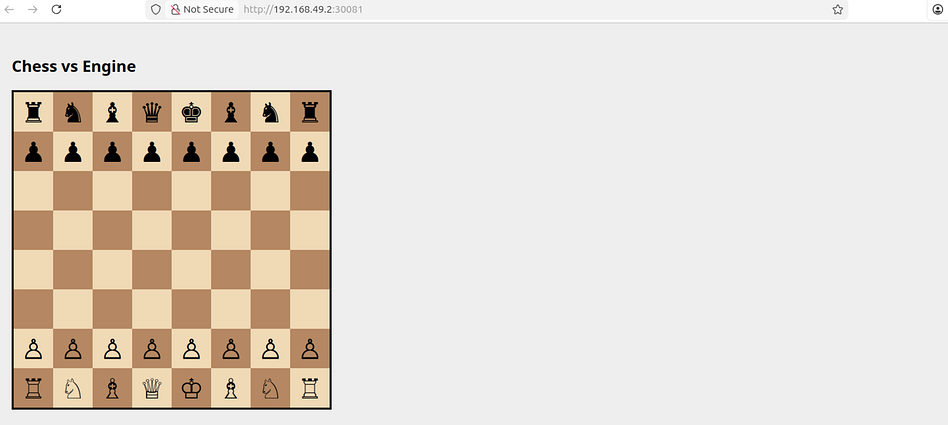
We can move a piece, and we’ll get an indicator that the bot is thinking.

Once it’s done, the bot will move one of its pieces.
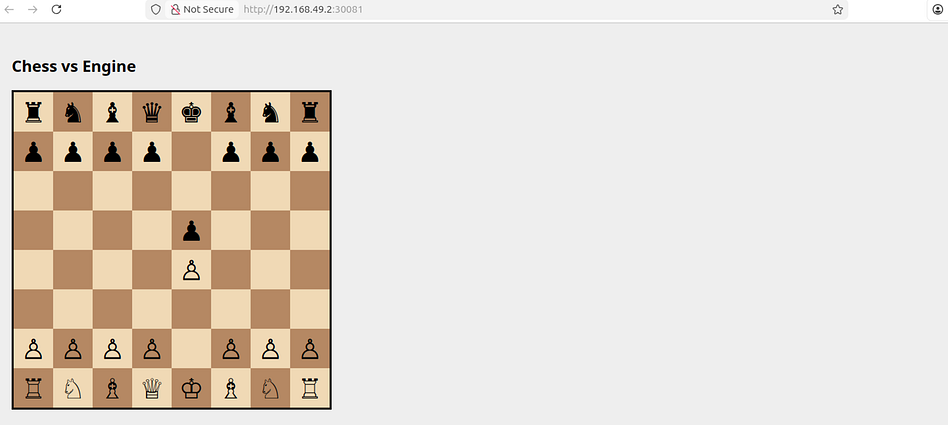
Et voila, chess app in kubernetes with helm.
It’s missing some core features of a chess app (like move validation, you can move the pieces around anywhere, which is pretty funny), but that’s not the point. The point is that we could deploy this on AWS, Google Cloud, or an on-prem server relatively easily. We can also scale up resources and have them load balance effectively. Of course there would probably be some bumps along the way, this is just a demo, but we could get there.
We can view some of the logs in Prometheus. First lets list out our pods in the chess namespace
kubectl get pods -n chessNAME READY STATUS RESTARTS AGE
alertmanager-chess-kube-prometheus-stac-alertmanager-0 2/2 Running 0 34m
chess-backend-57dd7cf788-cht69 1/1 Running 3 (34m ago) 34m
chess-grafana-6547bcdd7d-6fkqb 3/3 Running 0 34m
chess-kube-prometheus-stac-operator-85b4f7c55-j86kf 1/1 Running 0 34m
chess-kube-state-metrics-6d67db698b-qlnxt 1/1 Running 0 34m
chess-prometheus-node-exporter-wlnzt 1/1 Running 0 34m
chess-redis-master-0 1/1 Running 0 34m
chess-redis-replicas-0 1/1 Running 0 34m
chess-redis-replicas-1 1/1 Running 0 34m
chess-redis-replicas-2 1/1 Running 0 33m
chess-worker-75b8f44456-4b79q 1/1 Running 3 (34m ago) 34m
prometheus-chess-kube-prometheus-stac-prometheus-0 2/2 Running 0 34mwe can then port-forward the local Prometheus port to a remote port, so we can see it in the browser.
kubectl port-forward -n chess prometheus-chess-kube-prometheus-stac-prometheus-0 9090:9090we can then open up Firefox, go to
http://localhost:9090
(click the link to view mine), and you should see a cool dashboard with stuff going on.
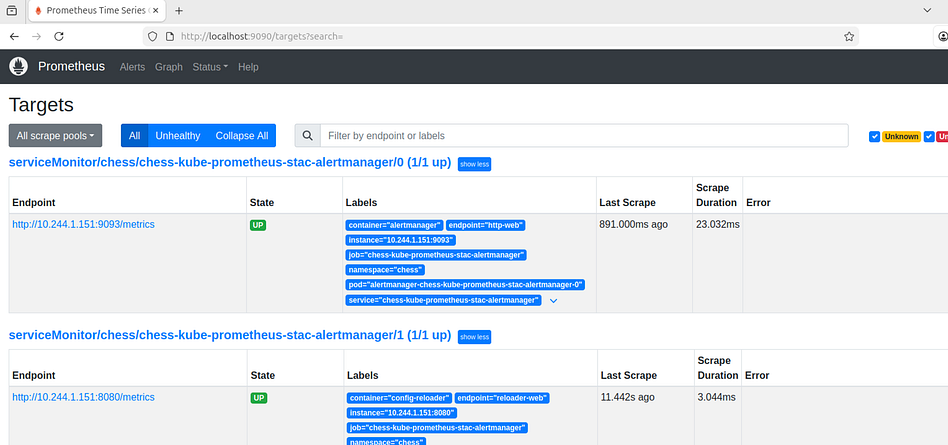
We can even navigate around and check out cool graphs of our CPU usage and stuff.
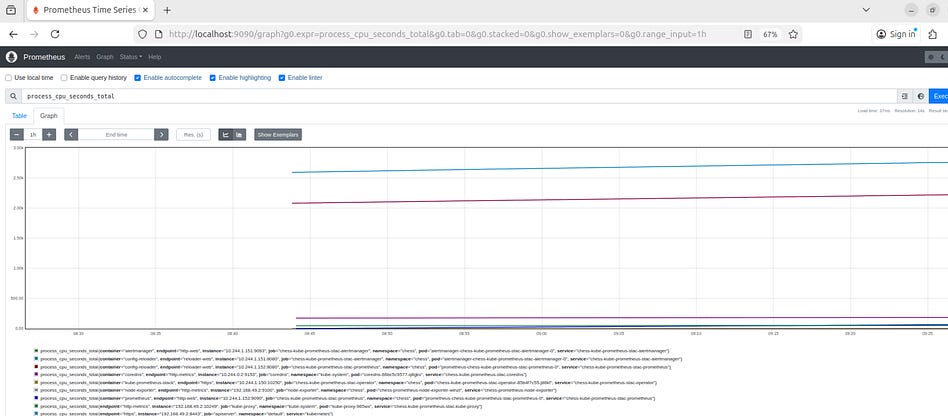
Again, this isn’t a Prometheus tutorial, but it’s kind of cool how we get all this functionality just by installing a dependency graph and doing a bit of configuration. It’s a lot to set up for a tutorial, but for a large-scale product it’s pretty easy for how powerful it is. For whatever reason my manually defined metrics aren’t working in this example, but whatever. I think we’ve covered enough for one article.
Conclusion
Helm/Kubernetes isn’t the easiest thing to work with. There’s a ton of configuration, a bunch of gotchas, and the abstraction makes development complicated and counterintuitive. It’s not worth investing in if you’re building a weekend project, and I would avoid it in favor of more pre-made backend tooling if working in a small team. That said, if you need it, you really need it. With the added complexity comes a tremendous benefit of power and flexibility. Kubernetes is an upfront investment that pays dividends as resources, users, and complexity scale within an application.
I think that’s a big reason there aren’t a ton of accessible tutorials for it online. It’s not super fun or flashy, it’s abstract, and demos look the same as what you could whip up in npm in 5 minutes. You should really only learn Kubernetes if you’re interested in working on things that matter, which is a subject many technical tutorials avoid in my experience.
I lied in the title; this is not an “exhaustive” tutorial, I don’t think that’s possible, practical, nor necessary. I think my job has been a success if you have a sufficient conceptual basis to know what Kubernetes is good for, and a base of understanding you can leverage when working with it on practical projects. I know I haven’t posted in a while, I have a few big articles like this one in the works. Stay posted.
Hey Daniel try podman instead of docker. Out entire engineering team switched. There is a handy alias u can use and podman will run like docker. Just faster and rootless...
Really appreciate the progression from Dockerfiles to K8s manifests to Helm charts here. The way you framed containers vs VMs (kernel reuse vs full OS) clarified somehting I'd been fuzzy on. Particlarly interesting how Helm's dependency system turns infrastructure into composable building blocks. Kinda reminds me of how package managers work in traditional dev, except you're composing entire distributed systems instead of libraries. Makes me wonder if the cognitive overhead pays off untill you're actually hitting multi-node scale tho.