
Infrastructure on Google Cloud—Intuitively and Exhaustively Explained
A high-level breakdown of the major components of cloud architecture


This is a big topic. Too big to be truly exhaustive. Instead, the goal of this article is to be “exhaustively intuitive.” We’re going to explore key tools in the Google Cloud Platform, how they function, and how they can be used to build large-scale, complex applications. By the end of this article, you’ll have a practical understanding of the fundamentals, a general understanding of the lay of the land, and an overall intuition of how Google Cloud can be used to solve large-scale problems in real-world settings.
To galvanize our understanding, we’ll be exploring seven projects throughout this tutorial, all of which explore fundamental ideas in common architectural design.
testproject1 — A simple “Hello World” application
chat-app — An application with a front end and database
diary — An app with user authentication, allowing for secure accounts.
pdf-reader — An event driven application which processes data and exposes it to users
collatz — A task designed for processing heavy workloads
collatzquota —The same as the previous one, but with caching and API-level rate limiting using Redis
PubSub — A high level exploration of a building an event driven architecture to process orders in an ecommerce context
This will give us a fairly comprehensive understanding, but doesn’t cover all of Google Cloud’s 150+ services. This article is the first in a series exploring more advanced topics like global networking, database technologies, and GenAI on Google cloud.
Who is this useful for? Anyone interested in understanding robust, cloud-scale applications.
How advanced is this post? This article is designed to introduce cloud architecture and build fundamental understanding. Advanced architectural experience is not required.
Prerequisites: Realistically, you’ll probably need some software development experience to get everything out of this article. If you’re a complete beginner, just read critically, google a lot, and ask questions to a chat assistant.
A Note on How to Read This Article: Learning how the cloud works is hard for one key reason; it requires both a high-level and low-level understanding. If you try to learn cloud concepts from a high level, the concepts feel detached and floaty. If you try to learn cloud concepts from a low level, it’s hard to know what’s going on and why things are happening. We’ll be exploring various examples from both high-level and low-level prospectives. If you find yourself confused, consider forging on regardless so that both levels of granularity can have an opportunity to wash over you.
The Core Building Blocks of Google Cloud
Google Cloud (often abbreviated as GCP, for “Google Cloud Platform”) is a platform with all the bells and whistles necessary to build enterprise-scale applications. Depending on how you count, it exposes over 200 named products or services, allowing you to do global information networking, spool up large compute resources, build databases, and do whatever else you might need to build a large-scale application.
This size is, to a large extent, why getting into cloud architecture is so difficult. There are a billion considerations one can make when building on the cloud, and knowing where to start can be challenging.
From a high level, the offerings in Google Cloud can be divided into the following macroscopic categories:
Compute — Run code on VMs, containers, or functions
Storage & Databases — Store and query your data
Networking — Connect, route, and protect traffic
Data & Analytics — Process and visualize data at scale
AI & ML — Build and deploy models and AI-powered features
Identity, Security & IAM — Control access and protect resources
DevOps & Developer Tools — Build, deploy, and ship code
Management & Monitoring — Observe, debug, and control costs
We’ll be touching each of these buckets, in one way or another, throughout the article.
Google has a free tier that users can employ when creating a new account. It gives you $300 worth of credits and a range of products that are free if you remain under a set utilization.

I’ve consumed a lot of tutorials on cloud architecture in my life, and I want to save you the pain of watching someone dig through all of the resources on GCP one-by-one. It’s a horrific experience. Instead, we’re going to be building several applications that highlight the core pieces of GCP so that we can build a practical understanding of how these things tick. Let’s start by setting up an account.
Setting Up a GCP Account
To do anything, we’re going to need an account.

Click the “Get started” button.
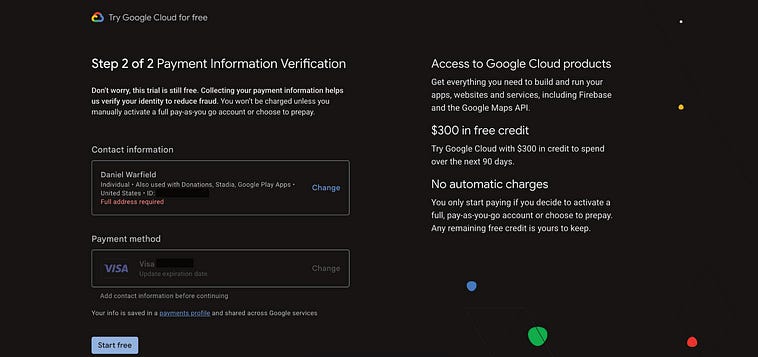
This will lead you to a setup page. You’ll have to put in your credit card to get started, but Google Cloud is pretty good about not allowing you to incur accidental charges unless you explicitly enable your account as a paid account.
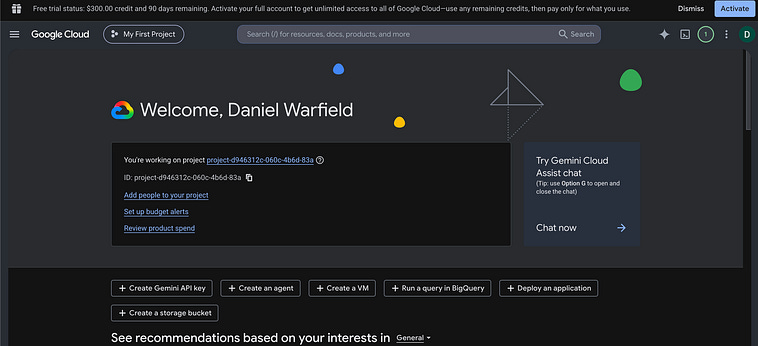
Once you answer a few questions, you’ll be in.
Projects on GCP
Arguably the first and most fundamental concept on GCP is that of a project. When you create a new account, a project will already be created, called “My First Project”
and if you click the project, you can view a project browser.
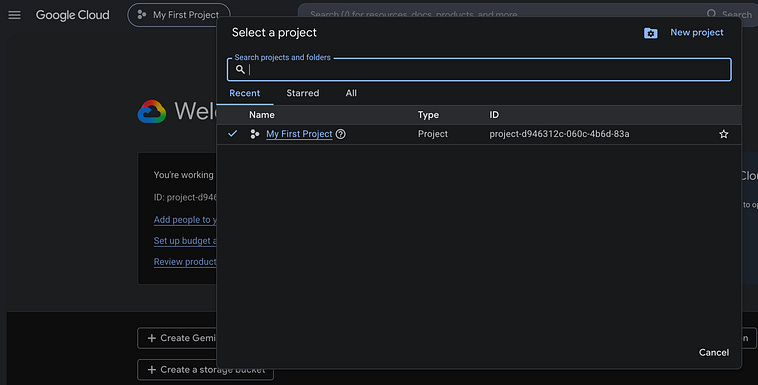
Projects are a base-level container that organizes everything on GCP. Compute resources, databases, all of the stuff that incurs a charge and needs to communicate with one another. “Projects” allow you to organize different projects into different buckets, both for isolating them for security purposes and to keep billing information organized.
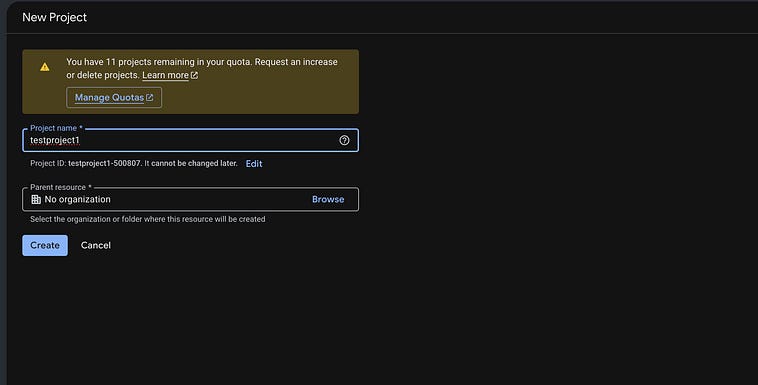
We can click the new project on the top right to create a new project.
Then, once you create a project, it’ll end up in the browser.
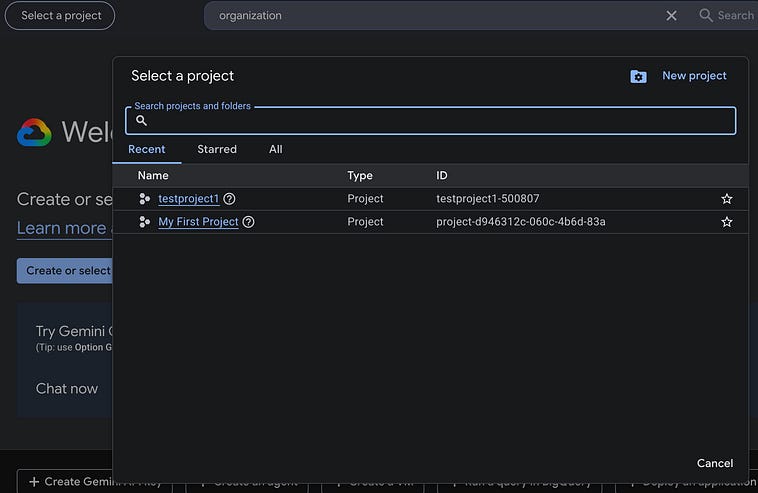
Let’s build a hello world application in our new test project.
Exploring Cloud Run
Go ahead and search “Cloud Run”, and select it.
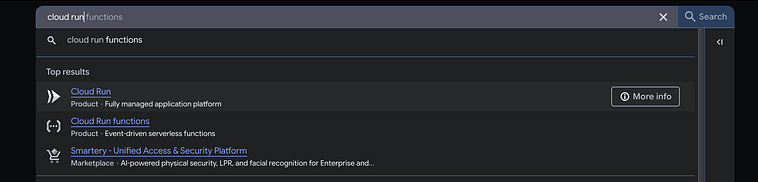
After doing that, we’ll end up here, on the dashboard for cloudrun, the first GCP product we’ll be diving into.
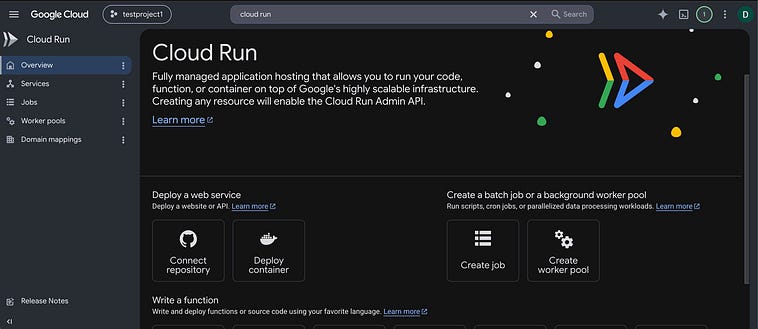
Various cloud providers have similar offerings to Cloud Run. The essential idea is that you have code, you point Cloud Run to it, and it runs it on the cloud.
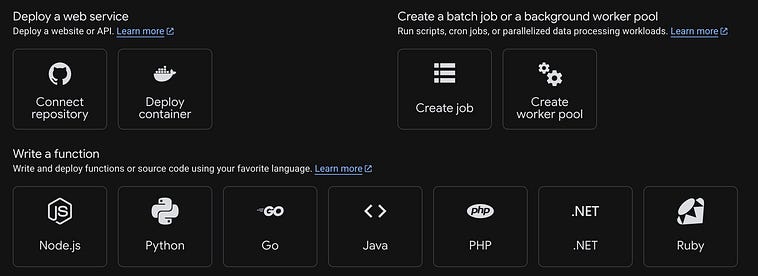
I’m going to start by creating a function in Python, and calling it “testfunction”
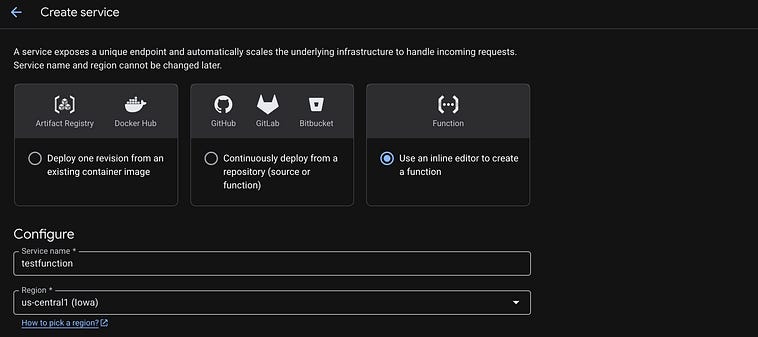
Then I’ll set up some configuration. There’s a few different runtimes, but I’ll be using Python. I’ll also expose the function to the public internet, so that it can be easily accessed. In a real-world situation this would require careful consideration from a cost and security perspective, but we’re just experimenting for now.
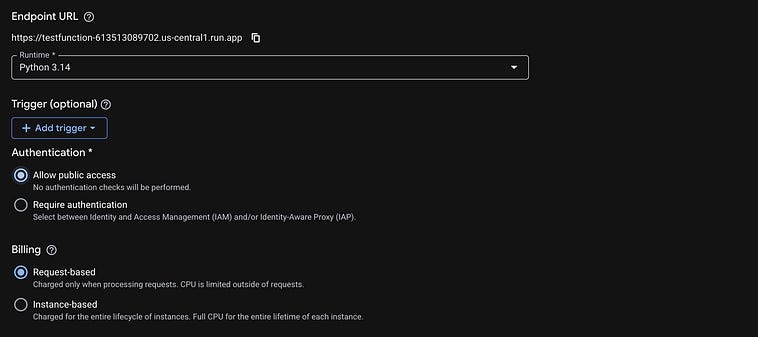
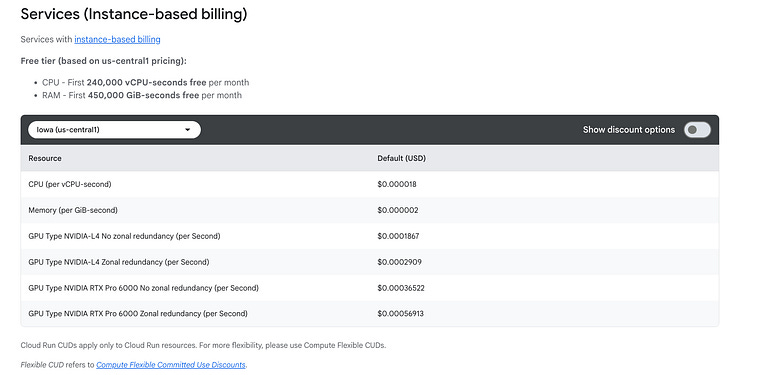
In billing, I’m doing “request-based”, which means I pay a small fee per request and for the CPU and memory needed to process the request.
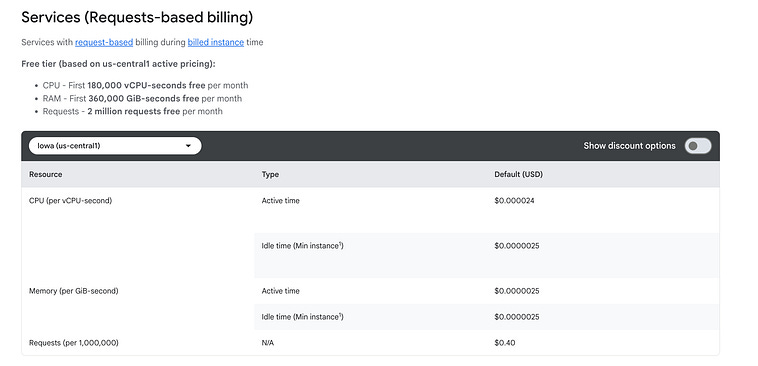
If I, instead, chose instance-based billing, I would be renting out a slice of a server and paying for the resources I provisioned over time.
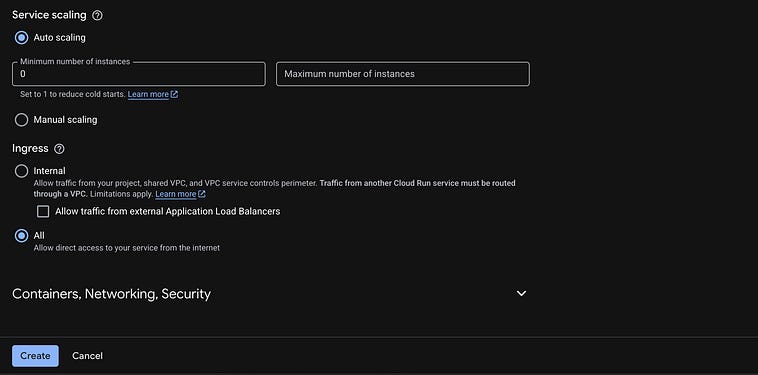
We’ll keep service scaling at the default; this setting will make more sense as we move on to discussing VMs and serverless. We’ll also set Ingress to “All,” allowing access to our function by anyone on the internet. And with that, we can go ahead and click “create.”
Then, you’ll get this popup. The Cloud Build API is a fundamental API used to programmatically build resources on your Google Cloud account. Various workflows around creating resources on GCP use the Cloud Build API under the hood to turn code into an actually runnable application. So, go ahead and “enable.”
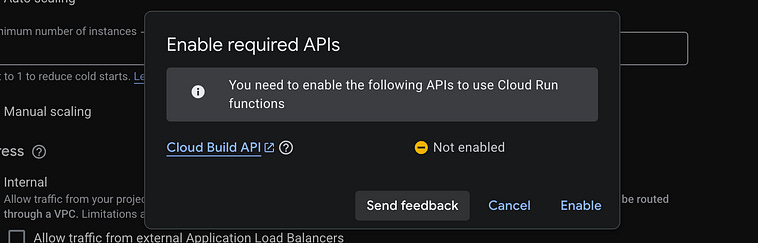
You might find it silly that such a fundamental idea would require enablement, but least privileges is a critical concept used to keep the cloud secure. We’ll be exploring that throughout the article.
Then, once our function gets built, we’ll see this dashboard.
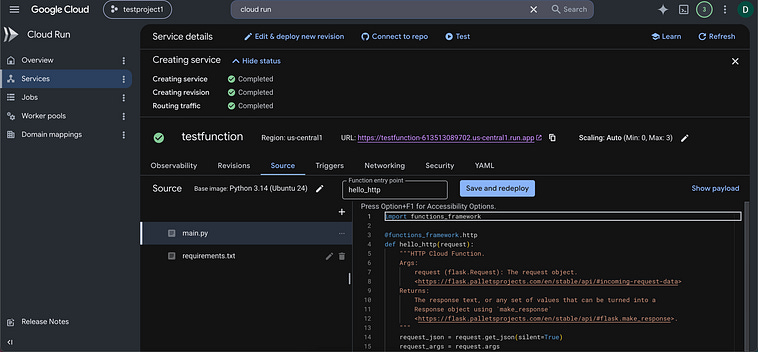
By default, a placeholder exists at the URL tied with this function. I’m going to click “Save and redeploy.” Then, after a moment it will go through the deployment steps and deploy my function.
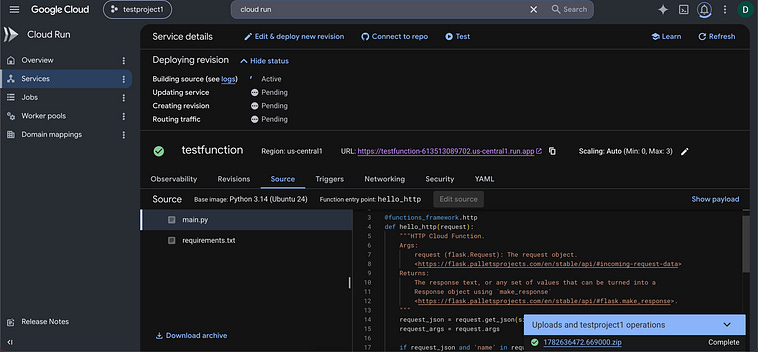
If I then click the URL listed, I’ll see the following output

which corresponds to the function I deployed; the default setup when I created the function.
import functions_framework

@functions_framework.http
def hello_http(request):
    “”“HTTP Cloud Function.
    Args:
        request (flask.Request): The request object.
        <https://flask.palletsprojects.com/en/stable/api/#incoming-request-data>
    Returns:
        The response text, or any set of values that can be turned into a
        Response object using `make_response`
        <https://flask.palletsprojects.com/en/stable/api/#flask.make_response>.
    “”“
    request_json = request.get_json(silent=True)
    request_args = request.args

    if request_json and ‘name’ in request_json:
        name = request_json[’name’]
    elif request_args and ‘name’ in request_args:
        name = request_args[’name’]
    else:
        name = ‘World’
    return f”Hello {name}!”
Et voilà, we published a function that’s accessible online. In reality a human probably wouldn’t access this cloud function directly; typically a function like this is for doing odd jobs to support a larger application, but we can make this function return HTML with some styling and JavaScript to serve a static website.
import functions_framework

HTML = “”“<!DOCTYPE html>
<html lang=”en”>
<head>
  <meta charset=”UTF-8” />
  <meta name=”viewport” content=”width=device-width, initial-scale=1.0” />
  <title>Intuitively and Exhaustively Explained</title>
  <link href=”https://fonts.googleapis.com/css2?family=Playfair+Display:ital,wght@0,700;1,400&family=Inter:wght@400;500&display=swap” rel=”stylesheet” />
  <style>
    *, *::before, *::after { box-sizing: border-box; margin: 0; padding: 0; }

    body {
      min-height: 100vh;
      display: flex;
      align-items: center;
      justify-content: center;
      background: #0f0f0f;
      font-family: ‘Inter’, sans-serif;
      overflow: hidden;
    }

    .stars {
      position: fixed;
      inset: 0;
      z-index: 0;
    }

    .star {
      position: absolute;
      border-radius: 50%;
      background: white;
      animation: twinkle var(--dur) ease-in-out infinite;
      opacity: 0;
    }

    @keyframes twinkle {
      0%, 100% { opacity: 0; }
      50% { opacity: var(--peak); }
    }

    .card {
      position: relative;
      z-index: 1;
      text-align: center;
      padding: 4rem 3.5rem;
      max-width: 640px;
      border: 1px solid rgba(255,255,255,0.08);
      border-radius: 20px;
      background: rgba(255,255,255,0.03);
      backdrop-filter: blur(12px);
    }

    .eyebrow {
      font-size: 11px;
      letter-spacing: 0.2em;
      text-transform: uppercase;
      color: #6b7cff;
      margin-bottom: 1.5rem;
    }

    .hello {
      font-family: ‘Playfair Display’, serif;
      font-weight: 700;
      font-size: clamp(2.8rem, 8vw, 4.5rem);
      color: #ffffff;
      line-height: 1.1;
      margin-bottom: 0.25rem;
    }

    .from {
      font-family: ‘Playfair Display’, serif;
      font-style: italic;
      font-weight: 400;
      font-size: clamp(1rem, 3vw, 1.35rem);
      color: rgba(255,255,255,0.45);
      margin-bottom: 0.6rem;
    }

    .brand {
      font-family: ‘Playfair Display’, serif;
      font-weight: 700;
      font-size: clamp(1.1rem, 3.5vw, 1.55rem);
      background: linear-gradient(90deg, #6b7cff 0%, #a78bfa 50%, #f0abfc 100%);
      -webkit-background-clip: text;
      -webkit-text-fill-color: transparent;
      background-clip: text;
      line-height: 1.35;
    }

    .divider {
      width: 40px;
      height: 2px;
      background: linear-gradient(90deg, #6b7cff, #a78bfa);
      border-radius: 2px;
      margin: 2rem auto;
    }

    .tagline {
      font-size: 0.875rem;
      color: rgba(255,255,255,0.3);
      line-height: 1.7;
      letter-spacing: 0.01em;
    }
  </style>
</head>
<body>
  <div class=”stars” id=”stars”></div>
  <div class=”card”>
    <p class=”eyebrow”>Welcome</p>
    <h1 class=”hello”>Hello</h1>
    <p class=”from”>from</p>
    <p class=”brand”>Intuitively and<br>Exhaustively Explained</p>
    <div class=”divider”></div>
    <p class=”tagline”>Where every concept finds its clarity.</p>
  </div>

  <script>
    const container = document.getElementById(’stars’);
    for (let i = 0; i < 120; i++) {
      const s = document.createElement(’div’);
      s.className = ‘star’;
      const size = Math.random() * 2 + 1;
      s.style.cssText = `
        width:${size}px; height:${size}px;
        top:${Math.random()*100}%; left:${Math.random()*100}%;
        --dur:${(Math.random()*4+2).toFixed(1)}s;
        --peak:${(Math.random()*0.7+0.1).toFixed(2)};
        animation-delay:${(Math.random()*6).toFixed(1)}s;
      `;
      container.appendChild(s);
    }
  </script>
</body>
</html>”“”


@functions_framework.http
def hello_http(request):
    return HTML, 200, {”Content-Type”: “text/html; charset=utf-8”}
After replacing the code for our function with this, saving and deploying, and waiting for the deployment to go through, we’ll see a static website when we hit the URL.
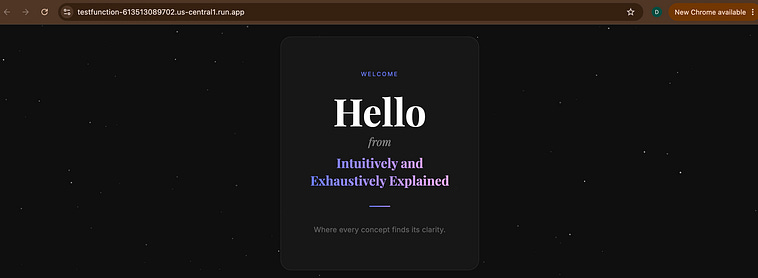
In theory you could make an entire website like this. For instance, when a user sends a request, we can parse arguments out of that request and use those arguments to decide what to return. The user can specify arguments directly in the URL itself. This, for instance,
https://testfunction-613513089702.us-central1.run.app/?page=home
hits our website with the argument page=home. We can change our website to output different content when page=home vs when page=about, and add into our website buttons that redirect us to different pages. If we build and run this code
import functions_framework
FONTS = ‘<link href=”https://fonts.googleapis.com/css2?family=Playfair+Display:ital,wght@0,700;1,400&family=Inter:wght@400;500&display=swap” rel=”stylesheet” />’
COMMON_CSS = “”“
* { box-sizing: border-box; margin: 0; padding: 0; }
body {
min-height: 100vh;
display: flex;
align-items: center;
justify-content: center;
background: #0f0f0f;
font-family: ‘Inter’, sans-serif;
}
.stars { position: fixed; inset: 0; z-index: 0; }
.star {
position: absolute;
border-radius: 50%;
background: white;
animation: twinkle var(--dur) ease-in-out infinite;
opacity: 0;
}
@keyframes twinkle {
0%, 100% { opacity: 0; }
50% { opacity: var(--peak); }
}
.card {
position: relative;
z-index: 1;
text-align: center;
padding: 4rem 3.5rem;
max-width: 640px;
width: 90%;
border: 1px solid rgba(255,255,255,0.08);
border-radius: 20px;
background: rgba(255,255,255,0.03);
backdrop-filter: blur(12px);
}
.eyebrow {
font-size: 11px;
letter-spacing: 0.2em;
text-transform: uppercase;
color: #6b7cff;
margin-bottom: 1.5rem;
}
.divider {
width: 40px; height: 2px;
background: linear-gradient(90deg, #6b7cff, #a78bfa);
border-radius: 2px;
margin: 2rem auto;
}
.nav-link {
display: inline-block;
margin-top: 2rem;
font-size: 0.8rem;
letter-spacing: 0.12em;
text-transform: uppercase;
color: #6b7cff;
text-decoration: none;
border: 1px solid rgba(107,124,255,0.3);
border-radius: 999px;
padding: 0.45rem 1.2rem;
}
“”“
STAR_JS = “”“
<script>
const c = document.getElementById(’stars’);
for (let i = 0; i < 120; i++) {
const s = document.createElement(’div’);
s.className = ‘star’;
const size = Math.random() * 2 + 1;
s.style.cssText = [
‘width:’ + size + ‘px’,
‘height:’ + size + ‘px’,
‘top:’ + (Math.random()*100) + ‘%’,
‘left:’ + (Math.random()*100) + ‘%’,
‘--dur:’ + (Math.random()*4+2).toFixed(1) + ‘s’,
‘--peak:’ + (Math.random()*0.7+0.1).toFixed(2),
‘animation-delay:’ + (Math.random()*6).toFixed(1) + ‘s’
].join(’;’);
c.appendChild(s);
}
</script>
“”“
def wrap(title, css, body):
return (
“<!DOCTYPE html><html lang=’en’><head>”
“<meta charset=’UTF-8’/>”
“<meta name=’viewport’ content=’width=device-width, initial-scale=1.0’/>”
“<title>” + title + “</title>”
+ FONTS
+ “<style>” + COMMON_CSS + css + “</style>”
“</head><body>”
“<div class=’stars’ id=’stars’></div>”
+ body
+ STAR_JS
+ “</body></html>”
)
def home_page():
css = “”“
.hello {
font-family: ‘Playfair Display’, serif;
font-weight: 700;
font-size: clamp(2.8rem, 8vw, 4.5rem);
color: #fff;
line-height: 1.1;
margin-bottom: 0.25rem;
}
.from {
font-family: ‘Playfair Display’, serif;
font-style: italic;
font-size: clamp(1rem, 3vw, 1.35rem);
color: rgba(255,255,255,0.45);
margin-bottom: 0.6rem;
}
.brand {
font-family: ‘Playfair Display’, serif;
font-weight: 700;
font-size: clamp(1.1rem, 3.5vw, 1.55rem);
background: linear-gradient(90deg, #6b7cff, #a78bfa, #f0abfc);
-webkit-background-clip: text;
-webkit-text-fill-color: transparent;
background-clip: text;
}
.tagline { font-size: 0.875rem; color: rgba(255,255,255,0.3); line-height: 1.7; }
“”“
body = (
“<div class=’card’>”
“<p class=’eyebrow’>Welcome</p>”
“<h1 class=’hello’>Hello</h1>”
“<p class=’from’>from</p>”
“<p class=’brand’>Intuitively and<br>Exhaustively Explained</p>”
“<div class=’divider’></div>”
“<p class=’tagline’>Where every concept finds its clarity.</p>”
“<a class=’nav-link’ href=’?page=about’>About us →</a>”
“</div>”
)
return wrap(”Intuitively and Exhaustively Explained”, css, body)
def about_page():
css = “”“
.card { text-align: left; max-width: 680px; }
.page-title {
font-family: ‘Playfair Display’, serif;
font-weight: 700;
font-size: clamp(2rem, 6vw, 3.2rem);
color: #fff;
line-height: 1.15;
}
.subtitle {
font-family: ‘Playfair Display’, serif;
font-style: italic;
font-size: clamp(0.95rem, 2.5vw, 1.15rem);
color: rgba(255,255,255,0.4);
margin-top: 0.25rem;
}
.body-text {
font-size: 0.9rem;
color: rgba(255,255,255,0.55);
line-height: 1.85;
margin-top: 1rem;
}
.pill-row { display: flex; flex-wrap: wrap; gap: 0.5rem; margin-top: 1.5rem; }
.pill {
font-size: 0.75rem;
letter-spacing: 0.1em;
text-transform: uppercase;
color: #a78bfa;
border: 1px solid rgba(167,139,250,0.25);
border-radius: 999px;
padding: 0.3rem 0.85rem;
}
“”“
body = (
“<div class=’card’>”
“<p class=’eyebrow’>About</p>”
“<h1 class=’page-title’>Our mission</h1>”
“<p class=’subtitle’>Making the complex feel inevitable.</p>”
“<div class=’divider’ style=’margin:1.75rem 0;’></div>”
“<p class=’body-text’>Intuitively and Exhaustively Explained exists for the person “
“who isn’t satisfied with a surface-level answer. We dig until the idea clicks “
“— then we dig a little further, just to be sure.</p>”
“<p class=’body-text’>Every explanation starts from first principles and builds up, “
“so by the end you don’t just know the what — you know the why, the how, “
“and the \”oh, of course.\”</p>”
“<div class=’pill-row’>”
“<span class=’pill’>First principles</span>”
“<span class=’pill’>Deep dives</span>”
“<span class=’pill’>No hand-waving</span>”
“<span class=’pill’>Built to last</span>”
“</div>”
“<a class=’nav-link’ href=’?page=home’>← Back home</a>”
“</div>”
)
return wrap(”About — Intuitively and Exhaustively Explained”, css, body)
PAGES = {
“home”: home_page,
“about”: about_page,
}
@functions_framework.http
def hello_http(request):
page = request.args.get(”page”, “home”)
handler = PAGES.get(page, home_page)
return handler(), 200, {”Content-Type”: “text/html; charset=utf-8”}We have a functional website where, if we click the “About Us” button
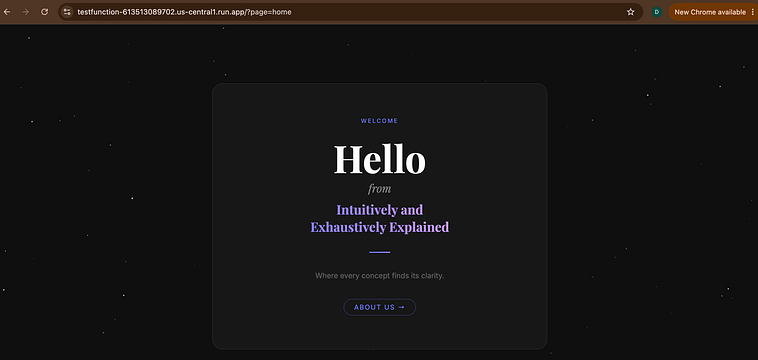
It redirects us to the about page by way of ?page=about at the end of the URL.
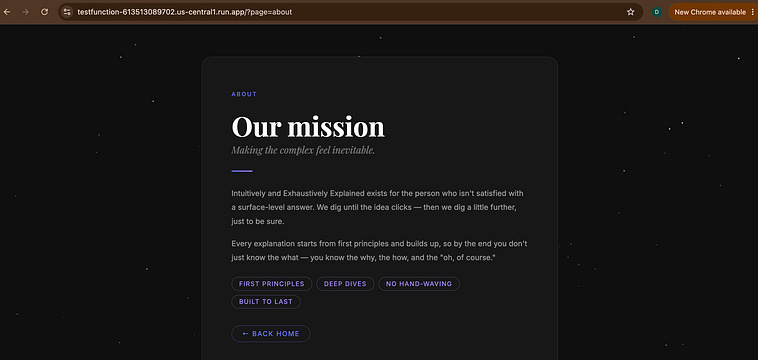
And, in theory, that’s it. You could make a whole product using a single cloud function and a whole lot of tender love and care. In reality this isn’t how it’s done, but you could.
Let’s go back to the Cloud Run dashboard and deploy a website the right way via GitHub.
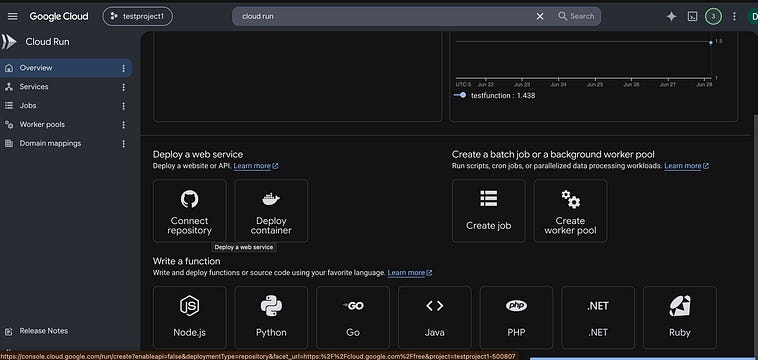
I’m going to choose Cloud Build.
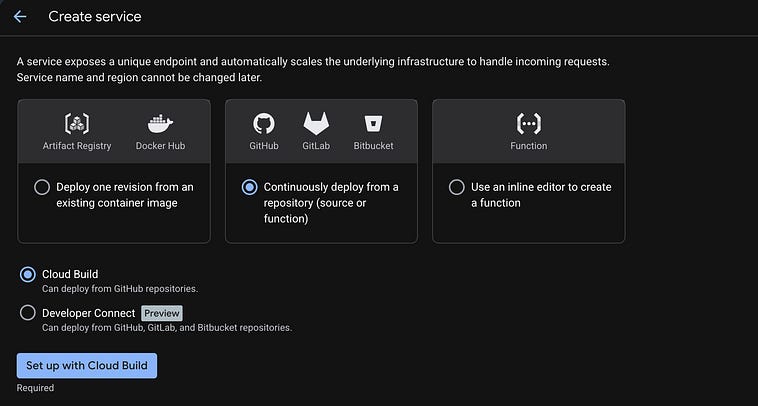
and, this time, we’re going to connect Cloud Run to a GitHub account with a more robust website built in. I set up some source code here; it’s basically just a Vue app.

When we click “Set up with Cloud Build,” we’re going to be directed to authenticate with GitHub
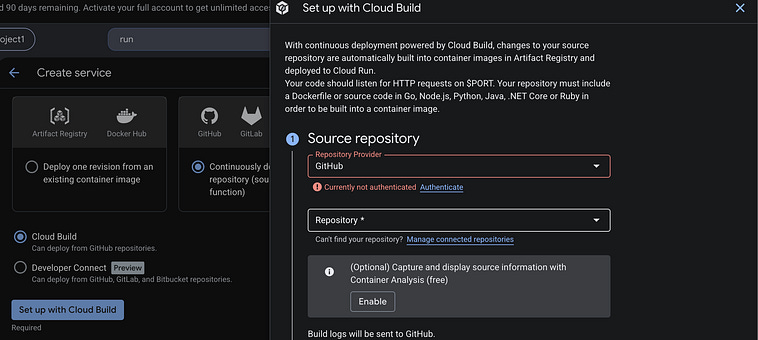
After a few steps setting up Github, installing stuff, and granting permissions

I can select my repository from my GitHub account.
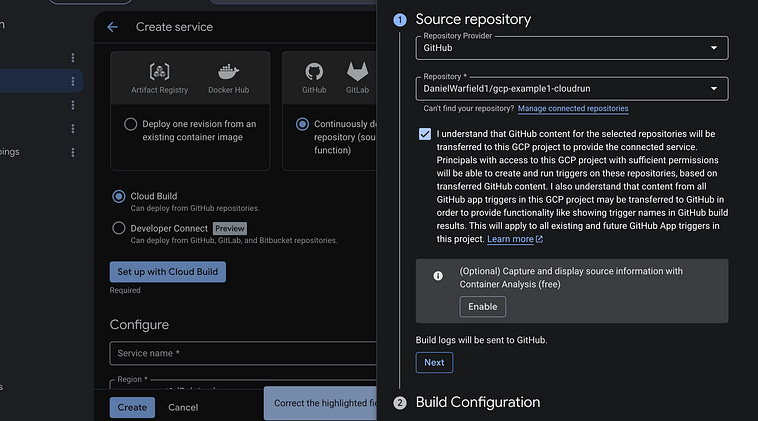
If we click next, we’ll see build configuration.
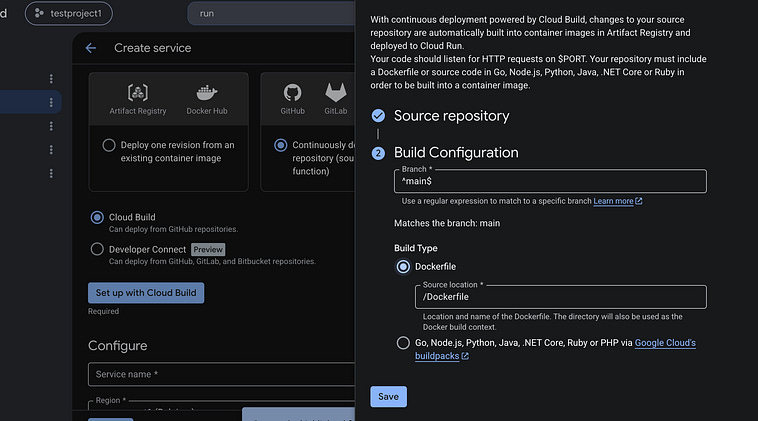
There are two ways to build, by specifying a Dockerfile, or a buildpack. Dockerfiles are the standard and recommended way of building on GCP, and our repo is set up with a Dockerfile, so we’ll choose that. After clicking “Save”, we can then click through the rest of the settings (just like the function we created previously), and set to “Allow public access” so we can see our website once it’s up.
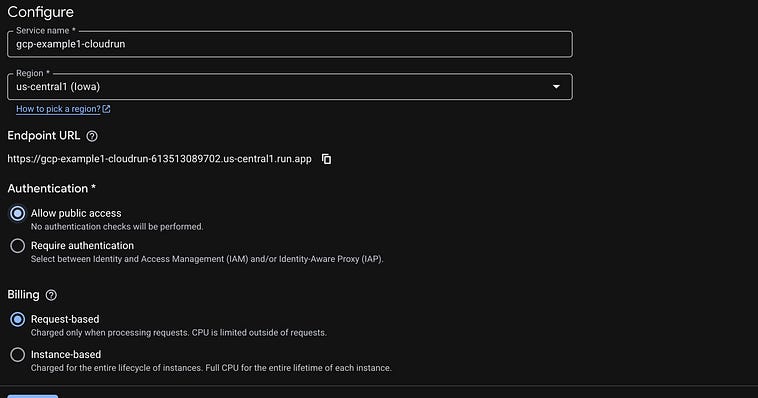
Once we’re happy with all our settings, we can click the “create” button. After a little while our app will be built and deployed. We can see both of the services we created are ready to rock in the “Services” panel.
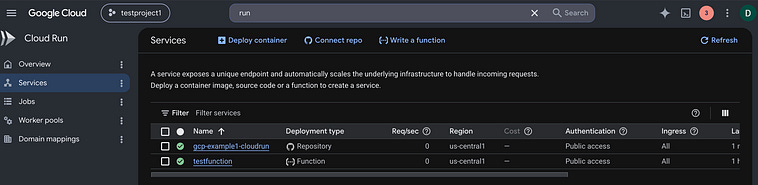
And if we click into gcp-example1-cloudrun we can see the URL and high-level health metrics.
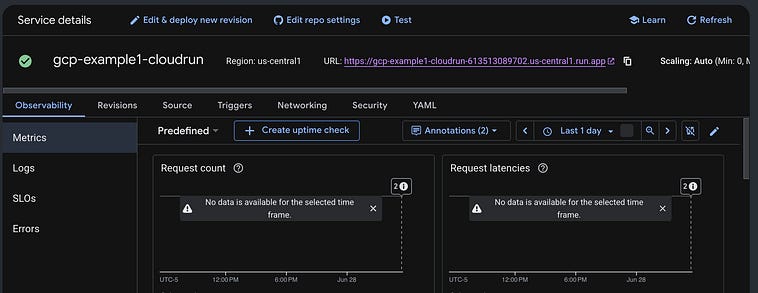
Clicking on the URL, we can see that the website has been deployed
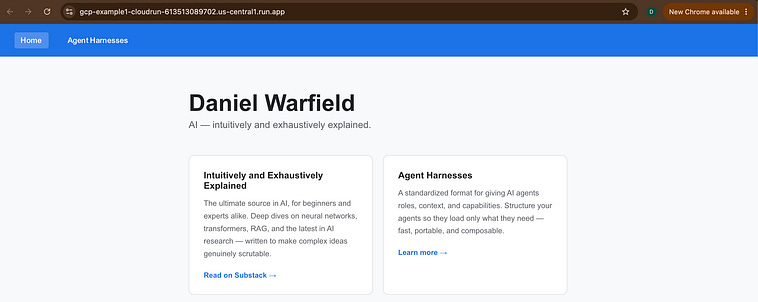
Neat!
The inquisitive among you might be wondering about the website itself, what Docker’s role is in making this site available, and some of the settings we glossed over around request and instance-based billing. Let’s take a moment to discuss the deployment of this website from a more conceptual perspective.
Core Concepts Behind Deployment
Covering even a small chunk of GCP is going to take a lot of time. To avoid going too far off track, we’re going to have to keep our exploration of the various applications we’re deploying high-level. If you want a more granular exploration of Docker, and how applications fit into it, I have an article on the subject:

To truly understand what’s going on, though, we’re going to have to form a high-level understanding about Docker.
Docker allows you to package your application and everything it needs to run into a portable and self-contained unit called a container. Instead of configuring servers on the cloud to run your application specifically, the servers are designed to be able to run Docker containers. So, if you package your code and its dependencies into a Docker container, you can be confident it can run on the cloud.
This is super useful because it alleviates the “but it worked on my machine” issues that are common to trying to get software off of a developer’s computer and onto the cloud. A common workflow is for a developer to build software and test it on their computer, then deploy it onto the cloud. Docker makes that process straightforward.
Containerization also allows a server to conveniently subdivide its resources across numerous applications simultaneously. You might imagine a server running several different people’s Docker applications simultaneously, running several parallel instances of your application on a single server, or even running the same application across many servers.
When people talk about “serverless architecture,” they’re usually talking about this paradigm. There’s still a server, but it’s not up to you as a developer to manage it. You just tell GCP to run some code, and it runs it in a containerized manner.
This also relates to the choice of billing being request-based or instance-based. Docker containers are pretty fast to set up and get running. If you only have to run a function once every couple of hours, it might be worth while to spool up your dockerized application when you need it, run it, and then de-prioritize it. You don’t need the code sitting there ready to go 24/7. Thus, you might choose request-based billing, which does that under the hood.
On the other hand, while it’s relatively efficient to spool up and tare down instances, there is some cost, and there’s a cost to managing the overhead of orchestrating how they’re spooled up or torn down. If you know you’ll get consistent traffic, it might make sense to rent the compute resources themselves, so you can park your code there over an extended period of time. That’s instance-based billing, in a nutshell.
Regardless of if you’re doing instance or request-based billing, there’s a concept of load-balancing and parallelization. If you’re doing instance-based billing, you might need several instances of your code running to keep up with the traffic. If you’re doing request-based billing, you might find yourself spinning up several containers at once to handle a burst of simultaneous requests. Either way, the system responds to increased load by running more copies of your code in parallel and spreading traffic across them.
While it’s relatively fast to set up a new container to run for request-based billing, and a bit slower but still relatively fast to spool up a new instance, it does take time. The word for this is “cold-start”, and includes all of the time required to get your code available to run.
Recall earlier in the article, when we spooled up our hello world function. There was an option to specify a minimum and maximum number of instances.
Setting the minimum number of instances to 1 ensures that your code is always ready to run, meaning you don’t have to wait for things to spool back up if your instances scaled down to zero due to a lack of usage. Naturally, there’s a cost to having some compute always ready to run.
One of the critical ideas allowing all this to run is the idea of statelessness. You can build stateful applications on GCP, we’ll explore that later, but the most common paradigm is that of statelessness.
Statelessness means that the servers running your code don’t contain any session-based information. If a user calls a function running on one computer in the cloud, and then calls the same function on a different computer on the cloud, they won’t know the difference because the response will be identical. This allows a user’s traffic to be balanced across many instances of an application, their traffic being switched between instances without them knowing. We’ll touch on that to a greater degree later in the article.
Exploring Firestore
We’re going to make a new project called “chat-app” which will consist of a website where users can register an account, create or select a chat room to join, and both view and contribute to that chat.
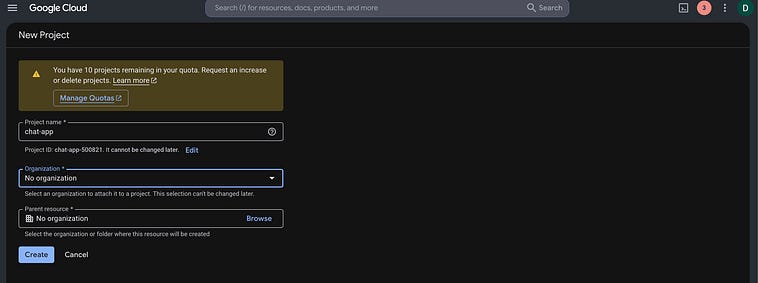
Generally, development of cloud resources happens locally before it gets deployed onto the cloud. Before we deploy Firestore on the cloud, we’re going to use local emulation to experiment with using a database on our machine.
Before we go further, it’s worth pausing on a question that’s about to get confusing: we set up a GCP project, and now we’re going to be using something called firebase. What gives?
The short version is that Firebase and GCP aren’t separate things. Firebase was an independent startup Google acquired in 2014; over the years the two have been steadily stitched together. Today a Firebase project is a Google Cloud project, but viewed through two different consoles. Firebase is best thought of as a developer-friendly layer sitting on top of GCP, aimed at app developers who want client SDKs, easy auth, hosting, and good local tooling without having to think about infrastructure.
A lot of the products blur across this line. Firestore, the database we’re about to use, originally came out of the Firebase world but is now a first-class GCP product. Firebase Authentication and GCP’s Identity Platform are similarly two faces of the same underlying login system, which is why later in the article we’ll authenticate with “Firebase Auth” and “Identity Platform” somewhat interchangeably.
So why touch Firebase tooling at all? Purely for convenience. The Firebase CLI ships a local emulator suite that’s the smoothest way to run Firestore on your own machine, which lets us build and test everything locally before spending a cent on the cloud. That’s all we’re borrowing it for here.
So, we’re going to create a new repo to hold our chat-app project, and run
npm install -g firebase-toolsIf you get permission errors, you might need to use superuser permissions to install it correctly
sudo npm install -g firebase-toolsOnce that’s set up, you can run
firebase loginto log into the CLI tool. You might need to answer a few questions, I just replied with all the defaults by pressing enter, then it should open up your file browser so that you can finish authenticating.
The application is going to be running fastapi in python. I’m going to manage local development by using uv, which I cover thoroughly in this tutorial.

This is application and local development stuff, and we can’t cover everything. Feel free to read that article if you want to learn more about uv. It’s great if you’re doing local Python development.
Anywho, we can initialize uv via uv init
uv initthen add the dependencies
uv add fastapi uvicorn google-cloud-firestoreThis will essentially give us a self-contained Python project where we can build our application, with all of the dependencies necessary to have that application run.
Now we need the database it’ll eventually talk to, so let’s set up Firestore in our project. Searching for “Firestore” in the console
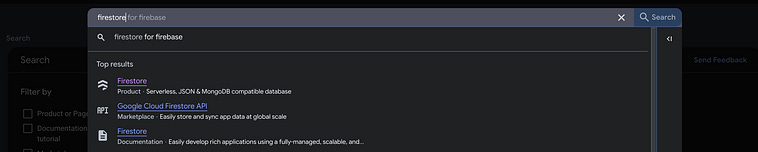
you should see something like this.
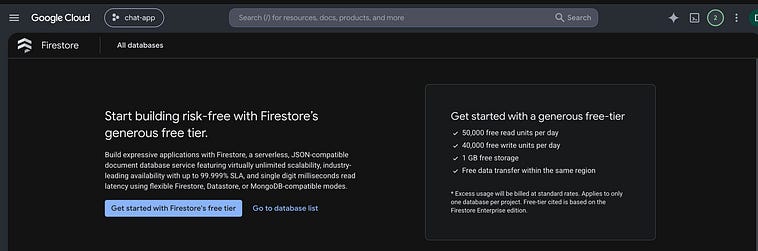
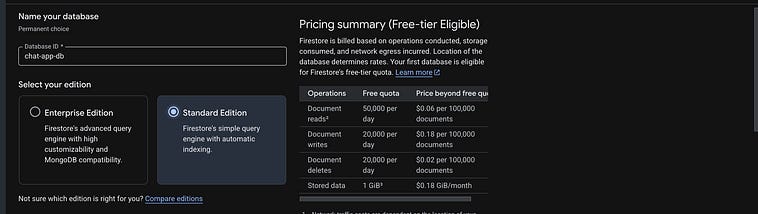
After clicking the “Get started with Firestore’s free tier” button, we can specify some key configuration fields. I’m naming the app chat-app-db, and using the “Standard Edition,” which is less expensive. The enterprise edition has some bells and whistles that we won’t need.
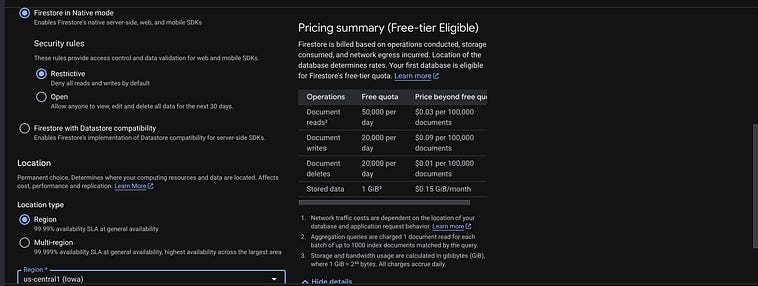
I’m going to launch Firestore in “Native mode”, which is the recommended mode. Restrictive is the default, and it’s a good idea to limit permissions as much as possible, so we’ll work with that. I’m also setting up Firestore in a single region; we don’t need a ton of multi-region resiliency in this demo.
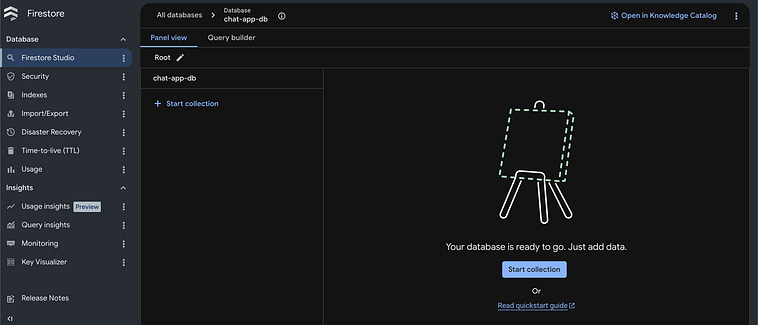
And with that, we can go ahead and click the create button to create our database.
We get redirected to this dashboard, which we could use to play around with data if we wanted to, but we’ll instead let our application create all the data we need through user interaction.
To actually develop our application, we’re going to build everything locally using the firestore local emulator, which we can run using the command
gcp-example2-chatapp % firebase emulators:start --only firestore --project chat-app-500821To actually get this to run, I had to set up some dependencies like Java on my computer. But, now that it ran properly, we can see
⚠  Could not find config (firebase.json) so using defaults.
i  emulators: Starting emulators: firestore
⚠  firestore: Did not find a Cloud Firestore rules file specified in a firebase.json config file.
⚠  firestore: The emulator will default to allowing all reads and writes. Learn more about this option: https://firebase.google.com/docs/emulator-suite/install_and_configure#security_rules_configuration.
i  firestore: Firestore Emulator logging to firestore-debug.log
✔  firestore: Firestore Emulator was started in standard edition.
✔  firestore: Firestore Emulator UI websocket is running on 9150.

┌─────────────────────────────────────────────────────────────┐
│ ✔  All emulators ready! It is now safe to connect your app. │
│ i  View Emulator UI at http://127.0.0.1:4000/               │
└─────────────────────────────────────────────────────────────┘

┌───────────┬────────────────┬─────────────────────────────────┐
│ Emulator  │ Host:Port      │ View in Emulator UI             │
├───────────┼────────────────┼─────────────────────────────────┤
│ Firestore │ 127.0.0.1:8080 │ http://127.0.0.1:4000/firestore │
└───────────┴────────────────┴─────────────────────────────────┘
  Emulator Hub host: 127.0.0.1 port: 4400
  Other reserved ports: 4500, 9150

Issues? Report them at https://github.com/firebase/firebase-tools/issues and attach the *-debug.log files.
And, if we click the link, we can see that we have an emulation of Firestore running locally.
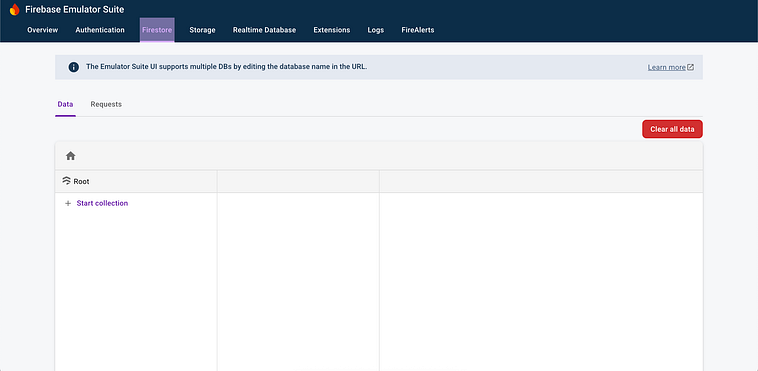
I don’t want to dig into the actual application code too much; here’s the repo.

It’s a FastAPI application in Python that serves a static website and can communicate with our local database. It can be downloaded via
git clone https://github.com/DanielWarfield1/gcp-example2-chatapp.gitThen we can CD into the repo and run the application.
FIRESTORE_EMULATOR_HOST=localhost:8080 uv run uvicorn main:app --reloadOnce it’s running, we can pull up localhost:8000/docs#/, which is the docs for out FastAPI api.
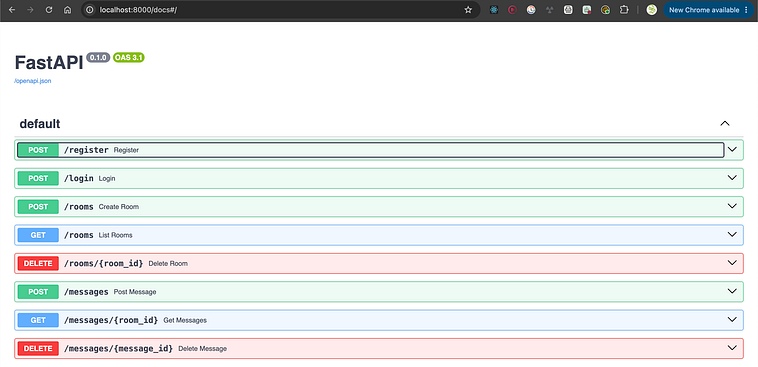
And, now that we’ve confirmed it’s working, we can hop right into localhost. We can register an account, log in
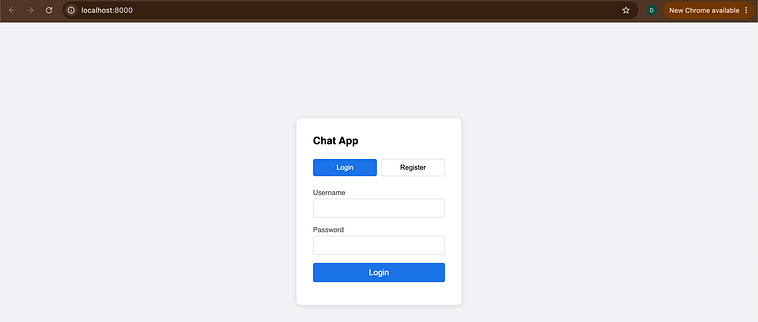
Create chat rooms, and chat with our friends.
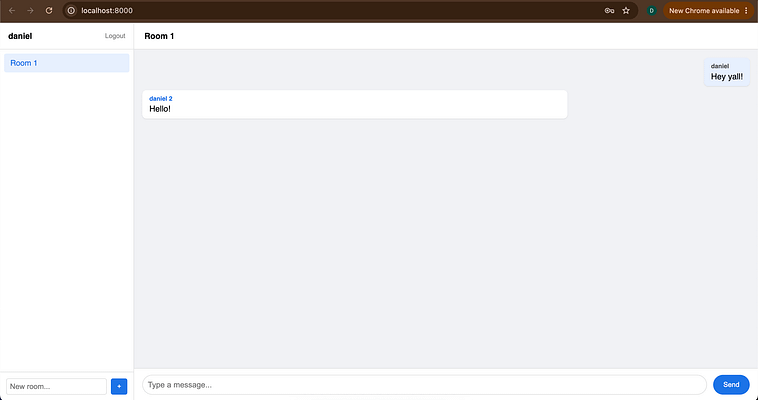
And, after a little bit of debugging to make sure everything is properly configured, we can see the data in our local emulation of Firestore.
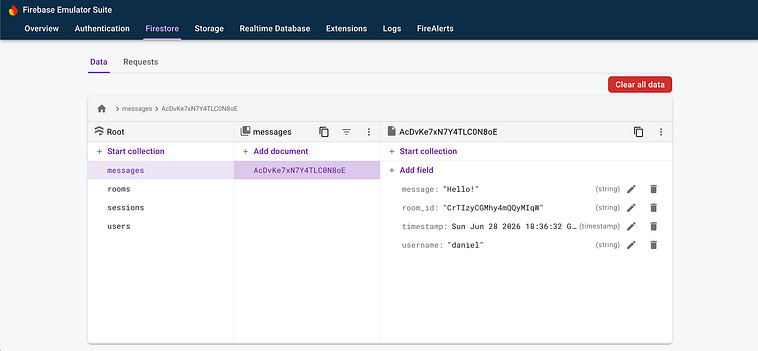
Firestore is a NoSQL database like MongoDB. I’ll probably do an article on MongoDB at a later date, but it’s basically just a bunch of JSON objects (called documents) within an indexed list (called collections). Here we have a collection for messages, rooms, sessions, and users, each has information based on the usage thus far. Our stateless FastAPI grabs this data, based on the request by the user, in order to respond with the page the user asked for, along with the data in that page.
This is cool, but it’s all running on my machine. The idea is to get it to run in the cloud so that anyone can chat via a public URL. I went ahead and made a docker file that containerizes the code, and sets everything up by running some commands in uv. You’ll have a solid idea of what’s going on here if you read my articles on uv and docker.
FROM python:3.12-slim
COPY --from=ghcr.io/astral-sh/uv:latest /uv /usr/local/bin/uv

WORKDIR /app
COPY pyproject.toml uv.lock ./
RUN uv sync --frozen --no-dev

COPY . .

CMD [”.venv/bin/uvicorn”, “main:app”, “--host”, “0.0.0.0”, “--port”, “8080”]
So, our repo should be ready to roll to deploy with Cloud Run, like we did before. Slide over to cloud run with our chat-app active
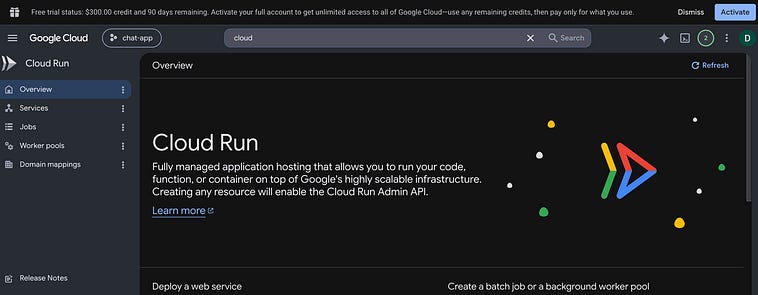
Choose GitHub.
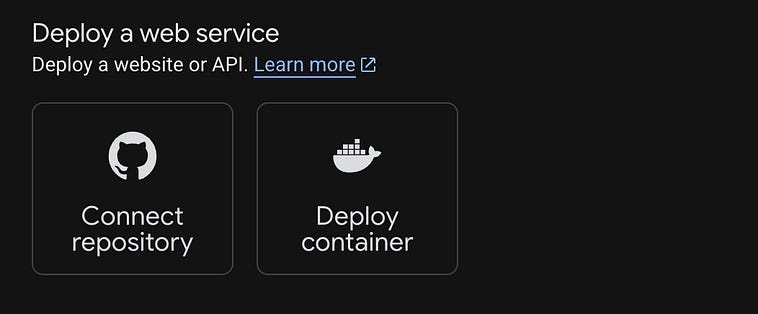
Then go through all the same configuration steps we went through to set up our previous application. Once it’s set up, it should be available on a public URL, and two people should be able to chat with one another.
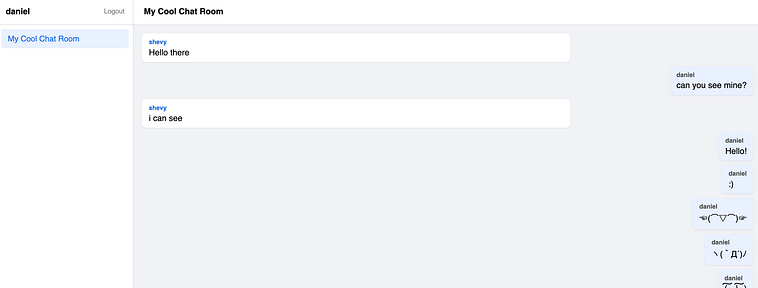
Twitter eat your heart out. New technocrat inbound.
Jokes aside, we glossed over pretty much all of the application logic to get to this point. Most of it’s out of scope, but I do think it would be pertinent to discuss the code that communicates with the database or the database emulation.
If we take a look at main.py we can see that we use the firestore library to connect with the database.
from google.cloud import firestore
...
db = firestore.Client(project=”chat-app-500821”, database=”chat-app-db”)
Because the application running on cloud run is in the same project as the chat app, authentication to connect securely to the database happens automatically, allowing our server to talk to our database despite the database being locked down from outside traffic.
When we ran the application locally on our computer, we used the following command.
FIRESTORE_EMULATOR_HOST=localhost:8080 uv run uvicorn main:app --reloadFIRESTORE_EMULATOR_HOST is a special environment variable that the firestore library automatically looks for. If that’s set, then whatever is specified in
db = firestore.Client(project=”chat-app-500821”, database=”chat-app-db”)is automatically discarded. This allows us to use an environment variable to run our application locally and point it at the emulator.
In the page returned by the server, there’s javascript that causes the website to request an update in three seconds, allowing for a simple implementation of real-time streaming. There’s also the HTML, CSS, and scripts necessary to run the application.
When you press various buttons, it calls endpoints in the FastAPI, like the login button calling the login endpoint.
async function login() {
    const u = document.getElementById(’login-username’).value;
    const p = document.getElementById(’login-password’).value;
    const res = await fetch(’/login’, { method: ‘POST’, headers: {’Content-Type’: ‘application/json’}, body: JSON.stringify({username: u, password: p}) });
    const data = await res.json();
    if (!res.ok) { document.getElementById(’auth-error’).textContent = data.detail; return; }
    token = data.token;
    username = u;
    showApp();
  }
That endpoint might return a token signifying that login was successful, allowing the user to authenticate with different endpoints
@app.post(”/login”)
def login(req: LoginRequest):
    doc = db.collection(”users”).document(req.username).get()
    if not doc.exists or doc.to_dict()[”password_hash”] != hash_password(req.password):
        raise HTTPException(status_code=401, detail=”Invalid credentials”)
    token = secrets.token_hex(32)
    db.collection(”sessions”).document(token).set({
        “username”: req.username,
        “created_at”: datetime.now(UTC),
    })
    return {”token”: token}
List the rooms that are available on the app, using the token from login as authentication.
@app.post(”/rooms”)
def create_room(req: RoomRequest, authorization: str = Header(...)):
    username = get_username_from_token(authorization)
    _, ref = db.collection(”rooms”).add({
        “name”: req.name,
        “created_by”: username,
        “created_at”: datetime.now(UTC),
    })
    return {”room_id”: ref.id, “name”: req.name}
Or whatever.
It’s worth noting that authentication is not done correctly in this application. This was a simple proof of concept, but the usernames and passwords are stored in plain text. In reality, you would want to use a more robust identity and access management system to make authentication to your app more robust. In fact, that seems like a good thing to discuss next.
Exploring Identity Platform
Cool, let’s make another project: a diary application. You log in, you can create and read your own diary entries. We’ll use a proper approach to auth and play around with using a frontend framework like Vue to make it a bit more human maintainable. Setup will be as follows:
Set up a new project, calling it
diarySet up a firestore in that project to function as the database
Set up Cloud Run to host the server
Very similar to the previous project we made, except, this time, the user will log into the application by authenticating with “Firebase Authentication” rather than with our own API.
First let’s set up the project and database
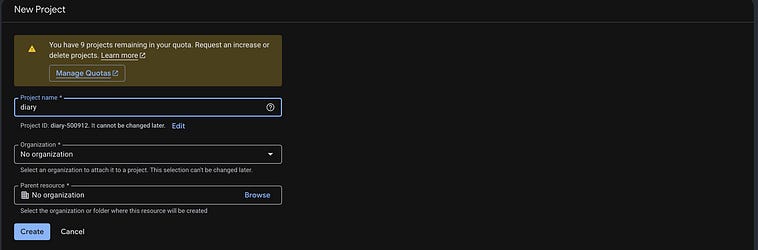
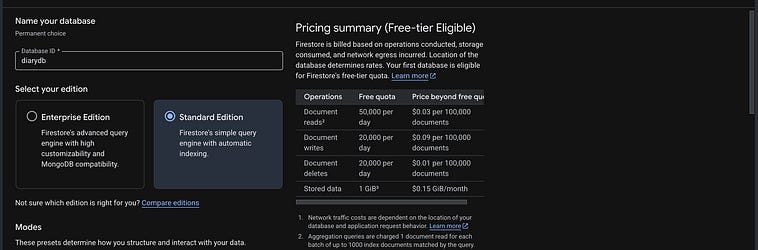
Essentially, when a user accesses our application, the server sends the login page. That login page will then direct the user to create or log into an account via “Identity Platform”, Google Cloud’s managed service for user management and authentication. Identity Platform manages cryptography and security, allowing us to identify users with user IDs.
To get it set up, search “Identity Platform.”

and enable it
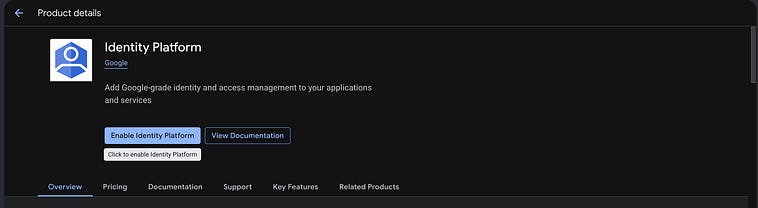
After a moment, the identity platform will be enabled in our project.
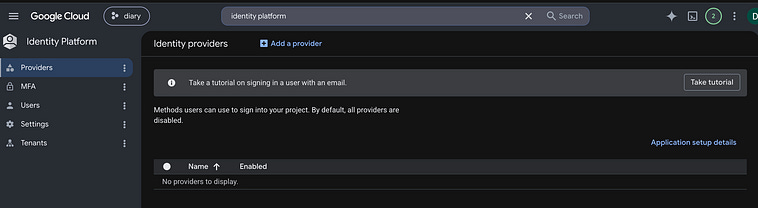
In providers, we’ll click “Add a provider”, and select “email/password”

Next, we’ll go back to “providers” and select “application setup details.”

Here we can see the code that we’ll need to inject into our front-end to enable identity platform authentication.
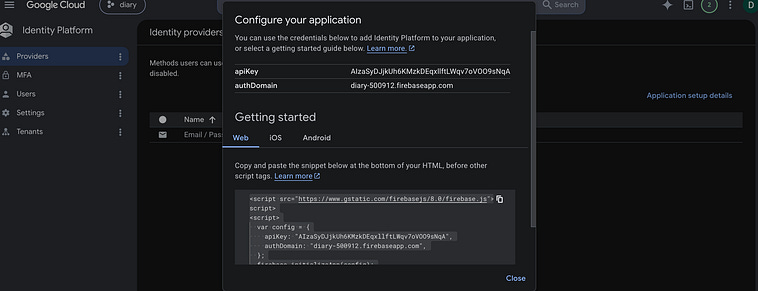
It’s worth noting, despite there being an API key, this is essentially public information. Users of our application will use this API key to talk to the authentication service. If they’re properly authenticated, they’ll receive a token that they can use to authenticate with our application.
Before we deploy our application, we can clone the repo and take a look at the code locally.
git clone https://github.com/DanielWarfield1/gcp-example3-diaryIt has a very similar core structure to the previous application, except there’s some code in the website that the user uses to authenticate with Firebase Auth (AKA GCP Identity Provider).
mounted() {
  firebase.auth().onAuthStateChanged(async (fbUser) => {
    if (fbUser) {
      this.user = { uid: fbUser.uid, email: fbUser.email };
      this.idToken = await fbUser.getIdToken();
      this.error = ‘’;
      await this.fetchEntries();
    } else {
      this.user = null;
      this.idToken = null;
      this.entries = [];
    }
  });
},
methods: {
  async submitAuth() {
    this.error = ‘’;
    try {
      if (this.authMode === ‘login’) {
        await firebase.auth().signInWithEmailAndPassword(this.email, this.password);
      } else {
        await firebase.auth().createUserWithEmailAndPassword(this.email, this.password);
      }
      this.password = ‘’;
    } catch (err) {
      this.error = err.message;
    }
  },
  async logout() {
    await firebase.auth().signOut();
  },
  authHeaders() {
    return { Authorization: `Bearer ${this.idToken}`, ‘Content-Type’: ‘application/json’ };
    },
When a user talks to our server, they get this code that runs in their browser. This code talks to Firebase Auth directly. Thus, we don’t need to manage user credentials at all. They talk to Firebase and get back a token they can use to talk with our server.
This token is called a “JWT” token, and it’s a cryptographic token generated by Firebase. It’s practically impossible to make a valid JWT token without knowing the private key, which the identity platform keeps in isolation. Whenever a user communicates our server, they have to send this token that they got from identity provider. We can use this information to decode a user ID, and confirm it with Firebase to make sure the token is valid.
def get_uid_from_token(authorization: str) -> str:
    if not authorization.startswith(”Bearer “):
        raise HTTPException(status_code=401, detail=”Invalid authorization header”)
    id_token = authorization.removeprefix(”Bearer “)
    try:
        decoded = firebase_auth.verify_id_token(id_token)
    except Exception:
        raise HTTPException(status_code=401, detail=”Invalid or expired token”)
    return decoded[”uid”]
Thus, we have a unique ID for our user, and can ensure every request has valid credentials associated with it, without needing to manage any critical authentication information ourselves.
We can run a local firestore emulation so our server has a database to talk to
gcloud emulators firestore start --host-port=localhost:8080and we can run our server
FIRESTORE_EMULATOR_HOST=localhost:8080 .venv/bin/uvicorn main:app --host 0.0.0.0 --port 8000This spools up the server locally on localhost 8000, which hosts our application.
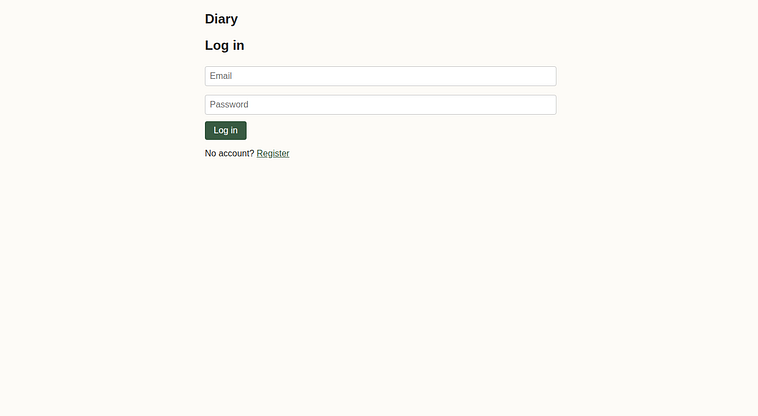
This user ID that we derive from the identity provider token is a unique identifier assigned to the user, which we can use to access user-specific data through the server, thus making our diary app private. If we create a new account
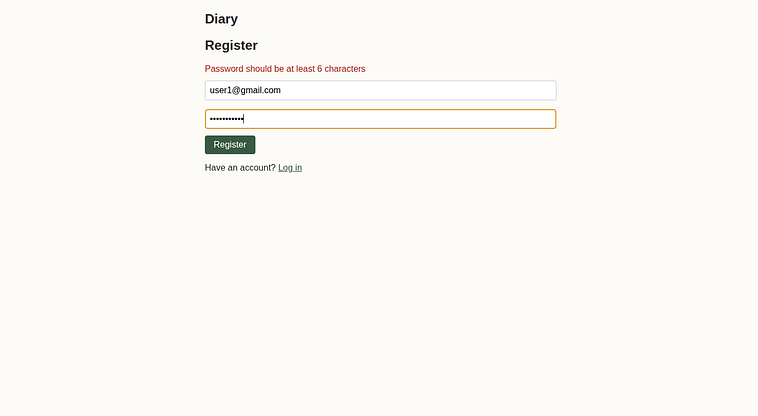
and add an entry
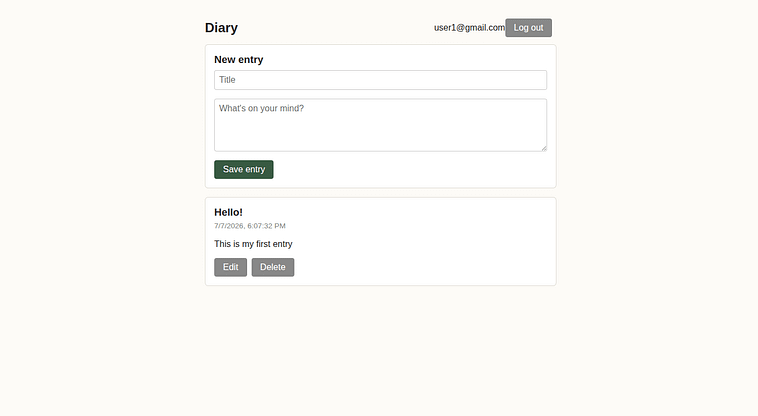
Then log out and log into a different account; we won’t see the entry from the other account.
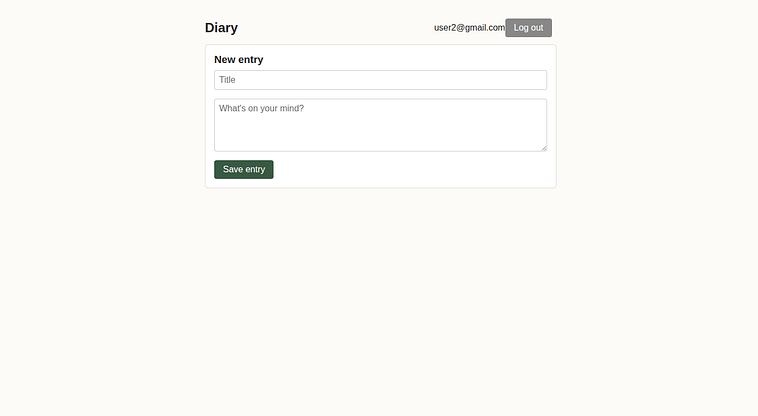
It’s worth noting we aren’t and don’t need to emulate authentication. Because the authentication code is nested into the client code directly, and talks directly with the Google identity provider, it works with the real system regardless of if we’re running a local instance or if we deploy it on the cloud.
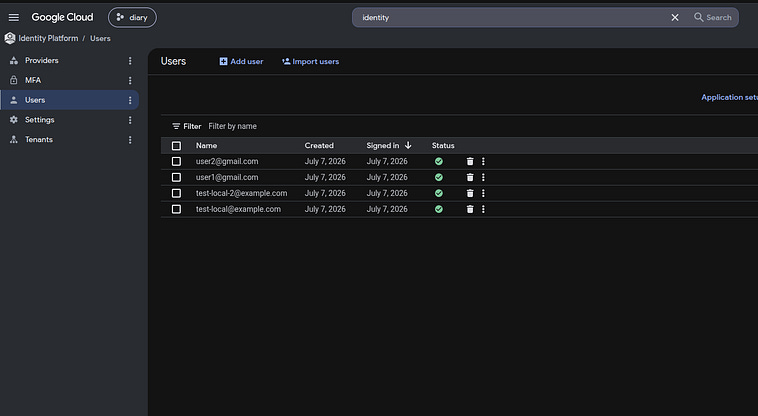
If we navigate to the providers section, we can see the ability to add multiple other providers if we wanted to support multiple signon methods
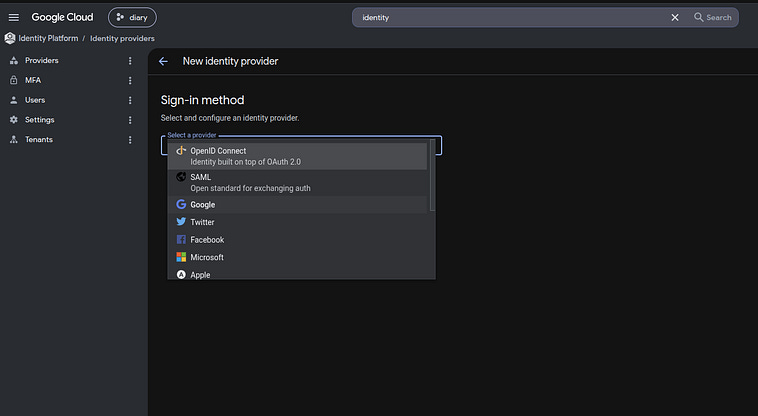
Now that we’ve confirmed that this stuff works, let’s deploy it. Just like last time, it’s as simple as spooling up a Cloud Run instance and configure it to point to the repos Docker File
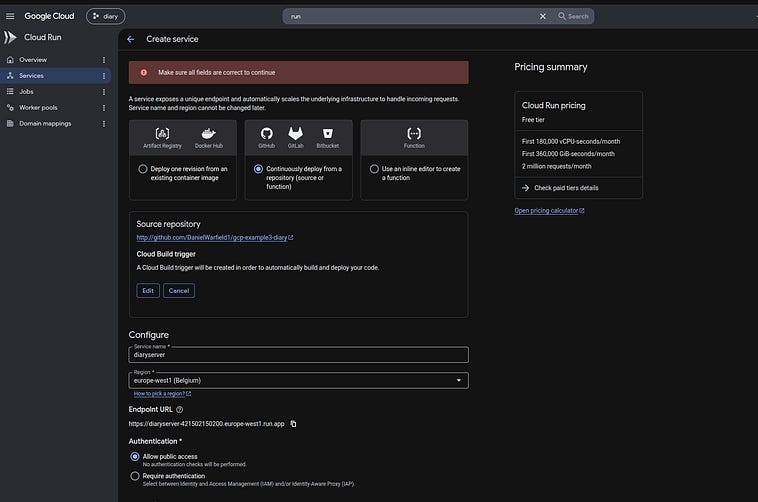
And after a few minutes, it’s live and functional.
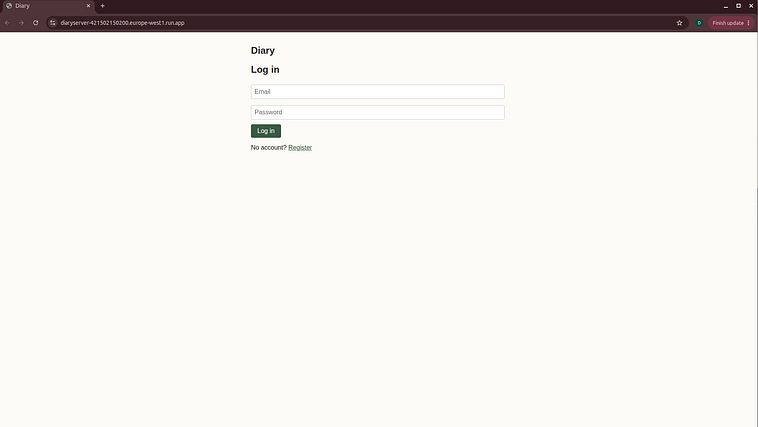
As a quick editorial note, I wanted to use firebase to make this example “easier”, which I think it is in some respects. However, I think the abstraction around firebase auth and firestore adds a level of confustion in this section. Future examples will use more GCP native approaches, which might be more intuitive.
Google Cloud Storage
In most cloud environments there are three key, fundamental types of storage: object storage, block storage, and file storage.
Block storage is essentially computer drives but on the cloud. You can rent discrete hard drive or SSD space and connect those to some compute resource. It’s essentially like making a big USB stick in the cloud, allowing you to connect it to different computers by mounting it directly to the operating system. It’s possible to use it directly, but it’s more common for it to be used behind the scenes, powering the storage used in your database or virtual machine.
The defining feature of a “block storage device” is that data is stored into fixed-size blocks throughout the storage medium. You might remember, back in the day, you had to “defragment” your hard drive, which involved moving data around to make your hard drive more efficient.
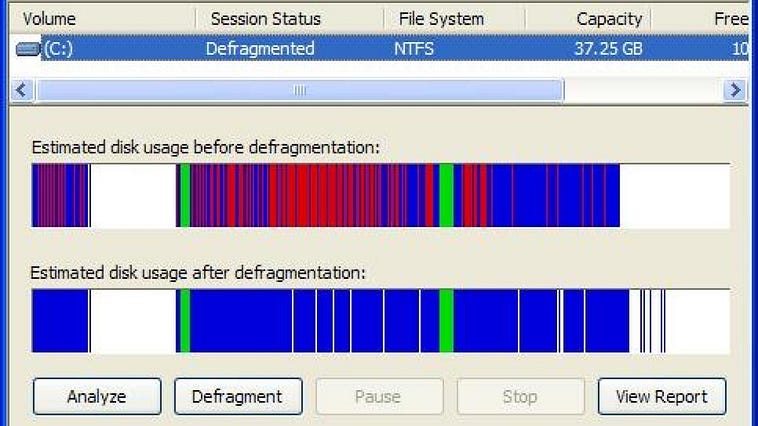
That’s because the hard drive on your computer is a block storage medium and, critically, back in the day, this data was read via a head that physically needed to move around
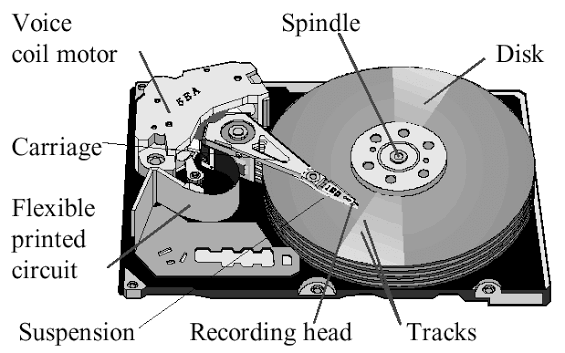
Block storage works by saving all data into fixed-size blocks. If you have a large file, it’s saved across numerous blocks. They don’t have to be close to each other, but when you have a hard drive that takes time to move around in physical space, having your data fragmented around your hard drive makes reads slower. Defragmentation is the process of moving stuff around so that data representing the same thing are next to each other. This isn’t practically required anymore, as storage has largely shifted to solid-state drives.
File storage is essentially an abstraction of block storage. You may have gotten a USB stick and needed to “format” it in the past. Essentially, raw block storage is great, but you might have several drives and want to organize the data onto your computer into a file system. Thus, you need to format block storage to hold data in a structured manner. File storage, on the cloud, is that at a cloud scale. Google File Store is a “network-attached storage” (NAS) product, where multiple machines can mount to the same network-attached storage device and access a shared pool of data simultaneously. This has some fun benefits and is used to do cool stuff, like allowing large sets of computers to train an AI system to quickly and efficiently read from a shared dataset without networking overhead.
GCS, Google Cloud Storage, is neither of these things. It’s a distributed object store that exposes an abstraction called “Blob Storage.” In blob storage, there is no folder structure. Instead, it’s a flat “key-value” storage system, where everything you upload has a specific name. These names can look like a folder structure, like “images/designs/set-design-1.pdf”, but in reality that entire URI is a key, not a specific subdirectory.
Because blob storage has a flat key-value organizational structure, it has some key advantages when storing certain types of data at scale:
Massive scalability. Since there is no hierarchical file system to manage, object stores can efficiently scale to billions or even trillions of objects spread across many storage servers.
High durability. Cloud providers automatically replicate objects across multiple disks, servers, and often multiple facilities, making it extremely unlikely for data to be lost.
Simple access patterns. Objects are retrieved directly by their key rather than traversing a directory tree. This makes blob storage ideal for applications that know exactly what object they want.
Cost efficiency. Blob storage is generally much cheaper than persistent disks or network file systems because it is optimized for storing large amounts of relatively static data.
As a result, blob storage is often used to store large files on a website, which might otherwise be expensive or cumbersome to store in a database, which is designed and optimized for a very different use case.
Because blob storage is chiefly designed for larger files, many cloud providers expose functionality allowing large files to be uploaded and downloaded from blob storage directly on the public internet. This is typically done with a “pre-signed URL”. Basically, if a user wants to upload a large file they can send a lightweight request to our server stating their intentions, then we can talk to blob storage and request a spot our user can put the data. Blob storage responds with a URL and a set of credentials, which are timeboxed and very restrictive, only allowing the user to upload that specific file. Our server can then pass that URL and the credentials to the user, and the user can upload files directly to blob storage.
This gets around a lot of nasty issues, HTTP timeouts, tying up server resources, or paying a high cost for network bandwidth. It also allows the storage provider to handle retries, multipart uploads, and other optimizations that make transferring large files more reliable. The result is a faster upload for the user, lower infrastructure costs, and a more scalable system overall.
Let’s explore a practical implementation. Let’s make a reading app that allows you to upload large PDF files, and read those PDF files. We’ll have Cloud Run serving as our core server, Firestore to keep track of application logic, and Google Cloud Storage to handle bulk file upload and download. We’ll also throw in a Cloud Run function that responds to upload events and generates a thumbnail for each of the PDFs so we can begin dabbling with event-driven architecture. Before we do that, though, let’s talk about the GCP CLI
The GCP CLI—gcloud
Our projects are starting to get a bit more complicated, and as a result, picking through the console UI to set up each resource is going to prove cumbersome. Plus, in our modern wave of AI-accelerated development, needing to navigate through a complex UI restricts the ability for AI assistance. Thus, in this example we’ll be using the command-line tool, gcloud, to set everything up.
Most cloud services have a command-line tool, and GCP is no exception. Instead of clicking a bunch of buttons, you can use the gcloud tool to create and manage resources via textual commands. This is useful for a whole bunch of reasons
commands can be copy-pasted, making re-production of similar resources simpler
AI can spit out these commands, accelerating our development
These can be automated, allowing us to manage our infrastructure using code
Things are generally more explicit and granular, allowing us to form a more thorough conceptualization of what’s going on under the hood
So, not only is the CLI convenient for educational purposes, it’s also practically very useful when managing large systems or keeping up with the AI-accelerated Joneses.
There are various ways to configure the CLI. You can set it up on your local machine or do it through the GCP dashboard. The dashboard is easier to set up and a simple way to get started, so we’ll use that until we have a reason to do otherwise. In our GCP dashboard, we can look to the top right and see a little terminal icon.
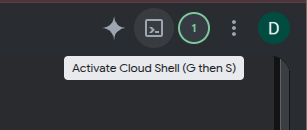
Then, after a moment and a bit of authentication stuff, we see a terminal.
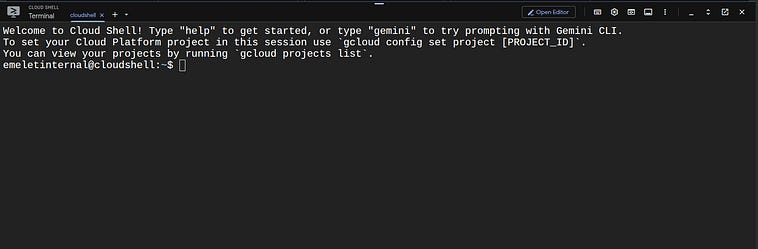
We can kick things off by running
gcloud projects listwhich gets me all of the projects I have on my account
PROJECT_ID: chat-app-500821
NAME: chat-app
PROJECT_NUMBER: 669756088814
ENVIRONMENT:

PROJECT_ID: diary-500912
NAME: diary
PROJECT_NUMBER: 421502150200
ENVIRONMENT:

PROJECT_ID: pdf-reader-502816
NAME: pdf-reader
PROJECT_NUMBER: 104419232710
ENVIRONMENT:

PROJECT_ID: project-d946312c-060c-4b6d-83a
NAME: My First Project
PROJECT_NUMBER: 894485926663
ENVIRONMENT:

PROJECT_ID: testproject1-500807
NAME: testproject1
PROJECT_NUMBER: 613513089702
ENVIRONMENT:
As you can see, I have a project called pdf-reader-502816 which I can set as my default project in the CLI. This will save us from needing to repeat this project ID over and over again for every command.
gcloud config set project pdf-reader-502816You may recall that, for new projects, we needed to enable a few APIs to allow us to even set anything up. We can do that with the following command:
gcloud services enable run.googleapis.com firestore.googleapis.com storage.googleapis.com \
  cloudfunctions.googleapis.com eventarc.googleapis.com pubsub.googleapis.com \
  artifactregistry.googleapis.com cloudbuild.googleapis.com iam.googleapis.com \
  iamcredentials.googleapis.com identitytoolkit.googleapis.com
Often when a CLI gets used, things get much more explicit, which can be daunting at first. What are these services, and why are they necessary for this application? Well, here’s why:
run.googleapis.com:
Let’s us use cloudrun, which our API layer for the application will use

firestore.googleapis.com:
Let’s use use firestore for storing user informaiton and metadata about our
books

storage.googleapis.com:
Let’s us use GCS, which is the whole point

cloudfunctions.googleapis.com:
Let’s us create cloudrun functions, which we’ll be using to create thumbnails

eventarc.googleapis.com:
This lets you connect a function call to some event on the cloud, which we’ll
be using to generate a thumbnail

pubsub.googleapis.com:
We haven’t talked about pubsub yet, but it’s used under the hood in eventrac,
so we need it

artifactregistry.googleapis.com:
When we use both cloudrun and cloud functions, we’re using containers.
Artifactregistry lets us store and manage containers, which is practically
required

cloudbuild.googleapis.com:
Our code needs to actually get turned into containers. We could do this ourselves
but we’ve been letting google take care of building our actual containers.
This is the resource that’s been doing that work.

iam.googleapis.com:
We need this for creating something called a “service account”, which is a
set of credentials allowing resources in our project to talk to one another

iamcredentials.googleapis.com:
This is required for creating presigned URLs

identitytoolkit.googleapis.com:
Required for using identity platform, which we’re using to manage our users
login credentials
Behind the scenes when we created stuff on the dashboard, a lot of these APIs were created when we enabled some service.
It’s worth noting we’re not using Firebase any more. After Google released and made popular Firebase, they migrated many of the offerings of Firebase into GCP. Firestore, the database technology underpinning Firebase, is now offered as a standalone product within GCP. Firebase Auth, the technology used for login, is now compatible with Identity Platform, which is GCP’s native identity system.
Next, we can set up a firestore database
gcloud firestore databases create --database=pdfreaderdb --location=us-central1--databasegives it a named ID that we’ll be using to connect with it later--locationsets the region for the database. Generally, resources that need to work together should be set in a similar location to reduce latency. I’m usingus-centeral1in this example.
Based on my research, setting up identity platform is a bit fiddly via the CLI, so we’ll do this step through the dashboard. To set it up we can search for identity platform

Enable it
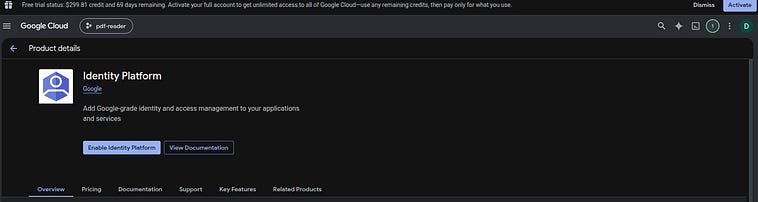
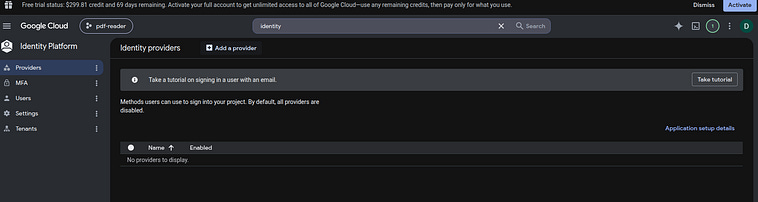
Add a provider
Set up an email provider
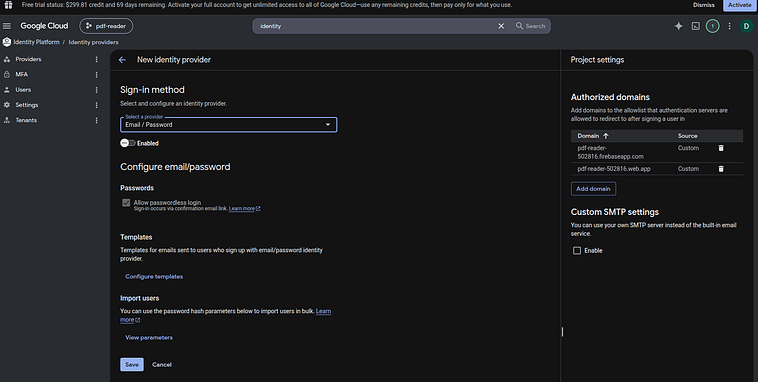
and make sure it’s enabled

Then, once we’re all set up, we can get the authentication setup details. This gets us the API key and domain our front end will use to authenticate with Google’s identity provider.
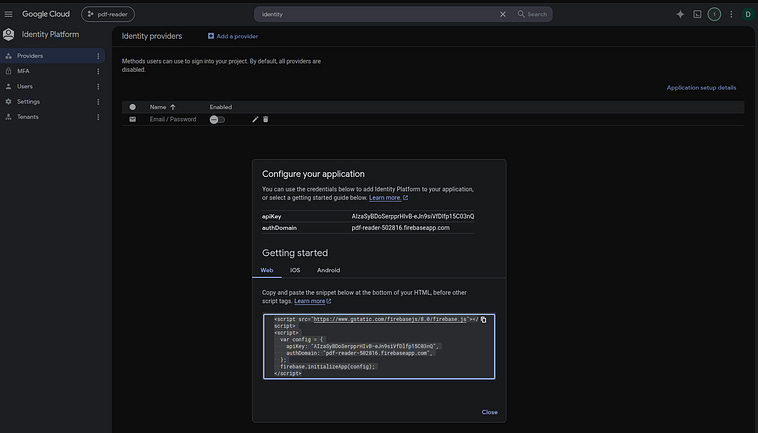
If you’re playing along at home, These credentials were added into the front end code via firebaseConfig
const firebaseConfig = {
  apiKey: “AIzaSyBDoSerpprHIvB-eJn9siVfDlfp15C03nQ”,
  authDomain: “pdf-reader-502816.firebaseapp.com”,
};
firebase.initializeApp(firebaseConfig);
Next, we need to create a service account. We’ll talk about permissions later, but a service account is a method for us to apply specific permissions onto services within GCP, so we can control what talks to what.
gcloud iam service-accounts create pdfreader-runtimeAfter we create a google cloud storage bucket, which is that blob storage technology we discussed previously
gcloud storage buckets create gs://pdf-reader-502816-books --location=us-central1We can add permissions to our service account, allowing it to access both Firestore and the GCS instance we created. This will allow our application layer to talk with these services, creating an explicit level of security in our application.
gcloud projects add-iam-policy-binding pdf-reader-502816 \
  --member=”serviceAccount:pdfreader-runtime@pdf-reader-502816.iam.gserviceaccount.com” \
  --role=”roles/datastore.user”
gcloud storage buckets add-iam-policy-binding gs://pdf-reader-502816-books \
--member=”serviceAccount:pdfreader-runtime@pdf-reader-502816.iam.gserviceaccount.com” \
--role=”roles/storage.objectAdmin”In a real production setting it’s a good policy to make service accounts least privileged and to have specific service accounts for specific things. We’re going to talk about permissions to a greater degree of depth throughout the article. For now, I’m glossing over the specifics so we can form a general understanding.
Next, we need to add this to the service account that connects to our bucket so that we can generate signed URLs and pass them to our user.
gcloud iam service-accounts add-iam-policy-binding pdfreader-runtime@pdf-reader-502816.iam.gserviceaccount.com \
--member=”serviceAccount:pdfreader-runtime@pdf-reader-502816.iam.gserviceaccount.com” \
--role=”roles/iam.serviceAccountTokenCreator”This allows our service account pdfreader-runtime to request the generation of a presigned URL. We’ll use this to create a URL that has a cryptographic key tied to it and allows the user with that key to do a specific action on a specific file within our cloud storage bucket. By passing a signed URL to the user, we can let GCS handle bulky uploads and downloads, rather than needing to manage that ourselves. This is a common paradigm in processing large files on the cloud.
Now we can set up Cloud Run. Recall that we previously set up Cloud Run to build directly with a GitHub integration. This could work perfectly fine for this use case, but I wanted to explore deploying in a slightly more explicit way so we can build an understanding of how containers actually get deployed under the hood. It will also be a bit easier to set up, though it won’t have some of the conveniences like automatic redeploy on updates to the codebase.
First, we need the code in our Cloud Shell so we can actually deploy it. You might need to fork the repository so you can configure it for your actual cloud environment.
git clone https://github.com/DanielWarfield1/gcp-example4-PDFreader.git
cd gcp-example4-PDFreaderThen we can run the following, which will tell GCP we want to create a cloud run compute instance based on the source code in the repo.
gcloud run deploy pdfreader --source . \
--service-account=pdfreader-runtime@pdf-reader-502816.iam.gserviceaccount.com \
--region=us-central1This will ask me if I want to create a registry for Docker containers, which I do. We’ll use this to store our dockerized application. Under the hood, this will use CloudBuild to build our docker container, then that build will be stored in the Artifact Registry. CloudRun will pull the build from the Artifact Registry to then deploy it.
Deploying from source requires an Artifact Registry Docker repository to store built containers. A repository named
[cloud-run-source-deploy] in region [us-central1] will be created.
Do you want to continue (Y/n)? YThen it asked me if I want to allow unauthenticated invocations. I said yes, because I want this to be exposed on the public internet. The application itself does authentication, but I want traffic from all sources to be accepted.
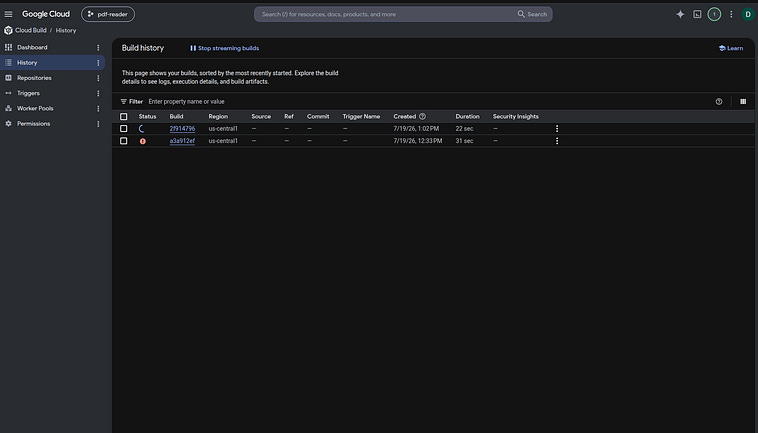
Allow unauthenticated invocations to [pdfreader] (y/N)? YIn the console output we’ll get a link to Cloud Build, where we can see GCP building our containerized application based on the dockerfile in the codebase. Again, I’ve covered docker in depth if you want to learn more about it.
Now, we can set up our cloud function that generates thumbnails for our uploaded PDFs. To do that, we’re going to need to set up some policies allowing the function to be triggered by key events in the bucket, like files being uploaded. This will trigger thumbnail generation when a file is uploaded.
gcloud projects add-iam-policy-binding pdf-reader-502816 \
--member=”serviceAccount:pdfreader-runtime@pdf-reader-502816.iam.gserviceaccount.com” \
--role=”roles/eventarc.eventReceiver”And we need to allow Google Cloud Storage to actually publish events that will trigger our function.
gcloud projects add-iam-policy-binding pdf-reader-502816 \
--member=”serviceAccount:service-104419232710@gs-project-accounts.iam.gserviceaccount.com” \
--role=”roles/pubsub.publisher”So, now our function can respond to events, and our bucket can generate events. Once all those permissions are set up, we can go ahead and deploy our function.
gcloud functions deploy generate-thumbnail --gen2 --runtime=python312 \
--region=us-central1 --source=functions/thumbnail --entry-point=generate_thumbnail \
--trigger-bucket=pdf-reader-502816-books \
--service-account=pdfreader-runtime@pdf-reader-502816.iam.gserviceaccount.com \
--memory=1Gi --timeout=300sBreaking down the arguments for this command and what they do:
- --gen2 — use 2nd-generation Cloud Functions, which run on top of Cloud Run under the hood (rather than the older gen1 runtime). This matters because gen2 functions get Eventarc-based triggers instead of gen1’s more limited built-in trigger system — that’s why all the Eventarc/Pub/Sub IAM plumbing you just fought through is even involved.
- --runtime=python312 — the language runtime to build the function’s container with (Python 3.12). This determines things like which base image and package installer gets used during the Cloud Build step.
- --region=us-central1 — where the function itself runs, matching your bucket, Firestore database, and Cloud Run service, so nothing is talking cross-region.
- --source=functions/thumbnail — the directory to package and deploy. Points at the folder containing this main.py and its own requirements.txt/dependencies, not the repo root (this function is a self-contained deployable unit, separate from the FastAPI backend).
- --entry-point=generate_thumbnail — which Python function inside that source directory actually gets invoked. Matches def generate_thumbnail(cloud_event: CloudEvent) at functions/thumbnail/main.py:14 — the @functions_framework.cloud_event decorator is what makes it invocable as an event-driven function at all.
- --trigger-bucket=pdf-reader-502816-books — shorthand that wires up the whole Eventarc pipeline you just debugged: creates a Pub/Sub topic, configures the bucket to publish “object finalized” notifications into it, and creates an Eventarc trigger routing those events to this function. Every time an object finishes uploading to this bucket, cloud_event.data[”bucket”]/[”name”] (lines 15-16) get populated with that object’s info.
- --service-account=pdfreader-runtime@pdf-reader-502816.iam.gserviceaccount.com — the identity the function runs as. This is why it needed roles/eventarc.eventReceiver (to receive the trigger) plus the existing roles/storage.objectAdmin and roles/datastore.user from step 6 (to read the uploaded PDF, write the thumbnail back, and update the Firestore doc — lines 31, 36-38, 40-46).
- --memory=1Gi --timeout=300s — resource limits: 1 GiB of memory and a 5-minute max execution time, sized generously for PDF rendering (fitz.open, get_pixmap) which can be memory-hungry for larger files.And now that the generate-thumbnail function is created, we need to give the service account for pdfreader-runtime permission to invoke it.
gcloud run services add-iam-policy-binding generate-thumbnail \
--region=us-central1 \
--member=”serviceAccount:pdfreader-runtime@pdf-reader-502816.iam.gserviceaccount.com” \
--role=”roles/run.invoker”Before we actually run this thing, there’s one other configuration we have to make now that everything is set up.
SERVICE_URL=$(gcloud run services describe pdfreader --region=us-central1 --format=”value(status.url)”)
echo “$SERVICE_URL”
cat > /tmp/cors.json <<EOF
[
{
“origin”: [”$SERVICE_URL”],
“method”: [”PUT”, “GET”],
“responseHeader”: [”Content-Type”],
“maxAgeSeconds”: 3600
}
]
EOF
gcloud storage buckets update gs://pdf-reader-502816-books --cors-file=/tmp/cors.jsonAnd with that, everything is set up. We have a database, application layer, authentication, cloud storage, and a cloud function that automatically generates thumbnails when a PDF has been uploaded. We can find the URL for our application by finding the public URL of our pdfreader cloudrun service
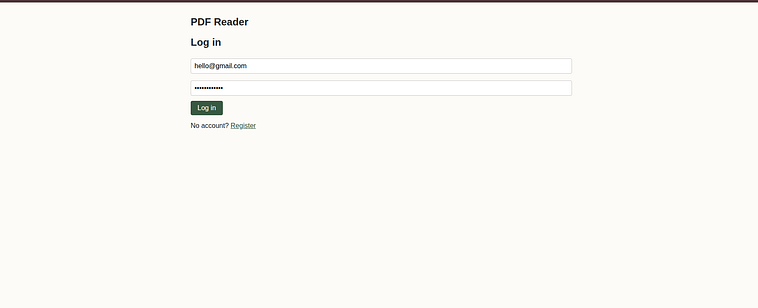
gcloud run services describe pdfreader --region=us-central1 --format=”value(status.url)”Then we can click on that URL, and see our application running online. We can create an account or log in
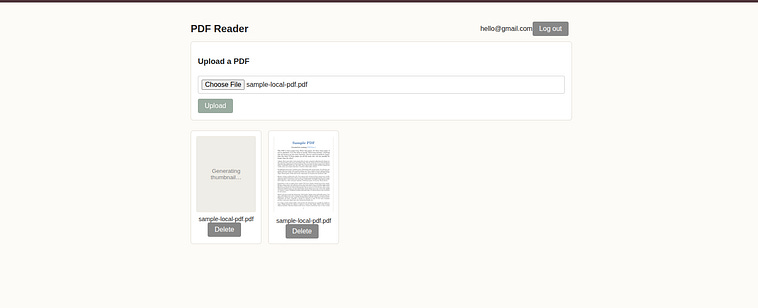
And see that we can upload PDFs. After a moment it will be populated with a thumbnail.
and if we click the PDF, we can read the whole file.
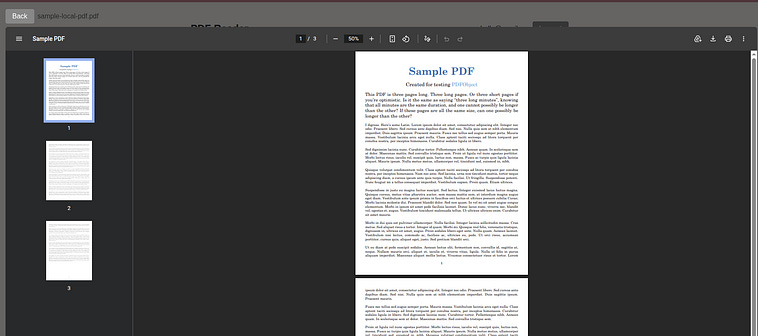
The objective of this article is to talk about the infrastructure rather than the application code, but I think it might be nice to explore the code, just a bit, to see how all this is working under the covers.

The application layer is defined in main.py. This serves as the core server that lives in the center of the application. The base path serves a static html page, which serves as the font end of the website
@app.get(”/”)
def index():
return FileResponse(”static/index.html”)Then there’s also a bunch of endpoints for manipulating data. The uid is associated with the user’s authorization credentials and saved in the database along with key data
@app.post(”/books”)
def create_book(req: CreateBookRequest, authorization: str = Header(...)):
uid = get_uid_from_token(authorization)
doc_ref = db.collection(”books”).document()
book_id = doc_ref.id
pdf_path = f”pdfs/{uid}/{book_id}.pdf”
doc_ref.set({
“uid”: uid,
“title”: req.filename,
“status”: “processing”,
“pdf_path”: pdf_path,
“thumbnail_path”: None,
“page_count”: None,
“created_at”: datetime.now(UTC),
})
return {”book_id”: book_id, “upload_url”: generate_upload_url(pdf_path)}so when the user attempts to retrieve data, we only give back the data associated with the user
@app.get(”/books”)
def list_books(authorization: str = Header(...)):
uid = get_uid_from_token(authorization)
docs = db.collection(”books”).where(”uid”, “==”, uid).stream()
books = []
for doc in docs:
data = doc.to_dict()
thumbnail_url = (
generate_download_url(data[”thumbnail_path”])
if data.get(”thumbnail_path”)
else None
)
books.append({
“book_id”: doc.id,
“title”: data[”title”],
“status”: data[”status”],
“thumbnail_url”: thumbnail_url,
“created_at”: data[”created_at”].isoformat(),
})
return sorted(books, key=lambda b: b[”created_at”], reverse=True)There’s also a few helper functions for getting presigned URLs for uploading and downloading, which are used to pass this information to the client.
def generate_upload_url(object_name: str) -> str:
blob = storage_client.bucket(BUCKET_NAME).blob(object_name)
return blob.generate_signed_url(
version=”v4”,
expiration=dt.timedelta(minutes=15),
method=”PUT”,
content_type=”application/pdf”,
credentials=_signing_credentials,
)
def generate_download_url(object_name: str) -> str:
blob = storage_client.bucket(BUCKET_NAME).blob(object_name)
return blob.generate_signed_url(
version=”v4”,
expiration=dt.timedelta(minutes=15),
method=”GET”,
response_disposition=”inline”,
credentials=_signing_credentials,
)The function that generates thumbnails, and what we deployed as a cloud function responding to upload events, looks like this:
import functions_framework
from cloudevents.http import CloudEvent
from google.cloud import firestore, storage
import fitz # PyMuPDF
PROJECT_ID = “pdf-reader-502816”
FIRESTORE_DATABASE = “pdfreaderdb”
storage_client = storage.Client(project=PROJECT_ID)
db = firestore.Client(project=PROJECT_ID, database=FIRESTORE_DATABASE)
@functions_framework.cloud_event
def generate_thumbnail(cloud_event: CloudEvent):
bucket_name = cloud_event.data[”bucket”]
object_name = cloud_event.data[”name”]
# Ignore anything that isn’t a freshly-uploaded PDF, including the
# thumbnails this function itself writes back into the same bucket.
if not object_name.startswith(”pdfs/”):
return
parts = object_name.split(”/”)
if len(parts) != 3 or not parts[2].endswith(”.pdf”):
return
uid, book_id = parts[1], parts[2].removesuffix(”.pdf”)
doc_ref = db.collection(”books”).document(book_id)
bucket = storage_client.bucket(bucket_name)
try:
pdf_bytes = bucket.blob(object_name).download_as_bytes()
pdf = fitz.open(stream=pdf_bytes, filetype=”pdf”)
pixmap = pdf.load_page(0).get_pixmap(matrix=fitz.Matrix(0.5, 0.5))
thumbnail_path = f”thumbnails/{uid}/{book_id}.png”
bucket.blob(thumbnail_path).upload_from_string(
pixmap.tobytes(”png”), content_type=”image/png”
)
doc_ref.update({
“status”: “ready”,
“thumbnail_path”: thumbnail_path,
“page_count”: pdf.page_count,
})
except Exception:
doc_ref.update({”status”: “error”})
raiseNaturally, with the function reacting to upload events, and this function also triggering upload events, there’s an opportunity for an infinite loop as the system reacts to the uploads it itself triggered. We nip that in the bud by only reacting to freshly uploaded PDF files, and not the thumbnails we’re uploading.
if not object_name.startswith(”pdfs/”):
returnIf it is a pdf, we generate a thumbnail and add it to the bucket. We also update the database as to whether we were successful or not. The frontend picks up the new thumbnail via polling. When we upload a new PDF we poll every 4 seconds while any of the books we’re uploading are in the processing state on the database.
startPolling() {
if (this.pollTimer) return;
this.pollTimer = setInterval(async () => {
if (this.books.some((b) => b.status === ‘processing’)) {
await this.fetchBooks();
} else {
this.stopPolling();
}
}, 4000);
},In the front end code, we find their state by using the fetchBooks function
async fetchBooks() {
const res = await fetch(’/books’, { headers: this.authHeaders() });
if (res.status === 401) return firebase.auth().signOut();
if (res.ok) {
this.books = await res.json();
} else {
this.error = ‘Failed to load books’;
}
},Which is hooked up to the list_book function on the API layer, which we previously discussed.
This app is pretty simple, but it could scale to a very large user base very easily. Because the users carry all of the state with them (i.e. who they are and what they want), the API layer is completely stateless. That means a user could make an API request from one server and then another server, and it wouldn’t matter, as both servers are talking to the database. As a result, the API layer could scale horizontally, adding more and more computers, and be able to serve a practically unlimited number of users.
Firestore and GCS are both designed to handle this type of workload at a massive scale, so they can handle a huge amount of throughput as well. Same with our cloud function; we can always provision the cloud function to be able to execute a large amount of parallel execution. If we have the pockets deep enough, any of these systems can scale pretty much infinitely.
The main issue for this system, in terms of reliability, isn’t scale but provisioning time. We can scale all these things up if we want to, allowing these resources to provision more computers to handle the load, but that takes time. If we get a huge flush of uploads all at the same time, it will likely crash our servers. The next topic, queuing, is designed to help us solve that problem.
Queuing
Sometimes you have a lot of work to do and not enough compute to do it. For instance, imagine a user uploads a stack of thousands of markdown files that you need to convert to PDF. If you push all these requests to a server simultaneously, forcing it to hold all these documents in memory and process them at the same time, you will likely run out of memory and crash that server.
Instead, you can upload all of the documents onto a task queue. A task queue is a system that can hold onto a list of tasks, acting as a buffer between the thing making requests and the thing fulfilling requests. If a lot of requests get made all at once, too much for our service to fulfill, we can add them to a queue to store the requests, which feeds them to our system at a steady rate. This context is commonly referred to as a “producer-consumer” system, where the “producer” is the thing making the requests, and the “consumer” is the thing fulfilling the requests.
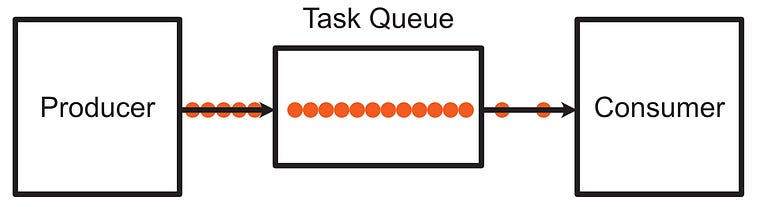
A Task Queue stores tasks and releases them at a steady rate; allowing a system to smooth out traffic spikes.
There are many ways to achieve the idea of queuing, which can generally be broken down into two families: push queues and pull queues. In a push system, the queue decides when to push requests to the consumer, while pull systems require the consumer to request tasks then mark them as completed. Cloud Tasks is a push-based system (Pub/Sub, which we’ll explore later, supports both push and pull delivery), which means Cloud Tasks decides when to send tasks to consumers based on configurable rate limits.
Let’s explore cloud tasks by making a system to compute the “Collatz conjecture”, otherwise known as 3n+1. If you’re not familiar, the Collatz conjecture has two key rules:
if the input number is even, divide by two
if the number is odd, multiply by three and add one
The idea is that, by following these rules over successive iterations, any input number will eventually converge to 1. It’s a pretty famous problem in math, and is somewhat of a boogeyman in the field
Mathematics is not yet ripe enough for such questions. — Paul Erdos
To help our mathematician friends out, we’re going to make a handy online tool that allows users to upload a bunch of numbers, and we’ll tell them how many cycles it takes for the number to converge to 1.
The issue with this system is that I expect some spikey traffic. It’s likely a user will upload a large quantity of numbers simultaneously, and I want to smooth that out so we can handle a large amount of intermittent traffic with a single machine. We’re going to use a queue to help us smooth out this traffic. We’re also going to be deploying everything this time with a single command.
Recall, in previous examples, we used console commands to deploy the infrastructure. Well, we can wrap the commands necessary to launch everything in a single bash file, then just deploy everything by running the bash file.

It’s the same stuff going on behind the scenes, but now everything get’s built in a single line on the command line, which is pretty cool. This is the full file, in all its glory.
#!/usr/bin/env bash
set -euo pipefail
cd “$(dirname “$0”)/..”
if [[ -f .env ]]; then
set -a
# shellcheck disable=SC1091
source .env
set +a
fi
# --- Configuration (env vars or .env; see .env.example) ---
PROJECT_ID=”${PROJECT_ID:?Set PROJECT_ID (export it or put it in .env)}”
REGION=”${REGION:-us-central1}”
QUEUE_NAME=”${QUEUE_NAME:-collatz-queue}”
WORKER_SERVICE=”${WORKER_SERVICE:-collatz-worker}”
API_SERVICE=”${API_SERVICE:-collatz-api}”
TASKS_SA=”${TASKS_SA:-collatz-tasks-invoker}”
CHUNK_SIZE=”${CHUNK_SIZE:-25}”
MAX_DISPATCHES_PER_SECOND=”${MAX_DISPATCHES_PER_SECOND:-5}”
MAX_CONCURRENT_DISPATCHES=”${MAX_CONCURRENT_DISPATCHES:-10}”
# Runs a gcloud “create” command; treats “already exists” as success and
# anything else as a real failure instead of silently continuing.
create_if_missing() {
local err
if ! err=”$(”$@” 2>&1)”; then
if echo “$err” | grep -qi “already exists”; then
echo “ (already exists, continuing)”
else
echo “$err” >&2
exit 1
fi
fi
}
gcloud config set project “$PROJECT_ID”
gcloud auth application-default set-quota-project “$PROJECT_ID” 2>/dev/null || \
echo “ (skipping ADC quota project — run ‘gcloud auth application-default login’ if source deploys fail with permission errors)”
echo “==> Enabling required APIs”
gcloud services enable \
run.googleapis.com \
cloudtasks.googleapis.com \
firestore.googleapis.com \
cloudbuild.googleapis.com \
artifactregistry.googleapis.com
echo “==> Ensuring a Firestore (Native mode) database exists”
create_if_missing gcloud firestore databases create --location=”$REGION”
echo “==> Creating service account used by Cloud Tasks to invoke the worker”
create_if_missing gcloud iam service-accounts create “$TASKS_SA” \
--display-name “Cloud Tasks -> Collatz worker invoker”
TASKS_SA_EMAIL=”${TASKS_SA}@${PROJECT_ID}.iam.gserviceaccount.com”
echo “==> Deploying worker service (private — only Cloud Tasks may invoke it)”
gcloud run deploy “$WORKER_SERVICE” \
--source ./worker \
--region “$REGION” \
--no-allow-unauthenticated
WORKER_URL=”$(gcloud run services describe “$WORKER_SERVICE” --region “$REGION” --format ‘value(status.url)’)”
echo “==> Granting the Cloud Tasks service account permission to invoke the worker”
gcloud run services add-iam-policy-binding “$WORKER_SERVICE” \
--region “$REGION” \
--member “serviceAccount:${TASKS_SA_EMAIL}” \
--role “roles/run.invoker”
echo “==> Creating the Cloud Tasks queue with a dispatch rate limit”
create_if_missing gcloud tasks queues create “$QUEUE_NAME” \
--location “$REGION” \
--max-dispatches-per-second “$MAX_DISPATCHES_PER_SECOND” \
--max-concurrent-dispatches “$MAX_CONCURRENT_DISPATCHES”
echo “==> Deploying API service (public entry point)”
gcloud run deploy “$API_SERVICE” \
--source ./api \
--region “$REGION” \
--allow-unauthenticated \
--set-env-vars “PROJECT_ID=${PROJECT_ID},LOCATION=${REGION},QUEUE_NAME=${QUEUE_NAME},WORKER_URL=${WORKER_URL}/process,WORKER_SERVICE_ACCOUNT=${TASKS_SA_EMAIL},CHUNK_SIZE=${CHUNK_SIZE}”
API_SA_EMAIL=”$(gcloud run services describe “$API_SERVICE” --region “$REGION” --format ‘value(spec.template.spec.serviceAccountName)’)”
echo “==> Granting the API service’s runtime service account permission to enqueue tasks”
gcloud tasks queues add-iam-policy-binding “$QUEUE_NAME” \
--location “$REGION” \
--member “serviceAccount:${API_SA_EMAIL}” \
--role “roles/cloudtasks.enqueuer”
API_URL=”$(gcloud run services describe “$API_SERVICE” --region “$REGION” --format ‘value(status.url)’)”
echo “==> Done.”
echo “ API URL: ${API_URL}”
echo “ Try: python client/collatz_client.py --url ${API_URL} --count 200”It starts off with some Bash-specific stuff. Taking it section by section:
This makes the script fail loudly if it bumps into issues, and exit immediately, which is a good idea if you’re deploying things on the cloud. Otherwise you might burn a bunch of time and create a bunch of resources that don’t work.
set -euo pipefailThen, this makes the script locationally independent. It doesn’t matter where you are when you call this script; the contents refer to the location of the bash file itself.
cd “$(dirname “$0”)/..”Then, there’s an optional .env file that can be used to define key values that this script uses. This checks if the file exists then, if it does, sets the key-value fields in the .env file to actual environment variables so that the script can use them.
if [[ -f .env ]]; then
set -a
# shellcheck disable=SC1091
source .env
set +a
fiAfter that, we get all our environment variables and save them as variables that we can use throughout the script.
# --- Configuration (env vars or .env; see .env.example) ---
PROJECT_ID=”${PROJECT_ID:?Set PROJECT_ID (export it or put it in .env)}”
REGION=”${REGION:-us-central1}”
QUEUE_NAME=”${QUEUE_NAME:-collatz-queue}”
WORKER_SERVICE=”${WORKER_SERVICE:-collatz-worker}”
API_SERVICE=”${API_SERVICE:-collatz-api}”
TASKS_SA=”${TASKS_SA:-collatz-tasks-invoker}”
CHUNK_SIZE=”${CHUNK_SIZE:-25}”
MAX_DISPATCHES_PER_SECOND=”${MAX_DISPATCHES_PER_SECOND:-5}”
MAX_CONCURRENT_DISPATCHES=”${MAX_CONCURRENT_DISPATCHES:-10}”The following is chiefly a quality of life feature:
# Runs a gcloud “create” command; treats “already exists” as success and
# anything else as a real failure instead of silently continuing.
create_if_missing() {
local err
if ! err=”$(”$@” 2>&1)”; then
if echo “$err” | grep -qi “already exists”; then
echo “ (already exists, continuing)”
else
echo “$err” >&2
exit 1
fi
fi
}This function runs an input command and captures any errors. If the error is that the resource already exists, it treats it as a non-error. If the error is about something else, the error is raised. This makes this script “declarative,” meaning it doesn’t define a set of procedures but rather declares what ought to exist. The idea of declaration comes up a lot in infrastructure as code, which I imagine we’ll cover to a greater degree of depth in future articles.
Next, we do some configuration
gcloud config set project “$PROJECT_ID”
gcloud auth application-default set-quota-project “$PROJECT_ID” 2>/dev/null || \
echo “ (skipping ADC quota project — run ‘gcloud auth application-default login’ if source deploys fail with permission errors)”The first one, we’ve seen before. This sets our project as the default project, using whatever we specified in the .env file. In this case, that’s collatz-503002. The next one is a practical requirement for local deployment, and has to do with quirks about uploading local source code when errors like PERMISSION_DENIED: … API requires a quota project, which is not set by default. We need to set our project id to be the “quota project” to get around this issue.
Now we get to some familiar territory. We enable a few APIs
echo “==> Enabling required APIs”
gcloud services enable \
run.googleapis.com \
cloudtasks.googleapis.com \
firestore.googleapis.com \
cloudbuild.googleapis.com \
artifactregistry.googleapis.comThis requires similar APIs we defined in the previous example, with the notable addition of cloudtasks, which we’ll use to make our task queue.
After that we create a firestore database
echo “==> Ensuring a Firestore (Native mode) database exists”
create_if_missing gcloud firestore databases create --location=”$REGION”Then we need to create a worker, create a service account allowing cloud tasks to invoke that worker, and create the task queue itself. We’ll start by creating the service account for our task queue, which we can attach permissions to.
echo “==> Creating service account used by Cloud Tasks to invoke the worker”
create_if_missing gcloud iam service-accounts create “$TASKS_SA” \
--display-name “Cloud Tasks -> Collatz worker invoker”
TASKS_SA_EMAIL=”${TASKS_SA}@${PROJECT_ID}.iam.gserviceaccount.com”And we’ll deploy the worker, not exposing it to the public internet. We’ll also find the URL and store it so other services can talk to it, provided they have a properly configured service account.
echo “==> Deploying worker service (private — only Cloud Tasks may invoke it)”
gcloud run deploy “$WORKER_SERVICE” \
--source ./worker \
--region “$REGION” \
--no-allow-unauthenticated
WORKER_URL=”$(gcloud run services describe “$WORKER_SERVICE” --region “$REGION” --format ‘value(status.url)’)”Now that we have a worker, we can grant our service account access to it. This command binds the role of run.invoker for the $WORKER_SERVICE , which we just created, to the TASKS_SA_EMAIL service account. This “email”, not an email at all just a quirk of naming, references the service account in charge of authenticating between the task queue and the worker.
echo “==> Granting the Cloud Tasks service account permission to invoke the worker”
gcloud run services add-iam-policy-binding “$WORKER_SERVICE” \
--region “$REGION” \
--member “serviceAccount:${TASKS_SA_EMAIL}” \
--role “roles/run.invoker”Now we can create the queue itself. This will have dispatch rate limits defined, which allows us to achieve our smoothing effect over spikey input traffic.
echo “==> Creating the Cloud Tasks queue with a dispatch rate limit”
create_if_missing gcloud tasks queues create “$QUEUE_NAME” \
--location “$REGION” \
--max-dispatches-per-second “$MAX_DISPATCHES_PER_SECOND” \
--max-concurrent-dispatches “$MAX_CONCURRENT_DISPATCHES”We’ll also create the “API Service”, which is the public server that actually accepts requests to our system. This service’s only job is to accept requests and rapidly fulfill them, either by querying the database or by forwarding jobs to the queue.
echo “==> Deploying API service (public entry point)”
gcloud run deploy “$API_SERVICE” \
--source ./api \
--region “$REGION” \
--allow-unauthenticated \
--set-env-vars “PROJECT_ID=${PROJECT_ID},LOCATION=${REGION},QUEUE_NAME=${QUEUE_NAME},WORKER_URL=${WORKER_URL}/process,WORKER_SERVICE_ACCOUNT=${TASKS_SA_EMAIL},CHUNK_SIZE=${CHUNK_SIZE}”Notice that there are a variety of environment variables assigned on the deployment. These allow the code in the API service to leverage these environment variables to reference these resources and configurations.
We then need to define a service account that allows our API service to add things into the queue. We define that binding here.
API_SA_EMAIL=”$(gcloud run services describe “$API_SERVICE” --region “$REGION” --format ‘value(spec.template.spec.serviceAccountName)’)”
echo “==> Granting the API service’s runtime service account permission to enqueue tasks”
gcloud tasks queues add-iam-policy-binding “$QUEUE_NAME” \
--location “$REGION” \
--member “serviceAccount:${API_SA_EMAIL}” \
--role “roles/cloudtasks.enqueuer”This actual command is some AI-generated shenanigans that I think are worth discussing. Instead of explicitly creating a service account and assigning it to our API service, we’re instead just adding a policy to the default service account assigned to our API service on creation.
--member “serviceAccount:${API_SA_EMAIL}” \This is fine for a little demo, but it has some major security concerns. GCP doesn’t create a unique service account for every new instance of Cloud Run, but instead shares the same default service account. That means, by creating this policy binding, we allowed any cloud function, GKE cluster, or other Cloud Run service to enqueue to the task.
This approach isn’t recommended, as it has obvious security concerns. It’s much more advisable to create dedicated service accounts to facilitate communication between specific resources. For this application, though, it’s fine.
Finally, this gets the URL of the public API service, which serves as the entry point into the system.
API_URL=”$(gcloud run services describe “$API_SERVICE” --region “$REGION” --format ‘value(status.url)’)”
echo “==> Done.”
echo “ API URL: ${API_URL}”
echo “ Try: python client/collatz_client.py --url ${API_URL} --count 200”There’s no UI tied to this project. Instead, I created a python client that can send a bunch of numbers to a URL, and waits for the backend to finish processing the job.
import time
import requests
class CollatzClient:
def __init__(self, base_url, poll_interval=2.0, timeout=120.0):
self.base_url = base_url.rstrip(”/”)
self.poll_interval = poll_interval
self.timeout = timeout
def submit(self, numbers):
resp = requests.post(f”{self.base_url}/submit”, json={”numbers”: numbers})
resp.raise_for_status()
return resp.json()[”job_id”]
def status(self, job_id):
resp = requests.get(f”{self.base_url}/status/{job_id}”)
resp.raise_for_status()
return resp.json()
def wait(self, job_id):
start = time.monotonic()
while True:
data = self.status(job_id)
if data[”status”] == “complete”:
return data[”results”]
if time.monotonic() - start > self.timeout:
raise TimeoutError(f”job {job_id} did not complete within {self.timeout}s”)
time.sleep(self.poll_interval)
def compute(self, numbers):
job_id = self.submit(numbers)
return self.wait(job_id)
if __name__ == “__main__”:
import argparse
import random
parser = argparse.ArgumentParser(description=”Submit numbers to the Collatz queue API”)
parser.add_argument(”--url”, required=True, help=”Base URL of the API service”)
parser.add_argument(”--count”, type=int, default=100, help=”How many random numbers to send”)
parser.add_argument(”--max”, type=int, default=1_000_000, help=”Max value for random numbers”)
args = parser.parse_args()
numbers = [random.randint(1, args.max) for _ in range(args.count)]
client = CollatzClient(args.url)
print(f”Submitting {len(numbers)} numbers...”)
results = client.compute(numbers)
for r in results:
print(f”{r[’number’]}: {r[’steps’]} steps”)We can run that function, with some arguments specifying the url we want to hit and a count for the number of random numbers we want to compute, and get an answer in a few seconds.
oxanne@roxanne-AMD-Ryzen-7-9700X-8-Core-Processor:~/Documents/Github/gcp-example5-collatz$ python3 client/coll
atz_client.py --url https://collatz-api-142557322943.us-central1.run.app --count 200
Submitting 200 numbers...
107618: 141 steps
750052: 110 steps
901988: 232 steps
397743: 117 steps
404336: 68 steps
347530: 166 steps
147499: 219 steps
...We can do this for a bunch more numbers and still get a result, just after waiting a bit longer.
roxanne@roxanne-AMD-Ryzen-7-9700X-8-Core-Processor:~/Documents/Github/gcp-example5-collatz$ python3 client/collatz_client.py --url https://collatz-api-142557322943.us-central1.run.app --count 20000
Submitting 20000 numbers...
288359: 114 steps
361443: 65 steps
571680: 146 steps
735096: 149 steps
894310: 95 steps
151479: 108 steps
174097: 72 steps
306038: 202 steps
...One issue with this system is rate limiting and a lack of backpressure. We’re protecting our infrastructure, but anyone can blast an arbitrary number of requests to our system on the public internet, slowing our system down and exposing us to undue financial risk. We know we can implement authentication to restrict who is talking to our system, but there’s no way to deal with one authenticated person sending too much traffic.
Rate Limiting with Redis
It’s worth noting that Redis isn’t always going to be the right choice for implementing rate limiting. Before we dive into implementing rate limiting with Redis, I want to discuss what Redis is, how rate limiting is commonly implemented, and when we might opt not to use Redis and instead use the database we already have.
I’m planning on doing an in-depth guide to Redis; it’s actually many technologies with a variety of interesting applications, but the most common application of Redis is in caching. Redis is essentially a very, very fast database that you can use to store information you need to read from and update frequently, saving the time and computational load in querying a larger database or triggering some downstream process by instead returning a value that’s been stored close to the API layer itself.
Imagine our users of our “Collatz conjecture” calculation system. They noticed their kids saying the number 67 over and over a few months ago, and they’re still coming to terms with the number’s implications from a mathematical perspective. So, they ask our system how many iterations it takes for the number to converge to 1. The answer is 27 steps. Hundreds of confused mathematicians grappling with the mystery of gen alpha are asking the same exact question over and over again.
A natural idea would be to put our answers in the database. So, any time we get a query of 67 we check if we’ve already solved it and return that. That’s actually a really good solution, but as the number of users grows, this puts a significant strain on our database. Millions of people, from around the globe, are hammering our database trying to find out how many iterations it takes of the Collatz conjecture for 67 to converge to 1.
It’s in these types of environments that caching is useful. The idea is to store the hottest values in their own highly efficient in-memory database, then check that database before checking the big, expensive database. Redis is specifically designed to satisfy these low-latency applications.
Redis is a “single-threaded in-memory data structure store.” Again, I don’t want to go too far in the weeds, but in a nutshell, it’s super good at quickly reading and writing small files. Because it’s in memory (on RAM) it’s not particularly resilient (if the Redis instance goes down, you lose your data, unless you’re using a fancy persistent tier). Thus, Redis shouldn’t generally be used as a primary database, but it’s great to use as a caching layer for things that don’t matter if we lose them, or things that are stored in the database but we just want a faster way to look them up.
For rate limiting, Redis is great. Any time a user sends a query, we can increment a counter on Redis for that user. When that user’s been allocated more resources, we can decrement that counter. Thus, we can keep track of specific users’ usage rates and reject traffic if their request frequency is too high. If Redis goes down once in a blue moon, whatever, people get their usage rate reset; no big deal (especially because we have a task queue defending our system generally).
One drawback with this approach is in the nature of Redis. We’ve been using cloud run with autoscaling, which has the nice quality of being able to scale down to zero instances. Both our servers and our functions only run when we need them to. Redis can’t function like this; its entire job is to be an in-memory database, meaning it can’t be scaled down to zero. As a result, we need to provision and constantly pay for a certain allocation of resources. This means using Redis isn’t the guaranteed right move for every application. In fact, for this one it’s probably overkill (we could just use the database to keep track of usage, or we could use GCS, either would probably work perfectly. Hell, the API layer is so light, we could probably use a single machine and just keep the rate-limiting information in memory and just scale our application vertically if needed), but for big applications with a lot of traffic and horizontal scaling Redis caching is a common paradigm, so I figured we’d give it a shot for educational purposes.
Here’s the code we’ll be working with
https://github.com/DanielWarfield1/gcp-example6-collatzquota
Because we’re using authentication, we need to set that up through the dashboard. So, head over to identity provider and set up a new email provider, just like we’ve done a few times.
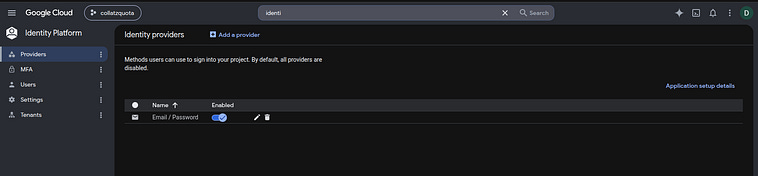
We’re going to need the application setup details
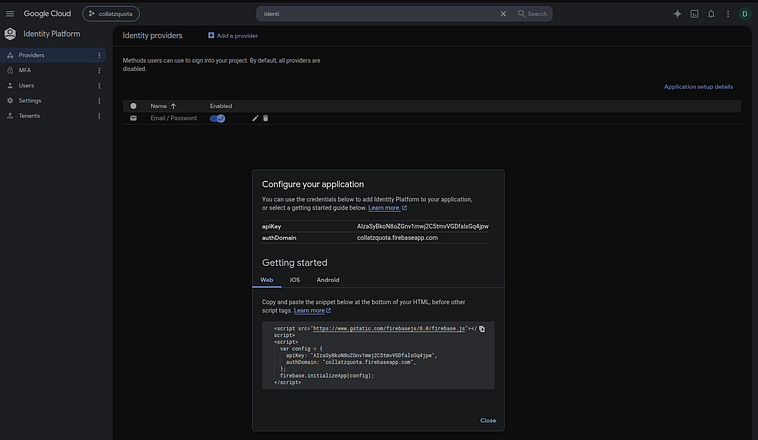
I opted to just hard-code these in the frontend. In reality it’s probably sleeker to define these as environment variables, but I won’t tell anyone if you don’t.
This project is very similar to the project we discussed previously; we have the same core architecture and application code, but we also deploy a caching layer. The full deployment code can be found here.

Going through some of the changes, we have a few new environment variables
RATE_LIMIT_CAPACITY=”${RATE_LIMIT_CAPACITY:-50}”
RATE_LIMIT_WINDOW_SECONDS=”${RATE_LIMIT_WINDOW_SECONDS:-60}”
API_KEY_CACHE_TTL_SECONDS=”${API_KEY_CACHE_TTL_SECONDS:-60}”
LAST_USED_FLUSH_INTERVAL_SECONDS=”${LAST_USED_FLUSH_INTERVAL_SECONDS:-60}”
REDIS_INSTANCE=”${REDIS_INSTANCE:-collatzquota-redis}”
REDIS_TIER=”${REDIS_TIER:-basic}”
REDIS_SIZE_GB=”${REDIS_SIZE_GB:-1}”
VPC_CONNECTOR=”${VPC_CONNECTOR:-collatzquota-connector}”
VPC_CONNECTOR_RANGE=”${VPC_CONNECTOR_RANGE:-10.8.0.0/28}”These define the following:
RATE_LIMIT_CAPACITY: The quantity of numbers an individuals can upload within a given rate-limiting window
RATE_LIMIT_WINDOW_SECONDS: The amount of time it takes for a user’s rate-limiting capacity to be refilled. It’s also used in clearing data from Redis, which we’ll discuss later.
API_KEY_CACHE_TTL_SECONDS: A cache to store API key authentication, limiting round-trip passes to the database. This, specifically, stores how long that cache exists before the database needs to be checked.
LAST_USED_FLUSH_INTERVAL_SECONDS: When we’re using an API key, we’re updating the database with when the API key was last used. We don’t want to write to the database for every single request; this serves as a rate limiter, minimizing how often we update the last used field for the API.
REDIS_INSTANCE: Just the name of the instance
REDIS_TIER: We’re using Google Cloud Memorystore, which hosts Redis for us. Memorystore has two tiers: basic, which just has one Redis node with no failover, and standard, which employs multiple Redis instances with failover. Standard is best when making sure Redis is maximally available, but we’ll use basic because failure of the cache doesn’t significantly harm our application and it costs less money. In a real production setting, the choice of exactly what to use would be based on the product itself and the needs of the customer.
REDIS_SIZE_GB: The amount of memory tied to the Redis cluster. This is, in effect, the size of the Redis database.
VPC_CONNECTOR: Necessary for getting our API service running on Cloud Run to talk to our Redis cache. We’ll talk about this more in a bit.
VPC_CONNECTOR_RANGE: Also used in communication; we’ll talk about this in a sec
Then, the next thing that changed is the API enablement
echo “==> Enabling required APIs”
gcloud services enable \
run.googleapis.com \
cloudtasks.googleapis.com \
firestore.googleapis.com \
cloudbuild.googleapis.com \
artifactregistry.googleapis.com \
identitytoolkit.googleapis.com \
redis.googleapis.com \
vpcaccess.googleapis.com \
compute.googleapis.comNew additions are
identitytoolkit.googleapis.com: For hooking up identity toolkit and allow for user authentication
redis.googleapis.com: For creating Redis clusters
vpcaccess.googleapis.com: For getting our API to talk to Redis
compute.googleapis.com: Also for getting our API to talk to Redis
The next addition is for actually creating Redis
echo “==> Creating the Memorystore Redis instance (first run can take several minutes)”
create_if_missing gcloud redis instances create “$REDIS_INSTANCE” \
--region “$REGION” \
--tier “$REDIS_TIER” \
--size “$REDIS_SIZE_GB” \
--redis-version redis_7_0This spools up a Redis instance and connects it to the VPC of the project. We haven’t talked about VPCs, so we should probably get into that now.
Previously, we’ve been using managed services that have an API and IAM roles built in. When we create a service account to connect two services together, Google Cloud manages making sure the connection between those two services is secure. Redis is an open-source software and doesn’t have those conveniences built into it. so we need to connect it to other resources ourselves.
A VPC, or virtual private cloud, allows us to do that securely. It’s a private connected cloud, where services can talk to one another directly. When we create a project, a VPC is automatically created. Redis is automatically exposed to the VPC, like we plugged an Ethernet cable into it on our home network. This is essentially required to make Redis do anything; because it’s not a fully fledged service with an API, it needs to be connected to some VPC so it can talk to other resources.
CloudRun, on the other hand, does not connect to our VPC by default. CloudRun is a serverless managed service that has an API, compute resources, and networking built in and thus doesn’t necessarily need to be connected to a VPC to do something. To get it to talk to Redis, we need to plug it into the same VPC that Redis is connected to. We do that configuration by creating a “VPC-access connector,” which is like plugging CloudRun into the same VPC our Redis account was connected to by default.
echo “==> Creating the Serverless VPC Access connector (Cloud Run’s route to Memorystore)”
create_if_missing gcloud compute networks vpc-access connectors create “$VPC_CONNECTOR” \
--region “$REGION” \
--range “$VPC_CONNECTOR_RANGE”
REDIS_HOST=”$(gcloud redis instances describe “$REDIS_INSTANCE” --region “$REGION” --format ‘value(host)’)”
REDIS_PORT=”$(gcloud redis instances describe “$REDIS_INSTANCE” --region “$REGION” --format ‘value(port)’)”
echo “==> Deploying API service (public entry point; needs the VPC connector to reach Redis)”
gcloud run deploy “$API_SERVICE” \
--source ./api \
--region “$REGION” \
--allow-unauthenticated \
--vpc-connector “$VPC_CONNECTOR” \
--vpc-egress private-ranges-only \
--set-env-vars “PROJECT_ID=${PROJECT_ID},LOCATION=${REGION},QUEUE_NAME=${QUEUE_NAME},WORKER_URL=${WORKER_URL}/process,WORKER_SERVICE_ACCOUNT=${TASKS_SA_EMAIL},CHUNK_SIZE=${CHUNK_SIZE},REDIS_HOST=${REDIS_HOST},REDIS_PORT=${REDIS_PORT},RATE_LIMIT_CAPACITY=${RATE_LIMIT_CAPACITY},RATE_LIMIT_WINDOW_SECONDS=${RATE_LIMIT_WINDOW_SECONDS},API_KEY_CACHE_TTL_SECONDS=${API_KEY_CACHE_TTL_SECONDS},LAST_USED_FLUSH_INTERVAL_SECONDS=${LAST_USED_FLUSH_INTERVAL_SECONDS}”There are some networking specifics in setting this up, which I think are useful to discuss.
Under the hood, there’s a computer running Redis somewhere on the cloud, and our API needs to talk to it. They’re essentially plugged into the same home router and can talk to each other. To do that, though, they need an IP and a port.
An IP address consists of four numbers from 0–255 that serve as the street number of a computer. There are public IPs and private IPs, but because we’re in a virtual private cloud, we’re only concerned with private IPs. Different computers on a network talk to each other by IP.
When a program runs on one of those computers, it can expose itself to connected computers by connecting to a port. Multiple programs can be operating on multiple different ports on a single computer. If I have a computer, and I want to talk to a specific program on another computer, I can find it by using the computer’s IP address, and the program’s port.
When we create a vpc-access connector, we essentially create a few tiny virtual machines that get attached to our VPC, and have an IP address assigned to them. When we connect Cloud Run to that vpc connector, we’re telling Cloud Run to route traffic to those tiny computers, which then make a request as a proxy on Cloud Run’s behalf. Those talk to Redis, then forward the response back to Cloud Run.
At this point, our API service needs to talk to two networks; the public internet and our private VPC. More specifically, it needs to accept incoming requests from the public internet, and make outgoing requests to Redis to read or write information. By setting these values:
--vpc-connector “$VPC_CONNECTOR” \
--vpc-egress private-ranges-only \We’re connecting our API to the VPC, and routing outgoing traffic to that VPC (which has Redis).
And those are all of the changes on the infrastructure side. There are some fundamental changes to the software running behind the scenes, which I want to briefly explore before we move on to another topic. All the interesting stuff is happening in the API.

In this folder there’s two new files: redis_client.py and rate_limiter.py. redis_client.py is pretty simple; it just creates a Redis client using the Redis library.
import os
import redis
redis_client = redis.Redis(
host=os.environ[”REDIS_HOST”],
port=int(os.environ.get(”REDIS_PORT”, “6379”)),
decode_responses=True,
)The rate_limiter.py, on the other hand, is more sophisticated. I don’t want to get into it too much because it does some Redis-specific things, but it maintains a count of how many tokens a given user has and returns that information to the client. You can explore the implementation here, I expect to cover Redis in the near future.

And with that we have rate limiting and caching API tokens in Redis. Again, kind of overkill for this application (database lookups would probably be more than fine), but a powerful general strategy when building larger applications.
Before we talk about more technologies, I want to take a moment to formalize our understanding of a few concepts we’ve been discussing.
Formalizing some Fundamental Ideas
Levels of Compute Abstraction
Throughout the article we’ve been talking about “little computers running on the cloud,” which is true. Under the hood, there are tiny computers being spooled up for pretty much everything: routing traffic, querying databases, and running cloud functions. It’s networking, compute, and storage. The big differentiator is the level of abstraction.
The least abstract level is probably “Compute Engine”, a service where you can provision specific classes of computers with CPUs, memory, and network-attached storage.
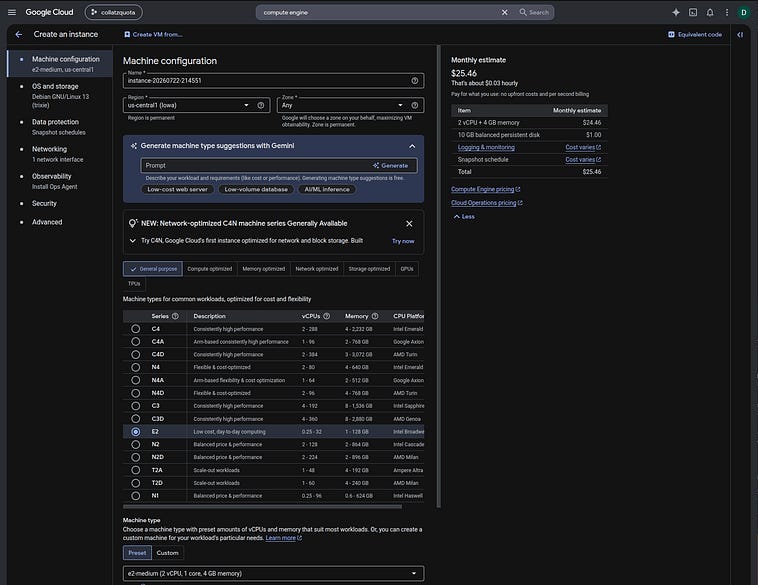
There’s still plenty of abstraction; it’s not just a computer sitting on a desk but a provisioning of resources sitting on a massive server farm. However, it walks and talks just like a computer. If properly configured, you can SSH into it and do pretty much whatever you want. You can even set up a remote desktop system and literally treat it like a desktop computer, play games on it, whatever.
The next level of abstraction is “Kubernetes Engine” (GKE), a system for managing clusters of computers. I have an in-depth article on Kubernetes, which I hope to expand in future installments
But, in a nutshell, kubernetes is a way to manage clusters of computers. While Compute Engine has you managing individual computers, GKE abstracts some of that control around provisioning and managing computers, allowing you to define high-level provisioning through the Kubernetes control plane.
One rung above that is Cloud Run, which we’ve been using. It’s built on technology similar to GKE and abstracts it significantly. You define containers, and Cloud Run handles the rest. Under the hood, depending on your settings, Cloud Run might manage one computer or a cluster of computers. It might choose to expose some of those computers to the internet or not. It might choose to scale compute based on some key metrics like CPU load or request frequency. It’s still a bunch of computers under the hood, but we have to do very little management of resources, which is great.
Cloud Run functions are yet another level of abstraction above using Cloud Run with containers. You don’t even have to define the container; you just define the code that gets run on the container, which Google manages. Yet another layer above that are technologies like App Engine or Firebase itself. These abstract away many of the needs to define infrastructure at all and instead allow you to build applications that just run on predefined architectures.
I suppose you can think of all of the abstract services in GCP as another layer of abstraction. In these, you don’t even define the code. When you set up a task queue, for instance, there is a compute service under the that manages scale by itself, has code to accept and work on your requests, has code to manage the queue, an API to interact with it, etc.
At the end of the day, there is no “right” or “wrong” in terms of abstraction, but there are better choices. Those choices are a function of the project you’re working on and its needs. If you’re working on a system that requires deep integration with core Linux configurations, you might need to work with provisioned instances in Compute Engine. If you have an existing set of documents and you want to turn them into a blog in five days, maybe use some abstract service like App Engine. The balance between control and agility through abstraction is fundamentally application-specific.
IAM
We touched on this topic adjacently throughout the article, but I want to take a moment to discuss what IAM is, what it does, and how it relates with ideas like service accounts.
IAM allows GCP to answer a fundamental question: “Is the entity making a request allowed to make that request?”, a question that’s tied to pretty much everything that happens on GCP. Any time you, as an administrator on GCP make a request via the console or to the CLI, your request is compared to the IAM permissions tied to your account. If you’re not allowed to do that operation, then the operation fails with a permission error.
Individual services like Cloud Run don’t have an account like humans do, so we give them a “Service account”. That allows us to bind IAM permissions to that service by way of the service account. It’s like Cloud Run has its own login, just like we do, with certain rules allowing it to access certain things.
Each IAM policy has the following core structure:
Who — the identity making the request (called a principal or member)
What — the role, which is a bundle of permissions
Which — the resource being acted on
By assigning specific permissions with service accounts, we can reference who they are, and assign what they can do to which resource, by building an IAM Policy.
The fundamental component of IAM is individual permissions. Everything on Google has a list of permissions with defined names. These generally map to a specific API method. Different services have different permissions, because they have different methods in their API.
storage.objects.create
storage.objects.get
storage.objects.delete
firestore.documents.get
firestore.documents.create
run.services.invoke
cloudtasks.tasks.createHere’s a list of permissions for just cloud storage. There’s a lot, because there’s a lot of stuff you can do with cloud storage. These are so granular to be ungainly for the majority of use cases. In most contexts it makes more sense to employ a “role”.
A “role” in IAM is a bundle of permissions. We used these throughout the previous examples, things like:
roles/datastore.user
roles/storage.objectAdmin
roles/iam.serviceAccountTokenCreator
roles/eventarc.eventReceiver
roles/pubsub.publisher
roles/run.invokerThese bundle a bunch of granular IAM permissions together into a convenient-to-use and easy-to-conceptualize grouping. Under the hood, they’re defined something like this:
title: “PDF Reader Object Writer”
description: “Create and read book objects; no delete.”
stage: “GA”
includedPermissions:
- storage.objects.create
- storage.objects.get
- storage.objects.listIf we saved that file as role-definition.yaml we could register our own role, like so
gcloud iam roles create pdfReaderObjectWriter \
--project=pdf-reader-502816 \
--file=role-definition.yamlGenerally, it’s preferable to use Roles managed by Google rather than build your own, as Google manages these roles for us. It’s really only recommended to build a custom role if there is a meaningful security improvement that justifies the level of ownership required to maintain that role.
Whether we’re using our own defined roles, or roles defined for us, we’ve been applying them via the add-iam-policy-binding throughout the article, like so:
gcloud projects add-iam-policy-binding pdf-reader-502816 \
--member=”serviceAccount:pdfreader-runtime@pdf-reader-502816.iam.gserviceaccount.com” \
--role=”roles/datastore.user”This function defines the “who”, “what”, and “which” necessary to define an IAM policy.
Who: The service account tied to
pdfreader-runtimeis being granted a permissionWhat: It’s being granted the permission defined in the role
datastore.user, which grants full CRUD permissions for Firestore (and Datastore, the legacy thing firestore was built off of, hence the role name).Which: This permission is being granted to all firestore/datastore instances in the
pdf-reader-502816project. So, resources tied to thepdfreader-runtimeservice account will be able to access all firestore instances in the project.
Permissions don’t have to be granted project-wide. This, for instance, binds a service account to a specific resource.
gcloud storage buckets add-iam-policy-binding gs://pdf-reader-502816-books \
  --member=”serviceAccount:pdfreader-runtime@pdf-reader-502816.iam.gserviceaccount.com” \
--role=”roles/storage.objectAdmin”Here the pdfreader-runtime service account is being granted the storage.objectAdmin role, but only to the pdf-reader-502816-books bucket.
A little gotcha: we actually can’t do that with Firestore because, under the hood, Firestore is several sub-services all working together. That’s why it’s common to apply an IAM policy on the project level for Firestore. If we did have multiple Firestore instances in a single project and wanted to make access more granular, we could specify a condition that, despite the scope of the permission being on the project level, it programmatically restricts that permission to certain namespaces.
gcloud projects add-iam-policy-binding pdf-reader-502816 \
--member=”serviceAccount:pdfreader-runtime@pdf-reader-502816.iam.gserviceaccount.com” \
--role=”roles/datastore.user” \
--condition=’expression=resource.name==”projects/pdf-reader-502816/databases/pdfreaderdb”,title=pdfreaderdb-only,description=Restrict to the pdfreaderdb database’That’s a bit more advanced, though. Like custom roles, the degree of granularity that should be adopted is a function of the necessities of security for your specific project.
IAM Policies are typically additive (though they can be subtractive through “deny policies”). Everything starts with no permissions to do anything, then we add policies across different scopes. Multiple policy bindings can be applied to the same account, allowing us to define different permissions for different scopes.
# Grant 1 — project altitude: read-only on ALL objects in ALL buckets
gcloud projects add-iam-policy-binding pdf-reader-502816 \
--member=”serviceAccount:pdfreader-reporting@pdf-reader-502816.iam.gserviceaccount.com” \
--role=”roles/storage.objectViewer”
# Grant 2 — single-bucket altitude: full control of ONE bucket
gcloud storage buckets add-iam-policy-binding gs://pdf-reader-502816-reports \
--member=”serviceAccount:pdfreader-reporting@pdf-reader-502816.iam.gserviceaccount.com” \
--role=”roles/storage.objectAdmin”In GCP, the hierarchy of organization of resources is as follows:
Organization: your entire company/domain. A grant here covers everything you own on GCP.
Folder: an optional grouping of projects (can nest), usually by team or environment. A grant here covers all projects inside it.
Project: the standard container your resources live in. A grant here covers every resource in that project
Resource: A grant here covers just that resource, if its type carries its own IAM policy. This works for things that are atomic, like cloud storage, but not for things that don’t really have a policy of their own, like firestore. Some resources are classified as “policy bearing resources”, and some are not, and instead are made up of “policy bearing resources”. The more abstract a services tend not to be policy bearing and instead combine several sub-resources.
Those were the topics I wanted to inject. I want to briefly touch on a few more technologies before we wrap up.
Pub/Sub
Publish/Subscriber technologies are a way to fan-out jobs to a variety of workers, decoupling producers and consumers and enabling event-driven architecture. We actually used Pub/Sub under the hood by implementing a task queue; which uses Pub/Sub to broadcast tasks out to worker nodes.
Essentially, with pubsub, you can have a system “publish” “messages”, with consumers that “subscribe” to those messages. The back and forth between subscribers and the Pub/Sub mechanism can either be pull-based or push-based, meaning you can either broadcast a message as soon as it’s ready, or hold the message until a subscriber requests it. Subscribers register with the Pub/Sub mechanism via a “subscription” to a particular “topic”.
Imagine you have a retail chain and, any time a user places an order, you want to trigger microservices that update inventory, send a confirmation email, and communicate with shipping companies. In a Pub/Sub context, your order processing service might publish a message to the order_event topic, which the downstream services process.
A big advantage of Pub/Sub is that it decouples producers from consumers logically. If we wanted to add a new downstream task to our system, we would just make that task subscribe to the order_event topic. We wouldn’t have to modify the ordering system, nor any of the other downstream microservices.
To whip up a system like this, we can start by registering a new topic called order-events
gcloud pubsub topics create order-eventsThen, on something like cloud run, we can make an order processing machine that runs some code like this, which publishes a message to the order-events topic.
from google.cloud import pubsub_v1
import json
publisher = pubsub_v1.PublisherClient()
topic_path = publisher.topic_path(”your-project-id”, “order-events”)
def publish_order(order_id: str, email: str, amount: float):
data = json.dumps({”order_id”: order_id, “email”: email, “amount”: amount}).encode(”utf-8”)
future = publisher.publish(topic_path, data, event_type=”order.placed”)
return future.result() # blocks until the message ID comes backEach of our subscribers will do different stuff, but they’ll have some endpoint allowing for a post request. After the request has been processed, they’ll send a 200 status code (or something like 200, like 204) to acknowledge that the request has been received. It will send something else if there’s been a failure.
from fastapi import FastAPI, Request
import base64, json
app = FastAPI()
@app.post(”/”)
async def handle(request: Request):
envelope = await request.json()
message = envelope[”message”]
payload = json.loads(base64.b64decode(message[”data”]).decode(”utf-8”))
send_confirmation_email(payload[”email”], payload[”order_id”])
return “”, 204 # 2xx = ack. non-2xx = nack, and Pub/Sub redelivers.Acknowledgement is how the pub/sub system knows to clear a message from a given subscription, or to try again after waiting some period of time. In Pub/Sub, every subscription is handled in isolation, so if there are three subscribers to a topic and one fails, the pub/sub system will try that one failed subscription again.
Once we have workers and a pub/sub system created, we need to wire up permissions so the publisher can publish to pubsub, and so pubsub has permissions to invoke subscribers. That would look something like so (this is AI generated and unconfirmed, but for demonstrative purposes):
#!/usr/bin/env bash
#
# Deploys a Pub/Sub fan-out system:
#
# client --> [API service] --publish--> (order-events topic)
# |
# +---------------------+---------------------+
# | | |
# (email-sub) (orders-sub) (analytics-sub)
# | | |
# [email service] [orders service] [analytics service]
#
# One publish fans out to three independent subscribers. Each subscription
# tracks delivery on its own, so if one subscriber fails, only THAT
# subscription redelivers - the other two are unaffected.
#
set -euo pipefail
cd “$(dirname “$0”)/..”
if [[ -f deploy/.env ]]; then
set -a
# shellcheck disable=SC1091
source deploy/.env
set +a
fi
# --- Configuration ---
PROJECT_ID=”${PROJECT_ID:?Set PROJECT_ID (export it or put it in deploy/.env)}”
REGION=”${REGION:-us-central1}”
TOPIC=”${TOPIC:-order-events}”
DEAD_LETTER_TOPIC=”${DEAD_LETTER_TOPIC:-order-events-dlq}”
MAX_DELIVERY_ATTEMPTS=”${MAX_DELIVERY_ATTEMPTS:-5}”
# One identity that Pub/Sub authenticates AS when it pushes to the private
# subscriber services. (You could split this per-subscriber for finer control;
# a single push identity that may invoke all three is a common middle ground.)
PUSH_SA=”pubsub-push-invoker”
# Treats “already exists” as success so the script is safe to re-run.
create_if_missing() {
local err
if ! err=”$(”$@” 2>&1)”; then
if echo “$err” | grep -qi “already exists”; then
echo “ (already exists, continuing)”
else
echo “$err” >&2
exit 1
fi
fi
}
gcloud config set project “$PROJECT_ID”
PROJECT_NUMBER=”$(gcloud projects describe “$PROJECT_ID” --format=’value(projectNumber)’)”
PUBSUB_AGENT=”@gcp-sa-pubsub.iam.gserviceaccount.com”>service-${PROJECT_NUMBER}@gcp-sa-pubsub.iam.gserviceaccount.com”
echo “==> Enabling required APIs”
gcloud services enable \
run.googleapis.com \
pubsub.googleapis.com \
firestore.googleapis.com \
cloudbuild.googleapis.com \
artifactregistry.googleapis.com \
iam.googleapis.com
echo “==> Ensuring a Firestore (Native mode) database exists”
create_if_missing gcloud firestore databases create --location=”$REGION”
echo “==> Creating the main topic and the dead-letter topic”
create_if_missing gcloud pubsub topics create “$TOPIC”
create_if_missing gcloud pubsub topics create “$DEAD_LETTER_TOPIC”
# A dead-letter topic is only useful if something reads it. Attach a plain
# subscription so failed messages are retained and inspectable.
create_if_missing gcloud pubsub subscriptions create “${DEAD_LETTER_TOPIC}-monitor” \
--topic “$DEAD_LETTER_TOPIC”
echo “==> Creating the shared push-auth service account”
create_if_missing gcloud iam service-accounts create “$PUSH_SA” \
--display-name “Pub/Sub push invoker for order subscribers”
PUSH_SA_EMAIL=”${PUSH_SA}@${PROJECT_ID}.iam.gserviceaccount.com”
# Pub/Sub’s own service agent must be allowed to mint the OIDC tokens it
# attaches to authenticated push requests.
echo “==> Letting the Pub/Sub service agent create push auth tokens”
gcloud projects add-iam-policy-binding “$PROJECT_ID” \
--member=”serviceAccount:${PUBSUB_AGENT}” \
--role=”roles/iam.serviceAccountTokenCreator” >/dev/null
# For dead-lettering to work, the SAME service agent needs to publish to the
# dead-letter topic and subscribe on the source subscriptions. Miss this and
# dead-lettering silently does nothing - no error, messages just pile up.
echo “==> Granting the Pub/Sub service agent dead-letter permissions”
gcloud pubsub topics add-iam-policy-binding “$DEAD_LETTER_TOPIC” \
--member=”serviceAccount:${PUBSUB_AGENT}” \
--role=”roles/pubsub.publisher” >/dev/null
# ---------------------------------------------------------------------------
# Helper: deploy one private subscriber service + its push subscription.
#
# $1 service name (e.g. email-service)
# $2 source directory (e.g. subscribers/email)
# $3 subscription name (e.g. email-sub)
# $4 runtime SA short name (e.g. email-runtime) or “” for the default SA
# $5 runtime role to grant (e.g. roles/datastore.user) or “” for none
# ---------------------------------------------------------------------------
deploy_subscriber() {
local service=”$1” src=”$2” sub=”$3” runtime_sa_name=”$4” runtime_role=”$5”
local runtime_sa_flag=()
if [[ -n “$runtime_sa_name” ]]; then
echo “==> [$service] creating runtime service account $runtime_sa_name”
create_if_missing gcloud iam service-accounts create “$runtime_sa_name” \
--display-name “$service runtime”
local runtime_sa_email=”${runtime_sa_name}@${PROJECT_ID}.iam.gserviceaccount.com”
runtime_sa_flag=(--service-account “$runtime_sa_email”)
if [[ -n “$runtime_role” ]]; then
echo “==> [$service] granting $runtime_role to its runtime SA”
gcloud projects add-iam-policy-binding “$PROJECT_ID” \
--member=”serviceAccount:${runtime_sa_email}” \
--role=”$runtime_role” >/dev/null
fi
fi
echo “==> [$service] deploying (private - only Pub/Sub may invoke it)”
gcloud run deploy “$service” \
--source “$src” \
--region “$REGION” \
--no-allow-unauthenticated \
--set-env-vars “PROJECT_ID=${PROJECT_ID}” \
“${runtime_sa_flag[@]}”
local url
url=”$(gcloud run services describe “$service” --region “$REGION” --format ‘value(status.url)’)”
echo “==> [$service] allowing the push SA to invoke it”
gcloud run services add-iam-policy-binding “$service” \
--region “$REGION” \
--member=”serviceAccount:${PUSH_SA_EMAIL}” \
--role=”roles/run.invoker” >/dev/null
echo “==> [$service] creating push subscription $sub with dead-letter policy”
create_if_missing gcloud pubsub subscriptions create “$sub” \
--topic “$TOPIC” \
--push-endpoint “${url}/” \
--push-auth-service-account “$PUSH_SA_EMAIL” \
--ack-deadline 60 \
--dead-letter-topic “$DEAD_LETTER_TOPIC” \
--max-delivery-attempts “$MAX_DELIVERY_ATTEMPTS” \
--min-retry-delay 10s \
--max-retry-delay 600s
# The service agent also needs subscriber on each source subscription to
# forward its dead-lettered messages.
gcloud pubsub subscriptions add-iam-policy-binding “$sub” \
--member=”serviceAccount:${PUBSUB_AGENT}” \
--role=”roles/pubsub.subscriber” >/dev/null
}
# Three subscribers on ONE topic. Note the differing least-privilege IAM:
# - email needs no data access at all
# - orders + analytics each get datastore.user and nothing more
deploy_subscriber “email-service” “subscribers/email” “email-sub” “” “”
deploy_subscriber “orders-service” “subscribers/orders” “orders-sub” “orders-runtime” “roles/datastore.user”
deploy_subscriber “analytics-service” “subscribers/analytics” “analytics-sub” “analytics-runtime” “roles/datastore.user”
# ---------------------------------------------------------------------------
# The publisher goes LAST so the topic already exists. It’s the only public
# service. Its runtime SA needs permission to publish to the topic.
# ---------------------------------------------------------------------------
echo “==> Creating the API runtime service account”
create_if_missing gcloud iam service-accounts create “api-runtime” \
--display-name “Order API runtime”
API_SA_EMAIL=”api-runtime@${PROJECT_ID}.iam.gserviceaccount.com”
echo “==> Granting the API publish rights on the topic”
gcloud pubsub topics add-iam-policy-binding “$TOPIC” \
--member=”serviceAccount:${API_SA_EMAIL}” \
--role=”roles/pubsub.publisher” >/dev/null
echo “==> Deploying the public API service”
gcloud run deploy “api-service” \
--source ./api \
--region “$REGION” \
--allow-unauthenticated \
--service-account “$API_SA_EMAIL” \
--set-env-vars “PROJECT_ID=${PROJECT_ID},TOPIC_ID=${TOPIC}”
API_URL=”$(gcloud run services describe api-service --region “$REGION” --format ‘value(status.url)’)”
echo “==> Done.”
echo “ API URL: ${API_URL}”
echo “ Try: python client/orders_client.py --url ${API_URL} --count 5”If you read through it, there are a lot of the similar suspects; cloud run, service accounts, enabling APIs, etc. I really just want to focus in on the pub/sub specific concepts.
First of all, there’s an important practical concept we haven’t explored; dead letters.
TOPIC=”${TOPIC:-order-events}”
DEAD_LETTER_TOPIC=”${DEAD_LETTER_TOPIC:-order-events-dlq}”
MAX_DELIVERY_ATTEMPTS=”${MAX_DELIVERY_ATTEMPTS:-5}”
When you have a pub/sub system or task queue system, it will retry sending events when an error occurs, which is great; this makes our system resilient to the intermittent outages that are practically common on large, internet-scale systems.
However, imagine we have a malformed message or task. If that were the case, the same message would be broadcast over and over, continually, eating up resources. As more malformed requests pile up, the task queue or pubsub topic would be saturated by the same malformed tasks being requested over and over again.
This idea is referred to as a “dead letter”, a message or taks in a queue or topic which has been retried a few times and needs to be quarantined for future analysis as to not cause downstream issues. In queues, this is called a “dead letter queue”, in pubsub it’s called a “dead letter topic”. The idea is that, after a message has been attempted some number of times, it will be moved to a dead-letter topic where a dedicated service can ingest and handle that message; likely storing it for future triage.
We can create those topics
echo “==> Creating the main topic and the dead-letter topic”
create_if_missing gcloud pubsub topics create “$TOPIC”
create_if_missing gcloud pubsub topics create “$DEAD_LETTER_TOPIC”
Next, we create a subscription, which does some interesting stuff.
# A dead-letter topic is only useful if something reads it. Attach a plain
# subscription so failed messages are retained and inspectable.
create_if_missing gcloud pubsub subscriptions create “${DEAD_LETTER_TOPIC}-monitor” \
  --topic “$DEAD_LETTER_TOPIC”
It might be useful to think of a topic as a queue of messages which consumers consume, but in reality topics don’t hold messages, “subscriptions” hold messages. Recall that multiple subscribers can be subscribed to an event, and failures and throughput are treated independently. Thus subscriptions function as a sort of queue which holds messages. Even though we don’t have a downstream process to ingest messages in our dead letter topic, we’ll need to create a subscription so they have somewhere to go. Otherwise, without a subscription, they’ll disappear into the void. By default, messages are held for 7 days on GCP, but this is configurable. Also, if we wanted, we could create a service that records this in a database for infinite retention.
After that, we have some permissions stuff. First we create a service account, which represents the permissions granted to our Pub/Sub system. Because our Cloud Run instances are not publicly exposable, Pub/Sub needs a service account that it can use to invoke downstream Cloud Run tasks. To do that, we create the service account
echo “==> Creating the shared push-auth service account”
create_if_missing gcloud iam service-accounts create “$PUSH_SA” \
  --display-name “Pub/Sub push invoker for order subscribers”
PUSH_SA_EMAIL=”${PUSH_SA}@${PROJECT_ID}.iam.gserviceaccount.com”
And give it the role of run.invoker on a particular service
echo “==> [$service] allowing the push SA to invoke it”
  gcloud run services add-iam-policy-binding “$service” \
    --region “$REGION” \
    --member=”serviceAccount:${PUSH_SA_EMAIL}” \
    --role=”roles/run.invoker” >/dev/null
There’s some fun functional logic going on in this particular example. Any time we create a new subscriber, we’re doing it with the deploy_subscriber() function, which simultaneously creates and connects a subscriber. The code above is run for each service being created, granting the pubsub push service account permission to invoke each subscriber.
After a particular service is created, and a permissioned service account is defined, we can set up the subscription
echo “==> [$service] creating push subscription $sub with dead-letter policy”
create_if_missing gcloud pubsub subscriptions create “$sub” \
  --topic “$TOPIC” \
  --push-endpoint “${url}/” \
  --push-auth-service-account “$PUSH_SA_EMAIL” \
  --ack-deadline 60 \
  --dead-letter-topic “$DEAD_LETTER_TOPIC” \
  --max-delivery-attempts “$MAX_DELIVERY_ATTEMPTS” \
  --min-retry-delay 10s \
  --max-retry-delay 600s
This does a few things:
defines the name of the subscription, here defined as the variable
$subtopic: says what topic the subscription will be to, in this case all of them observe the
order-eventstopic.push-endpoint: The URL of the subscribing Cloud Run. Pubsub will push messages to this URL.
push-auth-service-account: The service account granting permission for pubsub to invoke the cloudrun service
ack-deadline: How long a worker has to complete and acknowledge the message as complete before we consider it a failure and try again
dead-letter-topic: The topic where messages that repeatedly fail end up
max-delivery-attempts: The number of retries we get before we consider a message to be a dead letter
The two retry delays define the bounds for exponential backoff. If there’s a failure we re-try again in 10 seconds. If there’s another failure we wait double the time; 20 seconds. Another failure 40 seconds. That number keeps doubling every time, waiting longer and longer after trying again (approximately. In reality there’s some randomized jitter applied so that concurrent requests are naturally staggered). We cap the delay period we’re willing to wait with
max-retry-delay.
Now we get into some of the more counterintuitive aspects. The principle of least permissions, that everything should be granted minimal permissions by default, is a necessity in making the cloud secure at scale. However, the price for that security is an inevitable hunt for esoteric and counterintuitive permissions that need to be enabled to get everything working. Take for example the following:
PUBSUB_AGENT=”@gcp-sa-pubsub.iam.gserviceaccount.com”>service-${PROJECT_NUMBER}@gcp-sa-pubsub.iam.gserviceaccount.com”# Pub/Sub’s own service agent must be allowed to mint the OIDC tokens it
# attaches to authenticated push requests.
echo “==> Letting the Pub/Sub service agent create push auth tokens”
gcloud projects add-iam-policy-binding “$PROJECT_ID” \
--member=”serviceAccount:${PUBSUB_AGENT}” \
--role=”roles/iam.serviceAccountTokenCreator” >/dev/nullHere PUBSUB_AGENT is a Google-managed service account that moves messages around under the hood for PubSub. Our subscriber services are private, so Cloud Run only lets a request in if it carries a token proving the caller is from the PUSH_SA service account, the invoker identity we created and granted run.invoker. But the thing actually making the push request is Pub/Sub, i.e. PUBSUB_AGENT, which is a different account. So for the push to work, PUBSUB_AGENT has to attach a token that says “I am PUSH_SA” essentially, impersonating another account. serviceAccountTokenCreator is precisely the permission to mint a token as another service account. That’s what this grant does: it lets Google’s Pub/Sub agent generate tokens in the name of PUSH_SA, so that when it pushes to a subscriber, Cloud Run’s door check sees PUSH_SA and opens. Without doing this, PubSub can’t actually properly authenticate messages sent to our private workers.
This agent also needs permission to actually publish to the dead letter topic
# For dead-lettering to work, the SAME service agent needs to publish to the
# dead-letter topic and subscribe on the source subscriptions. Miss this and
# dead-lettering silently does nothing - no error, messages just pile up.
echo “==> Granting the Pub/Sub service agent dead-letter permissions”
gcloud pubsub topics add-iam-policy-binding “$DEAD_LETTER_TOPIC” \
  --member=”serviceAccount:${PUBSUB_AGENT}” \
  --role=”roles/pubsub.publisher” >/dev/null
And needs access to each subscription so it can manage the messages within them
# The service agent also needs subscriber on each source subscription to
  # forward its dead-lettered messages.
  gcloud pubsub subscriptions add-iam-policy-binding “$sub” \
    --member=”serviceAccount:${PUBSUB_AGENT}” \
    --role=”roles/pubsub.subscriber” >/dev/null
This is all required because the principle of least permissions is applied by default, but it means we might need to track down these Google-managed service accounts and modify them, especially when dealing with abstract services that have multiple elements going on under the hood.
After all that is configured, of course, the publisher needs to be wired up. with permissions to publish to the order-events topic.
gcloud pubsub topics add-iam-policy-binding “$TOPIC” \
  --member=”serviceAccount:${API_SA_EMAIL}” \
  --role=”roles/pubsub.publisher”
And, with that, we’ve reviewed what it takes to create a functional pub/sub system. There’s plenty more technologies I’m planning on exploring in following articles, but I think that covers the lion’s share I wanted to discuss in this article. Let’s briefly discuss some relevant concepts before concluding.
Brief Mentions
I’m planning on making some dedicated follow-ups to this article describing more specific technologies in GCP around ML, security, cost management, observability, and networking. There’s a lot to cover, and I can’t hope to explore everything in this article. However, I do want to discuss some technologies and concepts from a high level before concluding.
Idempotency
Both task queues and pub/sub systems tend to guarantee “at least once delivery”, meaning a message (that’s not flagged as a dead letter due to excessive failures) will be processed at least once, but may be processed more than once. This is because it’s possible for a consuming service to accept a message/task, then finish it after the acknowledgement deadline. From the queue’s perspective, the request failed, but it was actually successful, meaning the queue is sent it to another consumer while the first consumer was still running.
Practically, it’s very hard to guarantee exactly once delivery, and is typically too expensive to justify. Instead of trying to force single delivery, the way this is handled is with “idempotent” design. The idea of idempotency is to design systems such that, even if you send the same request over and over, you still get the same result as if you did the operation once.
We can use our three microservices for order processing as an example. Consider the three cases:
Recording order information in the database
Recording revenue information in the database, based on the order
Sending emails to users
In the first case, it’s pretty easy. If we write the following record more than once, it’s of no consequence
db.collection(”orders”).document(order_id).set({
    “order_id”: order_id,
    “email”: payload[”email”],
    “amount”: payload[”amount”],
    “status”: “recorded”,
})
Because we’re writing to the document defined by order_id, if we re-write the same data multiple times, we’ll end up with an equivalent record
Things get more complicated when we record metrics. Let’s say we’re trying to increment revenue and order count on a per-day basis. If we do that multiple times, we’ll end up incrementing the order count and revenue multiple times for a single order.
db.collection(”daily_revenue”).document(day).set({
    “revenue”: firestore.Increment(payload[”amount”]),
    “order_count”: firestore.Increment(1),
}, merge=True)
We can fix this issue by keeping track of the orders we’ve used for incrementation previously. If that already exists, then don’t do the incrementation.
from datetime import datetime, UTC
from google.cloud import firestore

order_id = payload[”order_id”]          # the idempotency key
amount = payload[”amount”]
day = datetime.now(UTC).strftime(”%Y-%m-%d”)

processed_ref = db.collection(”analytics_processed”).document(order_id)
counter_ref = db.collection(”daily_revenue”).document(day)

@firestore.transactional
def apply_once(txn):
    # Firestore requires all reads before any writes.
    already = processed_ref.get(transaction=txn).exists
    if already:
        return False                    # seen this order, do nothing
    txn.set(processed_ref, {”order_id”: order_id, “at”: datetime.now(UTC)})
    txn.set(counter_ref, {
        “revenue”: firestore.Increment(amount),
        “order_count”: firestore.Increment(1),
    }, merge=True)
    return True

apply_once(db.transaction())
return “”, 204
Firestore, for instance, allows us to execute several interactions in our database as a “transaction”. We wrap checking if a transaction has already been used, updating that the transaction has been used, and incrementing the counters as a single transaction. If one of these happens, they all happen. There’s a term called “ACID compliance”, which gives us certain guarantees about transactions, allowing us to design systems that are idempotent. Look up ACID transactions, or stay tuned for an upcoming article on databases.
The email-sending use case is a bit trickier. Generally speaking, if you’re sending an email, you’ll be triggering a request to a downstream email provider. Without having control of the email provider, it’s very hard to absolutely guarantee only one email will be sent. We can try our best to record what emails have been sent to mitigate duplicates, but what happens if the email system crashes after we record that we sent the email in our database? What happens if the database crashes as we attempt to send an email? Naturally, with more robust systems we can mitigate these issues with idempotent-like designs, but guaranteeing exactly-once delivery in all circumstances is very challenging. So difficult that it’s worth asking “is it that big of a deal if there’s a fringe possibility we send two confirmation emails occasionally?”
Sharding
We discussed statelessness throughout the article. Some things, like DataBases and caching layers, can’t be stateless for obvious reasons; the whole reason they exist is to record information and recall it efficiently. Because of this, databases are harder to scale horizontally; in a stateless application, it doesn’t matter which computer processes a request. Thus, you can just spool up more computers and load balance between them to achieve near-infinite scale. In stateful contexts, you need to use “sharding.”
Sharding is the idea of breaking up your database into different sub-databases. If you want to keep track of people’s birthdays, you might choose to divide that data, storing the birthdays for the people with the first name “Daniel” in one database, and birthdays for people with the first name “Rachael” in another database. These would be considered shards of one larger database. The effect is that you can divide your work across different computers in charge of managing different shards in the database.
The thing you elect to divide by, in this case the name of the person, is what’s called the “shard key”. In reality, using a name as a shard key is horrible, as there’s so many names you would need a bunch of shards. Choosing the right shard key has a massive impact on the distribution of load throughout a database, and choosing the right one is incredibly important. In some context it’s handled automatically, like in Firestore, but in some contexts, like Redis, the developer needs to choose their own shard key.
Billing
The cloud can become very expensive very quickly, and it’s important to continually monitor
You can generate reports breaking down the services you’re using and how much they cost
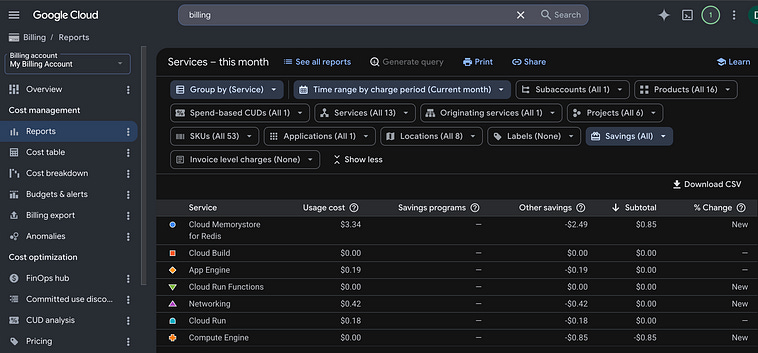
You can define budget alerts when you exceed that budget
and generally see how much your projects or products cost. It’s worthwhile to continually monitor costs as scale grows, and set up alerts notifying you when costs reach a threshold you expect.
Logging, Monitoring, and Tracing
When you’re trying to manage hundreds of computers across an internet-scale application, it can be difficult. Generally, Logging, Monitoring, and tracing are how developers understand performance at scale and identify key issues.
The Log Explorer allows you to view and query logs across the various machines running your applications.
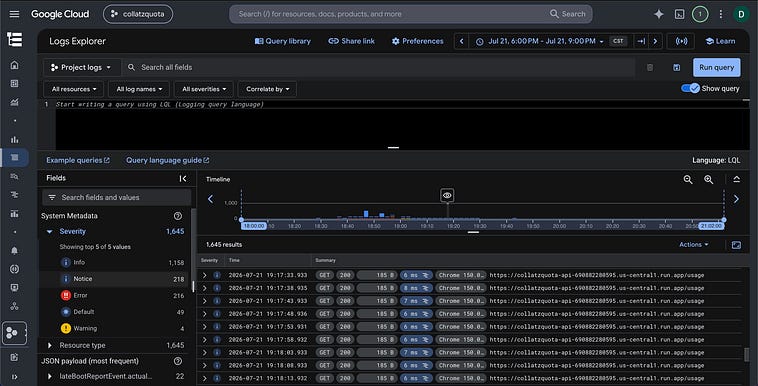
These logs are a capture of the stdout of the machine. There’s also a variety of metrics posted throughout various services
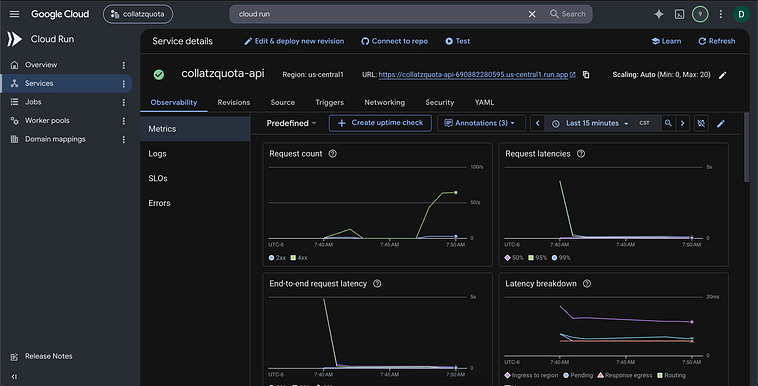
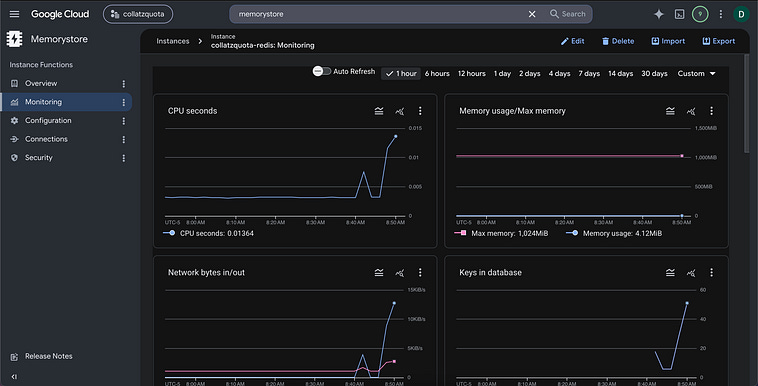
With a little bit of work, it’s also possible to wire up monitoring so all of the critical resources are organized into a single place
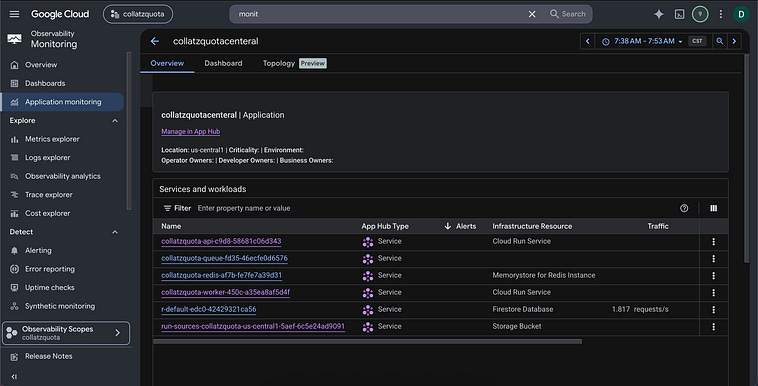
If you’re using tools like OpenTelemetry to trace requests throughout your application, you can also use CloudTrace to monitor how specific requests flow through your application. I’m hoping to cover that in a future installment.
Ingress
Ingress isn’t a service in itself, but there are a variety of services in GCP designed to help secure and handle inbound requests from the internet.
For what we’ve been doing, having a server publicly exposed as our API endpoint is a solid strategy. Tools like “API Gateway” really shine when you want to make a publicly accessible API. It does a lot of great stuff for us; authenticating users via their API token, rate limiting, that kind of stuff. It’s in the weeds for this article, but definitely worth exploring if you’re building an online API rather than an application.
“Load Balancers” are another form of ingress management that we’ve already used indirectly. We talked about scaling horizontally in previous sections, where we increase our capacity by creating several computers that can accept incoming requests. The thing that routes those requests to different computers is a load balancer.
A load balancer functions as a single entry point that then fans out requests to different services based on a variety of rules. A properly configured load balancer can distribute load across a scaling cluster, allow you to phase load between destinations to facilitate incremental rollout, and define routing rules based on the URL; routing different paths to different services.
Ingress management is a big topic, and we’ve already covered a lot. I’m planning on making a follow up article that discusses networking to a greater degree of depth.
Security
Naturally, we talked about security throughout the entire article. Setting IAM policies, defining service accounts, enabling authentication, and restricting public exposure. These are all fundamentally security decisions. In addition to those, GCP has a variety of tools specifically made to create more secure products.
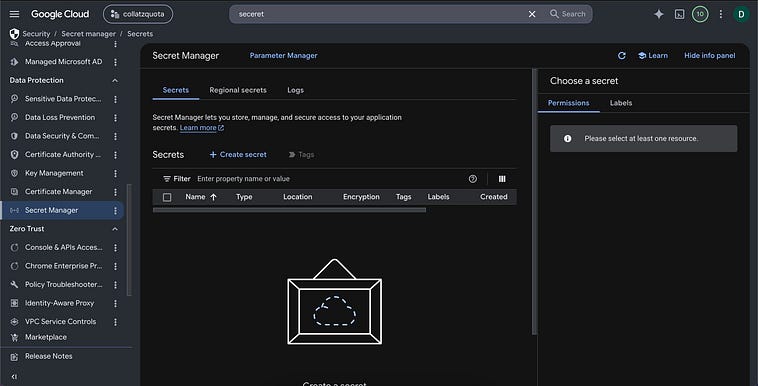
Some notable examples are:
Secret Manger: Allows you to store and distribute API keys securely.
Security Command Center: Scans through projects and identifies misconfigurations and security vulnerabilities
Cloud Armor: This is a Web Application Firewal DDOs system, rate limiter, Captcha enabler, etc. This can sit infront of your entire application to protect it from attack and malicious use
Identity-Aware Proxy: A complement to identity provider, allowing granular monitoring and blocking of traffic based on authentication.
Conclusion
The general topics we described are the beating heart of most large-scale cloud applications. Naturally, we couldn’t cover everything on Google Cloud, but with this knowledge you can make scalable backends that are secure, and use this knowledge to explore more advanced and application-specific technologies. Stay tuned for more idea-specific topics like GenAI, database technologies, and networking in future installments.