


A Practical Exploration of Sora — Intuitively and Exhaustively Explained
The functionality of Sora, and the theory behind it

OpenAI recently released Sora, their cutting edge video generation model. With Sora, they also released a web UI that allows users to generate and edit videos in a variety of sophisticated and interesting ways. In this article we’ll be exploring the features of that UI, and how Sora might be enabling those features.
Who is this useful for? Anyone who wants to use AI for video generation, or wants to forge a deeper understanding of artificial intelligence.
How advanced is this post? This post is intended for a general audience, and is designed to be a gentle introduction to artificial intelligence. It also contains some speculation about how Sora works, which might be compelling for more advanced readers.
Pre-requisites: None.
A Tour of Sora
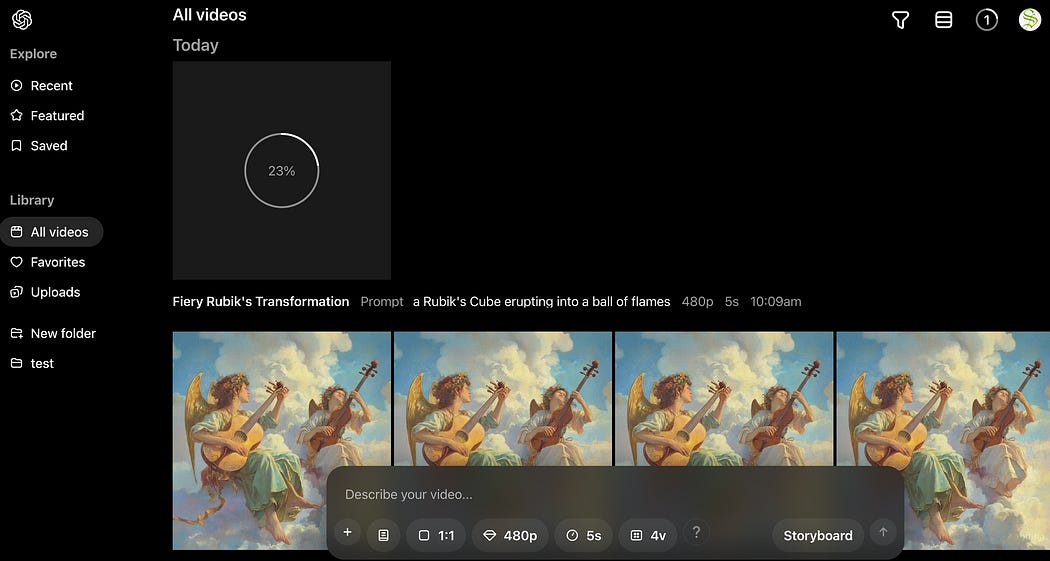
At the time of writing, here’s the main page of the Sora UI:

On the left are some of the typical suspects. The Explore section allows you to browse videos generated by other creators, and the library section allows you to browse and organize videos which you’ve generated.
To actually generate video, you use the text bar… thing at the bottom of the screen. Guides by OpenAI just refer to it as “the bottom of the screen”, and the HTML class used to define it doesn’t exactly roll off the tongue, so I’ll refer to it as the “creation bar” for our purposes.

The fundamental way of generating video with Sora is to type in some prompt and then press submit.

This will trigger a generation job, which will then appear as a progress bar in two places: in your list of videos and in your notification section at the top of the screen.
Once the generation has been completed, the results can be viewed intuitively throughout the Sora UI.
You can also upload images which can be used to inform video generation. Here, I’ve uploaded the cover of my article on LLM Routing
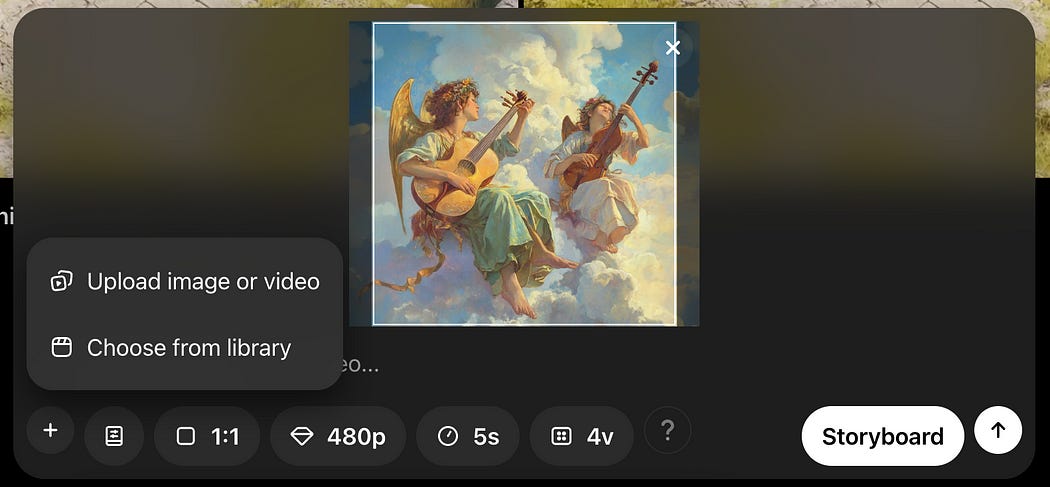
When you upload an image you can optionally add a prompt to describe the video you want, or you can upload the image by itself and let Sora figure out what type of video makes sense.
When generating video you can set the aspect ratio (the shape of the video),

The quality (different options available depending on your subscription tier),
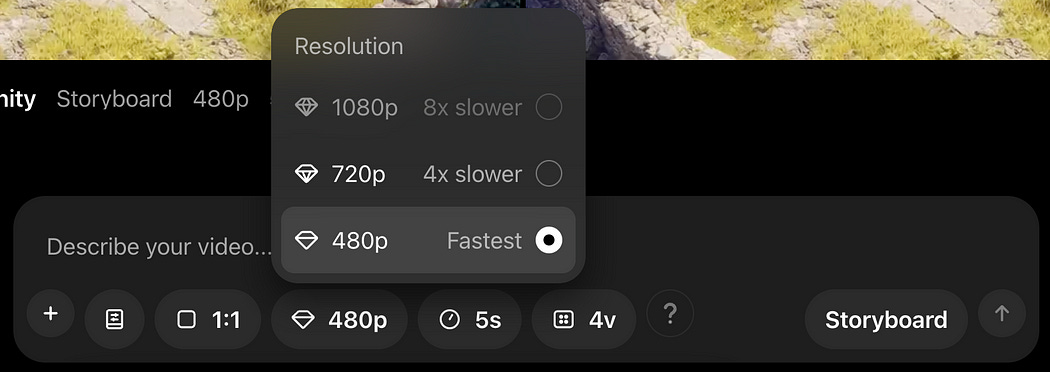
the length of the video you want to create (different options for this are also available depending on your subscription tier),

and how many variations of the video you want to generate per submission.

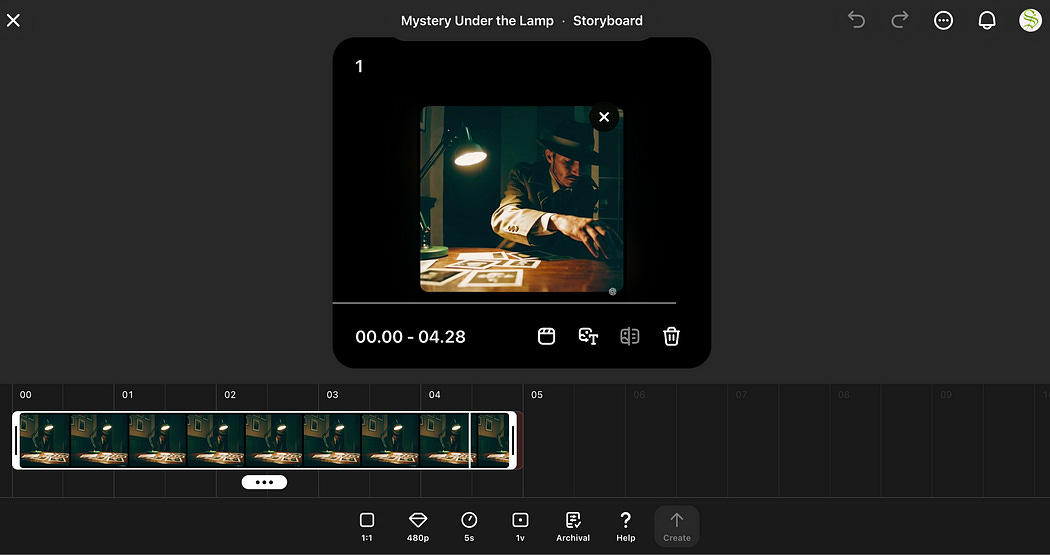
For those wanting more granular control of video generation, you can use the storyboard.
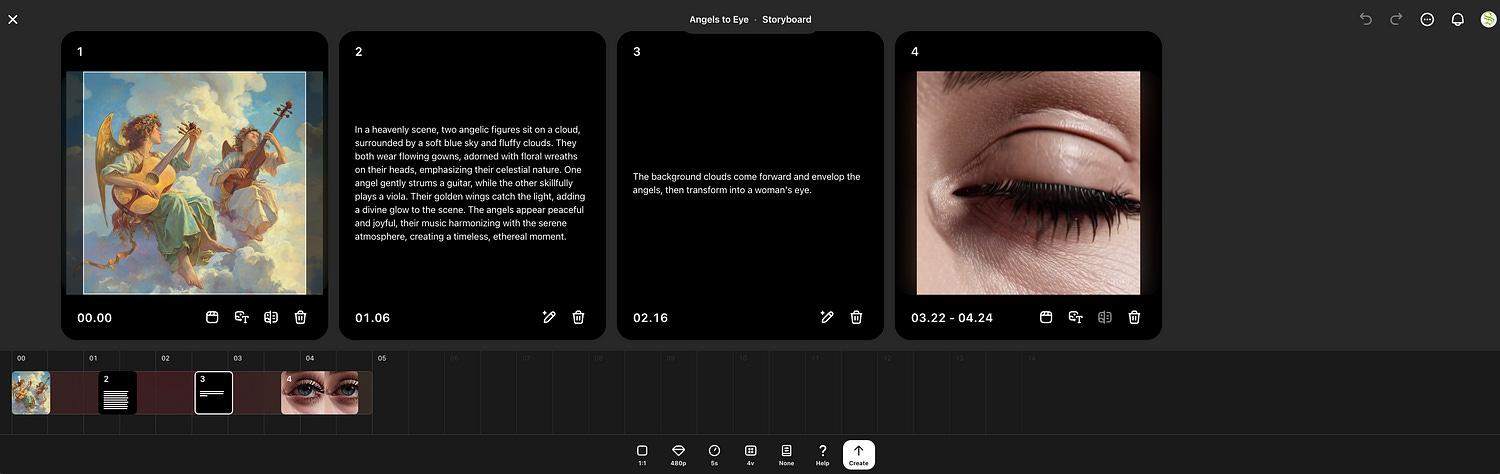
With storyboards you can inject images, videos, and text throughout the storyboard to granularly control how frames are generated.
The strategies of prompting video generation models can be very complex. getting a result of reasonable quality can take a substantial amount of fiddling, both in terms of the content blocks and their temporal position within the storyboard. I’ll talk about the storyboard and some ideas one can employ to get higher quality results in later sections.
Circling back to the creation bar, there’s also an option for presets
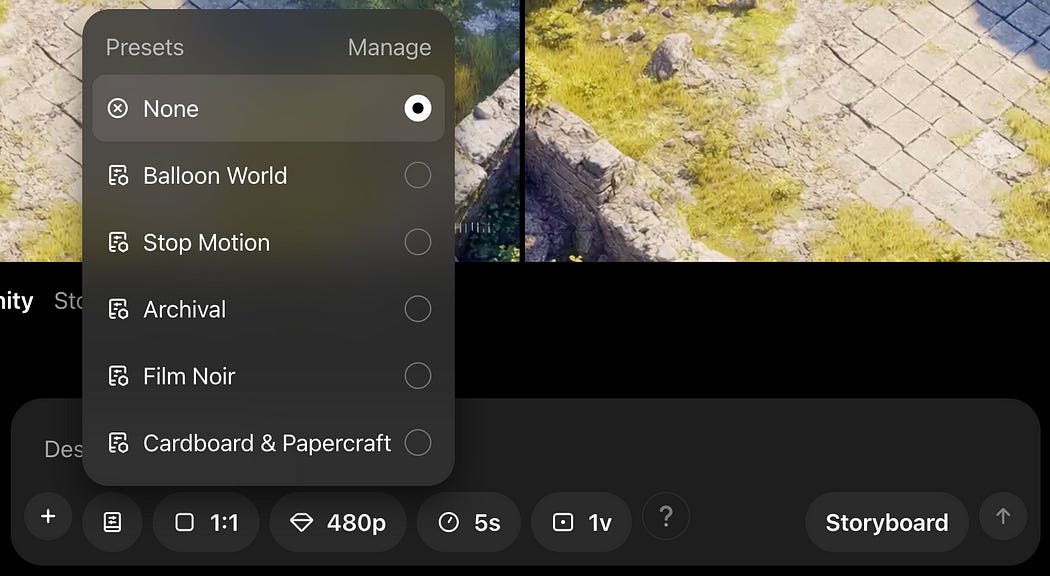
This probably uses a technology called LoRA, which I cover in another article. You can think of LoRA like specially trained filters that can be applied to an AI model like Sora.
Here’s a few examples of various generations with the same prompt and different presets:


once a video’s been generated there are a few options for editing it.

you can “Re-Cut”, which is like normal video cutting, except you can use AI to change the resolution of the image, the length, etc.
you can “Remix” which allows you to generate a new video based on a prompt and an existing video


You can blend between videos in a variety of ways with the “Blend” function

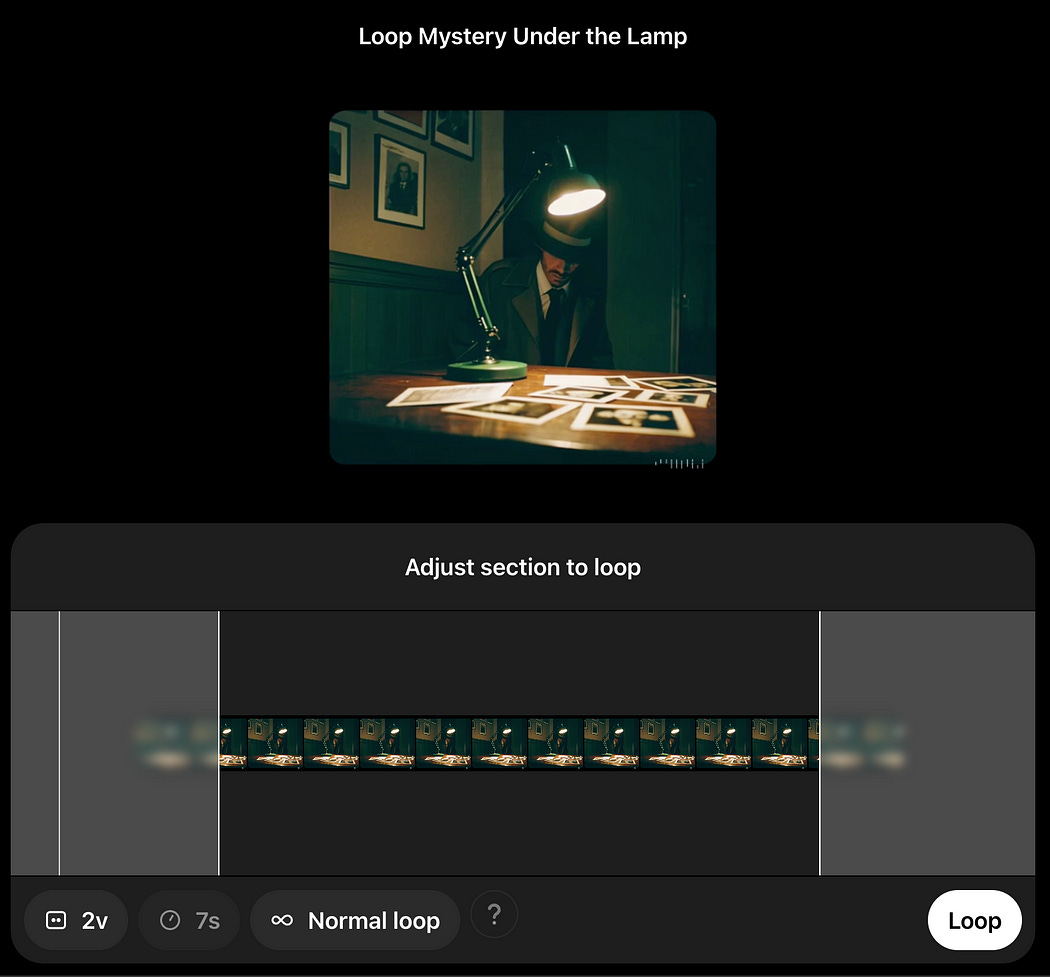
And you can turn your videos into a loop with the “loop” function. This will make it so the video loops seamlessly such that the end of the video perfectly feeds into the beginning.
And that’s the essence of Sora; it’s a big box of AI-powered video editing tools. In the following sections we’ll work through each of these functionalities, explore them more in depth, and discuss how they (probably) work.
Have any questions about this article? Join the IAEE Discord.
The Theory of Text to Video Generation
The most fundamental idea of Sora is the “diffusion model”. Diffusion is a modeling approach where the task of generating things like images and videos is thought of as a denoising problem.
Basically, to train a model like Sora, you start with a bunch of videos and a textual description of those videos. Then, you make those videos super noisy.

and then you train the model to generate the original videos from noise based on the textual descriptions.

By training a model like Sora on a lot of videos (like, millions or billions of hours of video), OpenAI trained a model that’s able to turn text into video through denoising.

And that’s about it. This one strategy of denoising video is powering text to video generation, image to video generation, timelines, blending etc. OpenAI is achieving all this complex functionality with a single model as a result of some clever tricks which we’ll be exploring in the following sections.
Sora’s Tricks
Recall that one way to make videos with Sora is by using a timeline editor

Let’s explore a few tricks that could be used to make this work.
Trick 1) Frame Injection
Recall that diffusion models take in noisy video and output less noisy video
If you have an image, and you want to create a video from that image, you can simply set one of those frames to be part of the input of the model.

If you have video you want to generate based off of, you can just include that video in the input.

The whole idea of Sora is that it understands video and denoises the entire input to make sense based on whatever textual description is provided. So, if you include video in the input to the model, it will naturally denoise the rest of the frames to make sense based on whatever frames you provided.
If you have multiple videos or images in a timeline, you can just put them in the corresponding locations in Sora’s input

The choice of what frames to add, and where they’re added in the input will drastically impact the output of Sora. I suspect this type of approach is central to some of the more advanced generation approaches, like the storyboard, blending, and looping features within Sora.
So that would explain how Sora deals with storyboards of images and video. When you place various images and videos within a storyboard, those are placed throughout the otherwise noisy input to Sora, and Sora takes those images and videos into account when denoising the rest of the frames.
The next trick describes how a storyboard of textual descriptions might work.
Trick 2) Gated Cross Attention
I wrote an article on a model called “Flamingo” a while ago. The idea of Flamingo was to create a language model which could generate text based on arbitrary sequences of text and images as an input.

In a lot of ways, Flamingo is similar to Sora. Flamingo accepts arbitrary sequences of images and text and uses that data to generate text. Sora accepts arbitrary sequences of images and text and uses that data to generate videos. Flamingo goes about the general problem of understanding images and text simultaneously by using a special masking strategy in a mechanism called “cross attention”.
This is a fairly advanced concept, but I’ll try to explain it from a high level.
Basically, there’s a mechanism in many modern AI models called attention, which allows vectors that represent words or sections of images to interact with one another to make abstract and meaning rich representations. These representations allow modern AI models to make their complex inferences.

AI models use two general flavors of attention: self attention and cross attention. Self-attention allows AI models to make complex and abstract representations of an input
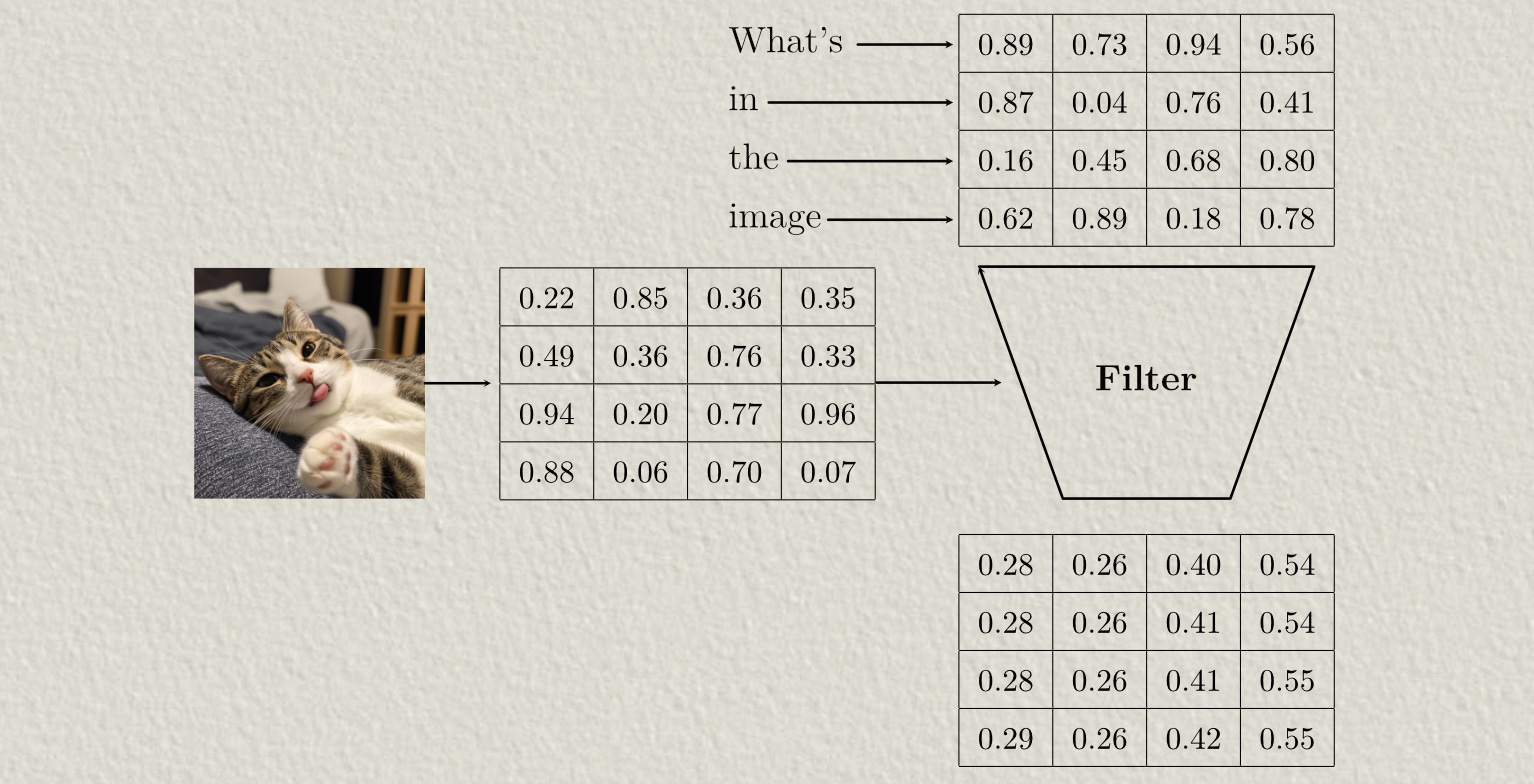
Cross-attention allows different inputs to interact with each other. You can think of cross attention as a sort of filter, where one input is used to filter another input.
Models that deal with multiple types of data, like Flamingo and Sora, typically use both self-attention and cross attention. Flamingo, for instance, uses cross attention to introduce image data into the representation for text, and uses self attention to reason about text.

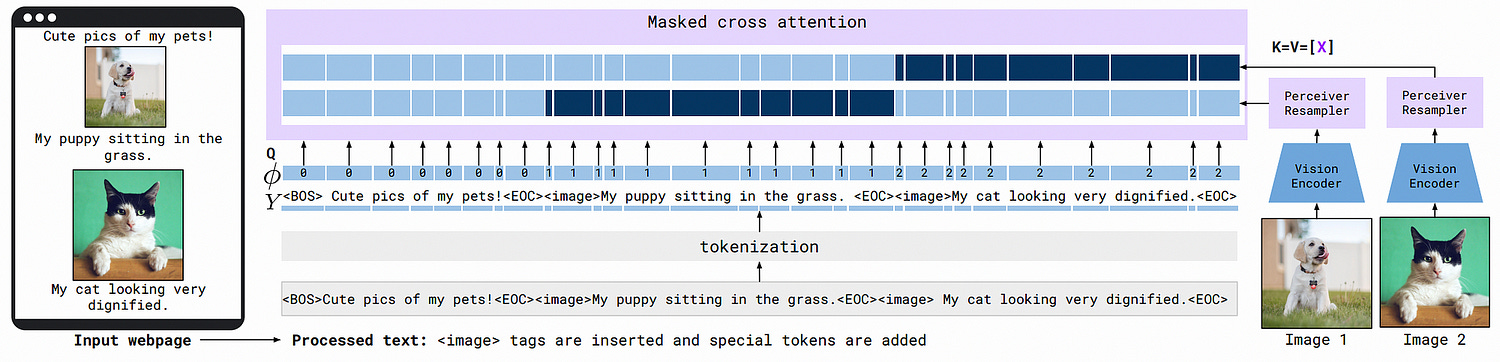
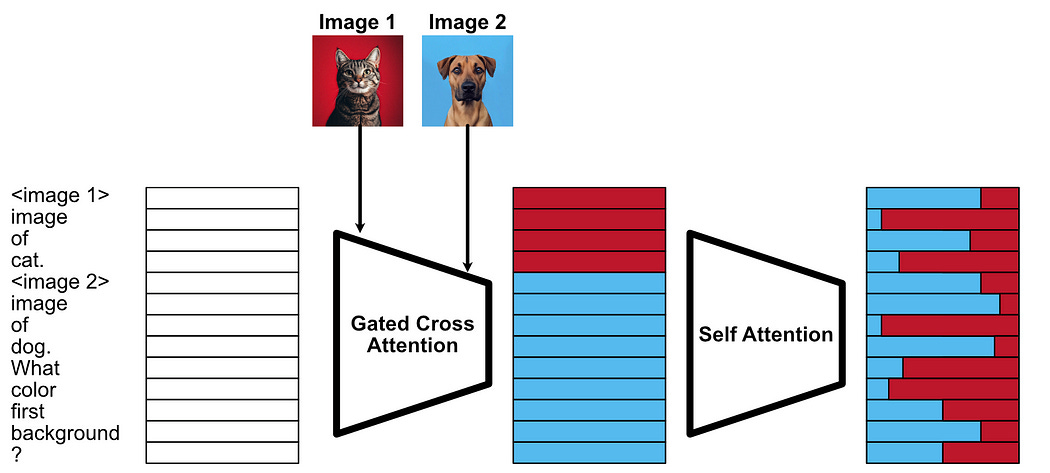
The whole idea of cross attention is to allow textual information to interact with image information, so you might imagine that it makes sense that all the image information would interact with all the textual information so that the model could reason about all images based on all of the text. However, the authors of the Flamingo paper only allow text to interact with the immediately preceding image, not all the images, within the cross attention mechanism. This is called “Gated” or “Masked” cross attention.
This works because, within the model, there are also instances of self attention. So, even though each image data can’t directly interact with all the text data, it can indirectly.
If I fed a list of captioned images into a model using both gated cross and self attention, then asked the question “What was in the first image?” Cross attention would allow the image data to be injected into some of the text data, then self attention would allow all of the text data to interact such that the model could answer the question.
Keep reading with a 7-day free trial
Subscribe to Intuitively and Exhaustively Explained to keep reading this post and get 7 days of free access to the full post archives.